One of the often-repeated rules of thumb for flash is that "aperture controls flash, while shutter speed controls ambient." In this post, we'll see why this adage can be misleading.
Showing posts with label exposure. Show all posts
Showing posts with label exposure. Show all posts
Tuesday, August 11, 2015
Monday, October 22, 2012
Better Point-and-Shoot Shots with an External Flash

Last weekend, one of our friends celebrated their daughter's birthday party. On this kind of occasion, I don't usually bring a DSLR anymore - I feel it is a little too much when we're not the celebrants. Instead, I brought our trusty Lumix LX5 (reviewed here). However, to get the best image quality out of the LX5, I paired it with an external flash, the Yongnuo YN-560EX (reviewed here).

Yes, the 560EX is a manual not TTL flash. (I don't have a dedicated TTL flash for the Lumix LX5.) However, using a manual flash while shooting run-and-gun is actually easier than it sounds. (See: Therapy for TTL Addiction: How to Use Manual Flash).
In this post, I'll discuss my thought process in setting the flash and ambient exposures.
Sunday, September 23, 2012
Further Experiments with the Nikon D600's Exposure
This post is a follow up to my earlier post about experiments on the Nikon D600's exposure. In that post my observation was that the Nikon D600 appeared to have a tendency to not give importance to highlights. For some shooters, the resulting image looks fine. For me, I like to protect highlights and there were way too many blown highlights even with ADL (i.e. the exposure is too "aggressive").
I posted about this observation on DPReview. Here is the thread. I received many helpful suggestions. I tried out the suggestions, and I will discuss the results in this post, learning a few things in the process.
I posted about this observation on DPReview. Here is the thread. I received many helpful suggestions. I tried out the suggestions, and I will discuss the results in this post, learning a few things in the process.
Friday, September 21, 2012
Experiments on Nikon D600 Exposure
UPDATE: I posted about this on DPReview, got some helpful responses suggesting that there are issues with my shooting method. That DPReview thread is here if you want to check it out. I have done follow up experiments that are inconclusive as to the advice given in that thread. The D600 still appears to overexpose. I will do a followup post about it.
UPDATE 2: 2nd set of experiments here
I've shot with a number of cameras and they all tend to have different exposure tendencies. For example the Pentax K100D and Fuji S5 attempt to avoid blowing highlights, often producing straight-out-of-the-camera (SOOC) images that appear underexposed. The Nikon D80 doesn't seem to be very concerned with highlights and produces SOOC images where the subject is correctly exposed but the image often has blown highlights such as in the background. Then there are cameras such as the Nikon D70 and Nikon D3 which in my opinion have a balanced exposure (taking into account the limits of the sensor's dynamic range).
In this post, I took some test shots with the D600 to evaluate whether the D600 has a tendency to overexpose or underexpose. All shots were taken in raw and processed in View NX2.
Tuesday, August 14, 2012
Choosing the Exposure for Dynamic Range

Over the weekend, we visited Knott's Berry Farm, one of the first theme parks in the U.S. What I like about Knott's is that the lines are much shorter than those of Disneyland therefore we get to experience more rides within the same amount of time. I also think Knott's has a more interesting variety of rides for young children like our 5-year old, and has more thrill rides (though not as many as Magic Mountain). Although the production value is not as high as that of Disneyland, it is still quite high.
During our visit the heat was intense, reaching 95°F (35°C), just one degree below the all-time record of 96 for that area, and 10 degrees hotter than the average for this time of the year. With the sun blazing overhead, the dynamic range was very wide. I used two different exposure strategies to deal with the dynamic range.
Friday, November 18, 2011
Winning a Photo Contest
Winning a photo contest both is and isn't a big deal. It isn't a big deal in the sense that a real artist would care more about expressing his or her idea and less about the audience reaction. On the other hand, I believe that art is a form of communication that becomes perfected when it is received by another person in a meeting of minds.
I entered the shot above in a photo contest and it was one of the winning entries. This is the second year in a row when I've had a winning entry in this contest and I thought I'd talk about the approach I used in making this photo.
Wednesday, November 17, 2010
Basic Tone Placement with Simplified Zone System (Intermediate)

Using the Zone System or some variant thereof is one way to have more control over the exposure of your photos. Here's a simple application of the Zone System.
REVIEW OF BASIC EXPOSURE CONCEPTS:
Let's review some basic concepts of exposure first.
1. Technically speaking, an exposure that renders middle gray as middle gray, white as white, and black as black is the "correct" exposure. However, as photographers we are of course free to choose any other exposure based on our artistic intent.
2. An incident light meter measures the amount of light falling on the subject and uses that information to let you know the "correct" exposure. Without an incident light meter, we're left to use the camera's built-in light meter, which is reflection-based (i.e., it measures the amount of light being reflected from the scene).
3. Light objects reflect more light than darker objects, so knowing the 'correct' amount of reflection from an object is necessary for a reflection-based metering measurement to be accurate. Unfortunately, cameras have no way to determine reliably whether the subject is white or black or gray. As a compromise, a camera generally chooses an exposure that will render the subject as middle gray.
SIMPLIFIED EXPLANATION OF THE ZONE SYSTEM:
The Zone System is a way of analyzing exposure. There is an infinite number of brightness gradations from total darkness to blinding light but the Zone System divides that spectrum into 11 zones (numbered from 0 to X) that are 1 stop apart:
- The middle zone (Zone V) corresponds to middle gray.
- The middle 5 zones (Zone III to VII) is the range that can show full texture in a print.
- The middle 7 zones (Zone II to VIII) is the range that can capture texture. In print, Zone II and VIII won't have visible texture but they will look like they have 'substance'.
- The middle 9 zones (Zone I to IX) is the range that can be captured by negative film (although at this time only a few digital cameras can capture such a wide dynamic range). In print, Zone I and IX look totally black and totally white respectively. While Zone II and VIII have substance, Zone I and IX look empty and featureless.
HOW TO USE A SIMPLIFIED ZONE SYSTEM FOR TONE PLACEMENT:
Knowing the basic characteristics of each zone in terms of its ability to show texture and substance, and perhaps some subjects that typically fall into certain zones (e.g. zone VI for "average" Caucasian skin), we can identify the most important part of the photo we want to capture, and visualize in which zone that part should be placed. For example, if you want something to look white while still having texture, then it should theoretically be exposed at 2 stops* above middle gray, i.e. Zone VII. [*The actual amount can vary by camera.] Similarly, if you want something to look black but still have texture, then expose it at 2 stops below middle gray (Zone III).
What about everything else in the photo? We just let them fall where they may. Let's say there are two objects beside each other -- one that is middle gray and one that is white. Using the approach above, we can spot meter the gray object and render the middle gray one as Zone V or spot meter the white one and render it as Zone VII. Both approaches should produce a similar result -- the gray would be in Zone V, while the white would be in Zone VII.
However, for creative purposes, we can specify the placement of 2 tones. In the example above, we can make the gray object look black while the white object would still look white by altering the contrast. To do this, we would render the white as Zone VII but expand contrast by 2 stops so that the gray object is rendered as Zone III. Similarly, we could render the gray as a light gray Zone VI while keeping the white as Zone VII by decreasing the contrast in post-processing by 1 stop.
EXAMPLE
Here is a shot with the default exposure. The camera was in aperture priority mode and the exposure was 1600 ISO, f/2.8, 1/10, with no exposure compensation adjustment (btw, no flash - just ambient light):

The swaddle on our daughter is supposed to be white, but looks grayish (around Zone VI). In post-processing, I tried adjusting exposure by +1EV:

The white swaddle now looks more reasonably white, but in my opinion our daughter's complexion looks too light. I adjusted exposure so that it was +0.5EV instead, while also increasing the contrast. With a +0.5EV exposure compensation, our daughter's complexion looks the way I visualized it. However, at +0.5EV, the white swaddle still looks a bit grayish:

By increasing the contrast, our daughter's complexion remained as visualized while the white swaddle looks more white:
For reference, here are comparisons of the different exposures:

Resource used: Zone System for 35mm Photographers
Thursday, October 14, 2010
Balancing Flash and Ambient: Does TTL take ambient exposure into account? (Basic)
All other factors being equal, does TTL ignore the ambient exposure and add a fixed amount of light, or does TTL take the ambient exposure into account so that the total exposure is the constant? This question is relevant when thinking about balancing ambient and flash when they overlap. I took some test shots and found that for my equipment combination the answer appears to be somewhere in between, though closer to the latter (i.e. constant overall exposure). YMMV.
Test protocol: the test target was a plain white cardboard. I took control shots using ambient only light (which was from yellowish fluorescent light) in manual exposure (in matrix metering), with the light meter at 0, -1, -2, -3, plus one shot at sync speed with practically zero ambient. I took similar shots with TTL flash and TTL-BL flash. Equipment used: D300 and SB-800.
Results:

First column: ambient-only
Second column: ambient + TTL flash (0 FEC)
Third column: ambient + TTL-BL flash (0 FEC)
The top row is with the light meter at 0, and the next rows are with the light meter at -1, -2, -3 respectively. The bottom row is with ambient "deleted."
For the ambient-only column, the changes in exposure are what I expected. The second (TTL) and third column (TTL-BL) seem to show a more-or-less constant exposure. If the amount of flash that is added to the image is constant, I would have expected the exposure to vary about as much as the ambient-only exposure. The fact that there is seemingly no variation implies that TTL does take ambient exposure into account to keep the final overall exposure (the sum of the ambient exposure and flash exposure) close to constant. (Note: in the actual shots, the histograms were a bit different, and crept upwards with increasing ambient light.)
In the top and second rows, the colors are a bit different because a greater percentage of the overall exposure comes from the ambient exposure (which is yellowish in color). I tried using a simple black and white conversion in Corel PSP X3 to see how close the luminance values are, and here's what I got:

The numbers in the boxes represent the 8-bit RGB value in the middle of the box (I don't know how to display the luminance value on a pixel level but I take it that the value shown here is a decent proxy for luminance). Note the noticeably higher value in the top row for the second and third columns. This reinforces the concept that the ambient must be at least slightly underexposed relative to our desired exposure (the flash can't take away light after all - it can only add light).
Application: if indeed TTL makes overall ambient exposure constant, then balancing flash and ambient when they overlap becomes much easier than otherwise, because we would be free to adjust the ambient to the desired exposure, leaving TTL to do the heavy lifting (in calculation terms) to reach a 'correct' overall (ambient + flash) exposure. The only limit appears to be that the ambient must be at least slightly underexposed if we don't want to overexpose it when we add flash. My results are limited however to my equipment. You can test if your equipment combination also behaves similarly by taking test shots with the protocol above.
Tuesday, August 31, 2010
Tip: Shutter + Aperture Priority for Nikon (Intermediate)
Some Pentax DSLRs have a nifty exposure mode called Shutter and Aperture Priority (TAv), which allows you to dial in the aperture you want, the shutter speed you want, then let the camera pick the ISO automatically. This is useful if for example you have a specific aperture and shutter speed combination that you want.
At least some Nikon cameras can emulate that TAv function to some extent. Here's how:
1. Switch to manual exposure mode.
2. Turn on Auto ISO.
3. Dial in the aperture and shutter speed that you want.
You'll notice that Auto ISO will adjust your exposure upward or downward, up to as low as the base ISO to as high as the ISO limit that you set in the menus. You'll also notice that the light meter won't move as it usually does, instead showing 0 until you go beyond the minimum or maximum ISO. If you do want to adjust exposure to match your intent, you can use exposure compensation.
Here are test shots. The baseline shot is at ISO 800, f/4, 1/25, taken on manual exposure mode, matrix metering, with the light meter at 0. Let's assume that this is the correct exposure.

In the next shot, I activated Auto ISO, then changed the aperture and shutter to f/5.6, 1/50, with ISO initially at 800. ISO automatically adjusted to 2800, showing that Auto ISO will adjust upward as needed.

In the following shot, I changed the aperture and shutter to f/2.8, 1/13 with ISO initially at 800. ISO automatically adjusted to 220, showing that Auto ISO will also adjust downward as needed.

In this shot, I changed the aperture and shutter to f/2.8, 1/6. ISO could not adjust below the base ISO (ISO 200 for the D300), resulting in overexposure (you do get a warning of sorts because the light meter will show an overexposure).

Wednesday, August 4, 2010
Flash Blur (Basic)

The shot above is an illustration of flash blur, where part of the subject is relatively sharp, but the subject's movement appears as a trail/blur. It can be good or bad, depending on your intent. The upside is that it definitely creates a feeling of movement. The downside is the blurriness of the subject.
Whether you want to avoid flash blur or intentionally cause it, here's how it happens:
1. Exposure is set for normal exposure (not underexposure) of ambient light.
2. Shutter speed has to be slow.
3. Flash is activated and the flash exposure is also normal.
4. Subject and/or camera have to be moving.
The flash freezes the subject's image either at the beginning of the exposure (front curtain sync) or at the end of the exposure (rear curtain sync). In either case, the subject's movement becomes visible in the image from the slow shutter speed. If the ambient is sufficiently underexposed, flash blur becomes imperceptible.
Here's another sample of flash blur:
Extreme case of flash blur (and not appropriate in this case):

Wednesday, July 21, 2010
Why is sync speed optimal for flash efficiency? (Basic)
When using flash, shooting at the sync speed ensures that you're using your flash most efficiently. Here's why.
Aperture affects both ambient and flash exposure. The larger the aperture, the more light enters the sensor (from both flash and ambient). The most output from your flash will result from the widest aperture. The catch though is that a wider aperture will also increase the ambient exposure, possibly to the point of overexposure.
Enter shutter speed. Shutter speed affects ambient but not flash exposure (up to a limit, as discussed below). The duration of a burst of flash is so brief that whether the shutter travels quickly or slowly, all of the flash burst reaches the sensor. That is, of course, assuming the entire sensor is exposed.
Indeed, the entire sensor is fully exposed at typical shutter speeds. At a high shutter speed, however, the rear curtain starts to close even before the front curtain has traveled completely, therefore the sensor is never fully exposed at any given time. When the flash is fired at these very high speeds, the part that is covered by the rear curtain will not be exposed to flash, leading to uneven exposure which is visible as a dark bar across the bottom or top of the image. The highest shutter speed where the entire sensor is fully exposed is the camera's sync speed. Typical sync speeds are 1/200 or 1/250, but sometimes as slow as 1/125 and as high as 1/500. (Trivia: medium format cameras with leaf shutter lenses can sync at all speeds, and point-and-shoots can sync at any speed because they don't have mechanical shutters :-D ) By default, cameras usually prevent the use of shutter speeds faster than the sync speed when the flash is being used.
Going back to the discussion, higher shutter speeds will nonetheless reduce ambient exposure. We use this to our advantage using the reciprocal relationship between shutter speed and aperture for any given exposure. Let's say it's a bright, sunny day, and the correct exposure is f/16 at 1/125 at 100 ISO. Under the reciprocity principle, you can get the same exposure with any of these combinations:
f/11 at 1/250 at 100 ISO
f/16 at 1/125 at 100 ISO
f/22 at 1/60 at 100 ISO
Of the three combinations above, the one that will require the least power from the flash is the one with the widest aperture, i.e., f/11 at 1/250 at 100 ISO.
Does that mean we should just use aperture priority and always choose the widest aperture to get the most from our flash? Not necessarily. If conditions are bright and aperture is wide, then the shutter speed can be pretty high -- higher than the sync speed. In the example above, suppose we had a lens that can go as wide as f/2.8. If we change aperture to f/2.8, the shutter speed for the same exposure would be 1/4000, which is way faster than the sync speed.
What about high speed sync mode? External flashes can fire at shutter speeds higher than the natural sync speed at the expense of output by firing many small flash bursts (instead of a single flash burst) while the rear curtain travels across the sensor. With HSS, however, the flash loses slightly more than 2 stops of output. In other words, it becomes more than 4x weaker. In other words, its range drops to slightly less than half. You get the idea.
In summary, if you want to maximize your flash while minimizing your ambient, shoot at the sync speed.
Wednesday, June 30, 2010
Portrait with Fountains and Fireworks (Basic to Intermediate)

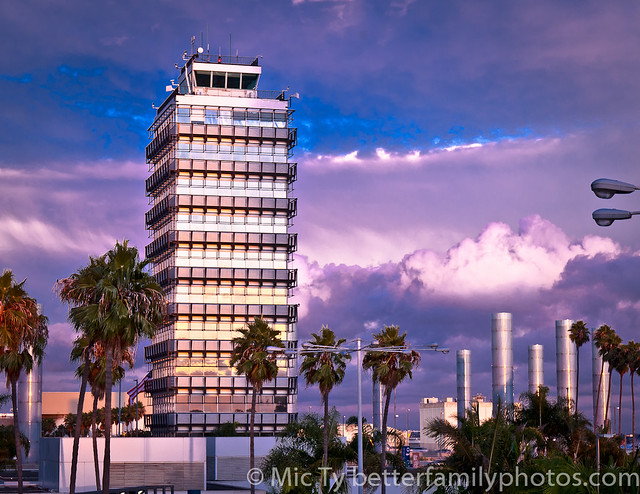
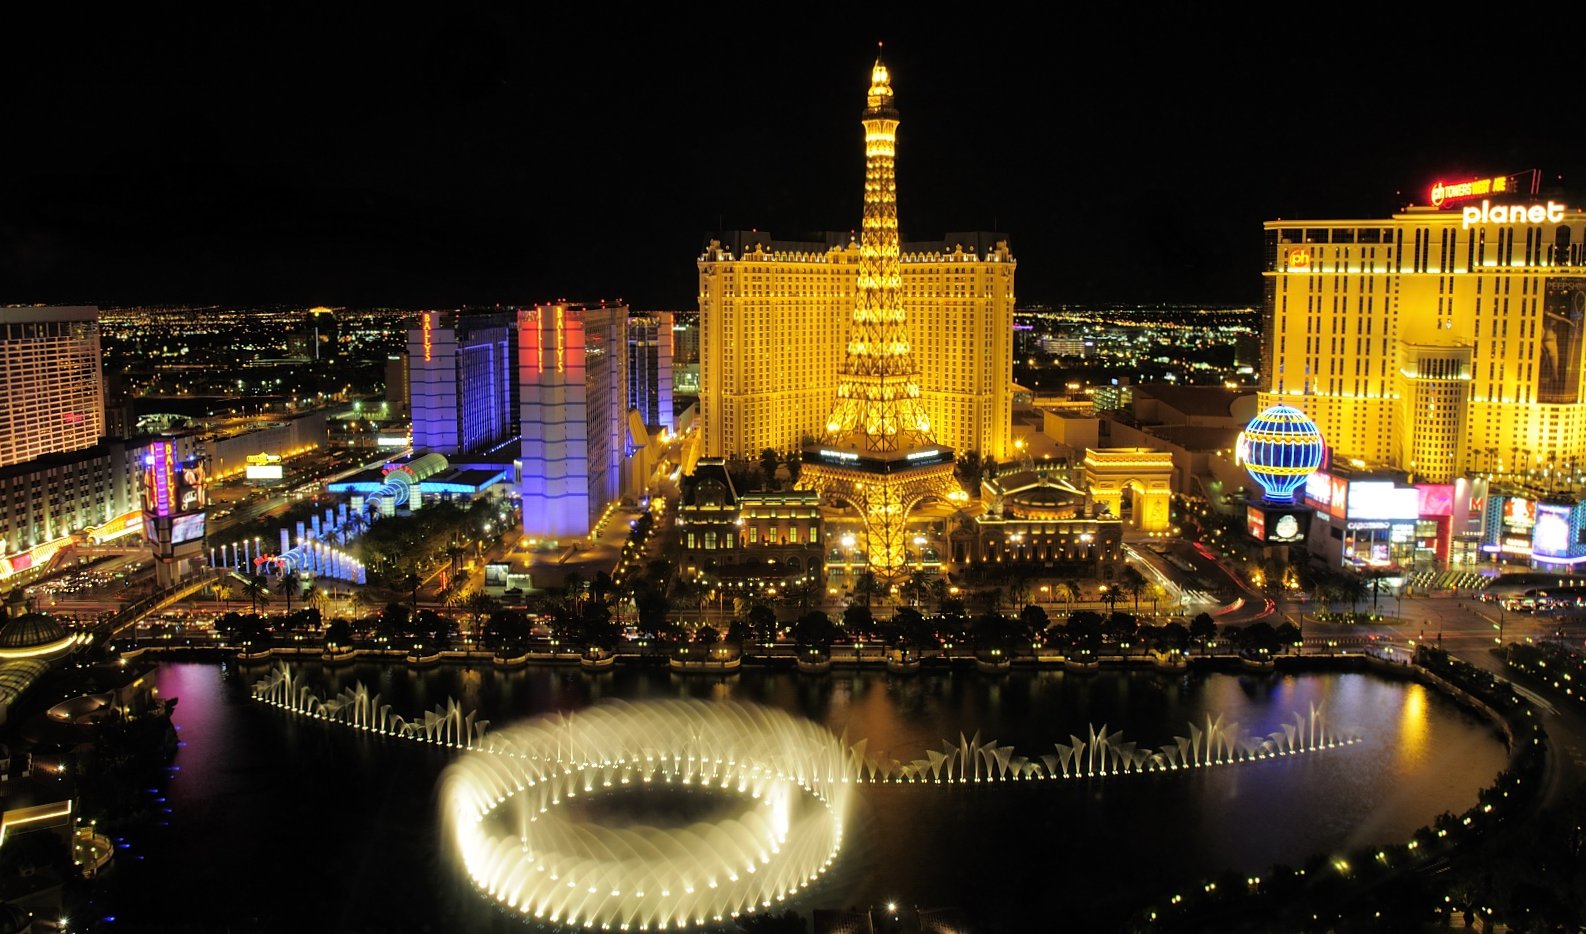
The photo above explains why I hadn't had a blog post in more than a week (I was too cheap to get internet access at the hotel :)) ). I thought about putting a post about our trip but hesitated for security reasons (I didn't want to publicize our absence from our house). Anyway I'm still taking test shots for the second part of the TTL tutorial but meanwhile I thought I would post a blog entry about taking fireworks photos, apropos to the upcoming 4th of July weekend. We didn't see fireworks during our trip to Las Vegas, but the Bellagio fountains are analogous. Here's how I took the shot above:
I like fireworks photos that include some portion of the location in order to give the image context. I also wanted at least one portrait-type shot with us in it.
First, I setup the camera on a tripod with the composition of the final image in mind. Next, I wanted to get the exposure of the background right. To do this, I first selected manual exposure (for predictability), and estimated the difference in exposure between the lit buildings and the fountain. In this case, I estimated that the fountain would be roughly as bright as the buildings, or a bit brighter. I chose a slow shutter speed in order to allow the fountains to create some trails, though I didn't want it to be so long that the patterns of the fountains would look like a meaningless blur. I chose 1/8 for the shot above.
For the aperture, it would depend on your intent. If the subject of the photo is the fountain, then I would choose a reasonably small aperture like f/8 for sharpness and a wider depth of field, and choose an ISO that creates a test shot that looks roughly like what my eyes see. That's the approach I took with the shot below:
Going back to aperture and ISO: if the subject of the photo is a person and you want the fountain to be only part of the background, I would choose an aperture and ISO that is slightly underexposed. In this case, I chose a wide aperture to keep the emphasis on the people as the subject, then chose an ISO that resulted in an underexposure of 0.7 stops.
After setting the exposure for the background, I then worked on getting the correct flash exposure for the people. TTL should work reasonably well (just adjust the flash exposure using flash exposure compensation). However, in this case, for predictability, I ultimately chose manual flash mode (through a bit of trial and error, I chose a power of 1/64 +1/3 stop).
.
In order to get soft light, you can use an umbrella or try to bounce the light. Using an umbrella requires less power from your flash, but you'll need another tripod or light stand to support the umbrella. In the shot above, I didn't have an extra tripod, so I mounted the flash on-camera then bounced the light off a wall, which was reasonably neutral in color.
When the music began for the fireworks, I just listened for the highlights of the song to get an idea of the 'peak' times when there would be more lights for the fountain.
That's all there is to it for portraits with fountains (and fireworks). Enjoy your weekend and be safe.

Tuesday, June 15, 2010
In Hindsight: Large Dimly-Lit Room with High Ceilings (Basic to Intermediate)
HindsightThis is the second of a series of entries where I examine some of the older pictures I took and analyze what I would have done differently to learn from my mistakes.
Issue: Lighting and Exposure
Situation: church with dim ambient lighting. I wanted to have a decent exposure.
How I did it then: if I recall correctly, I tried to bounce the flash from the walls a la Neil Van Niekerk. I think I was either in Program or Aperture Priority. My exposure settings turned out to be:
ISO 200, f/4, 1/6, flash used.
This was the result:

On the plus side, it appears as if flash was not used. However, there are many problems with the exposure and lighting in the picture: white balance, underexposure, blur from subject movement.
Analysis:
1. White balance: most DSLRs don't do well with artifical light sources. White balance is also often a problem when bouncing light, which takes on the color cast of the bounce surface. When the two issues are combined, it's a recipe for white balance disaster. There are two things that can be done to fix the white balance issue: a. take the shot in RAW. b. Use the appropriate gel on the flash if necessary. You have a lot of latitude with changing the white balance of an image shot in RAW. It would have been easy to click on any of the white object in the picture such as our kid's outfit to correct the white balance.
Ideally, a gel should also be used on the flash to match the ambient light. Otherwise, there will be a difference in white balance between the subject (illuminated by the whitish/bluish flash) and the background (illuminated by yellowish incandescent light).
2. Exposure: ISO here was way too low given the dim ambient light as well as the bounced flash. Because of the low ISO, and not so wide aperture (I think I was using the Tamron 18-250), the shutter speed was a glacial 1/6 - which naturally resulted in blurry subjects. A high ISO is also needed when bouncing flash, because the light has to travel the distance to the bouncing surface and back, plus lose some stops of light depending on how reflective the bounce surface is.
How I would do it today:
Option 1: handheld umbrella
I think the ideal solution here to get soft light on the subjects is to use an umbrella (I would probably use a handheld umbrella). Because the subjects and background are about evenly lit by ambient, I would underexpose the ambient by about 1 stop then use the flash with umbrella to provide the key light. The ISO needn't be so high because the umbrella is more efficient than bouncing, but I would still probably choose 400 to 800 ISO. Given that it's a group shot, I would probably choose an aperture no wider than f/4 to get adequate depth of field, and then adjust the shutter speed (or exposure comp) to get -1 stop underexposure for ambient. I would adjust the flash exposure compensation as necessary to achieve a good overall exposure.
The result would probably look kinda like this shot, where I used a handheld umbrella in a mall where the ceiling was about 5 stories high.

D80, Tamron 28-75, f/2.8, 1/200, ISO 400, flash: TTL -1.0 FEC
Option 2: bounce.
Bouncing may be possible but it won't be easy. I would probably select 1600 ISO to maximize my bounce capability. I would zoom the flash to 105mm to get the highest guide number (the bounced light will still be soft). I would probably try to underexpose the ambient by 1 stop, and shoot as above.
The result would probably look a bit like this shot, where I underexposed ambient by 1 stop then bounced the flash to a ceiling that was about 20 feet high and about 20 feet away laterally.

D300, Tamron 17-50 VC, f/4, 1/50, ISO 800, flash: TTL @ -0.7 FEC
The following is another example of a similar type of shot (also 20 feet high ceiling, about 20 feet away laterally). Ambient was also underexposed 1 stop using exposure compensation (I was on aperture priority). Flash was bounced to the ceiling at high camera left at +1 FEC (to balance out the -1 EV exposure compensation for net 0 FEC).

D80, Tamron 28-75, f/2.8, 1/60, ISO 200, aperture priority -1 EV exposure compensation + on-camera bounced flash: TTL @ +1 FEC (net: 0 FEC).
Issue: Lighting and Exposure
Situation: church with dim ambient lighting. I wanted to have a decent exposure.
How I did it then: if I recall correctly, I tried to bounce the flash from the walls a la Neil Van Niekerk. I think I was either in Program or Aperture Priority. My exposure settings turned out to be:
ISO 200, f/4, 1/6, flash used.
This was the result:

On the plus side, it appears as if flash was not used. However, there are many problems with the exposure and lighting in the picture: white balance, underexposure, blur from subject movement.
Analysis:
1. White balance: most DSLRs don't do well with artifical light sources. White balance is also often a problem when bouncing light, which takes on the color cast of the bounce surface. When the two issues are combined, it's a recipe for white balance disaster. There are two things that can be done to fix the white balance issue: a. take the shot in RAW. b. Use the appropriate gel on the flash if necessary. You have a lot of latitude with changing the white balance of an image shot in RAW. It would have been easy to click on any of the white object in the picture such as our kid's outfit to correct the white balance.
Ideally, a gel should also be used on the flash to match the ambient light. Otherwise, there will be a difference in white balance between the subject (illuminated by the whitish/bluish flash) and the background (illuminated by yellowish incandescent light).
2. Exposure: ISO here was way too low given the dim ambient light as well as the bounced flash. Because of the low ISO, and not so wide aperture (I think I was using the Tamron 18-250), the shutter speed was a glacial 1/6 - which naturally resulted in blurry subjects. A high ISO is also needed when bouncing flash, because the light has to travel the distance to the bouncing surface and back, plus lose some stops of light depending on how reflective the bounce surface is.
How I would do it today:
Option 1: handheld umbrella
I think the ideal solution here to get soft light on the subjects is to use an umbrella (I would probably use a handheld umbrella). Because the subjects and background are about evenly lit by ambient, I would underexpose the ambient by about 1 stop then use the flash with umbrella to provide the key light. The ISO needn't be so high because the umbrella is more efficient than bouncing, but I would still probably choose 400 to 800 ISO. Given that it's a group shot, I would probably choose an aperture no wider than f/4 to get adequate depth of field, and then adjust the shutter speed (or exposure comp) to get -1 stop underexposure for ambient. I would adjust the flash exposure compensation as necessary to achieve a good overall exposure.
The result would probably look kinda like this shot, where I used a handheld umbrella in a mall where the ceiling was about 5 stories high.
D80, Tamron 28-75, f/2.8, 1/200, ISO 400, flash: TTL -1.0 FEC
Option 2: bounce.
Bouncing may be possible but it won't be easy. I would probably select 1600 ISO to maximize my bounce capability. I would zoom the flash to 105mm to get the highest guide number (the bounced light will still be soft). I would probably try to underexpose the ambient by 1 stop, and shoot as above.
The result would probably look a bit like this shot, where I underexposed ambient by 1 stop then bounced the flash to a ceiling that was about 20 feet high and about 20 feet away laterally.
D300, Tamron 17-50 VC, f/4, 1/50, ISO 800, flash: TTL @ -0.7 FEC
The following is another example of a similar type of shot (also 20 feet high ceiling, about 20 feet away laterally). Ambient was also underexposed 1 stop using exposure compensation (I was on aperture priority). Flash was bounced to the ceiling at high camera left at +1 FEC (to balance out the -1 EV exposure compensation for net 0 FEC).
D80, Tamron 28-75, f/2.8, 1/60, ISO 200, aperture priority -1 EV exposure compensation + on-camera bounced flash: TTL @ +1 FEC (net: 0 FEC).
Monday, June 7, 2010
Spot Metering on Palm as Gray Card (Basic)
Spot metering a gray card is about as good as gauging exposure with an incident light meter. But you don't need to bring a gray card with you. Here's an old photography trick: just use the palm of the subject's hand (or anyone's hand), which is 1 stop brighter than middle gray (regardless of ethnicity). Remember to put the palm near the face (or target), and adjust so that the light meter shows 1 stop over 0.
Saturday, May 22, 2010
Beginner's Simplified Guide to Exposure with Digital Cameras (Basic)
If you've never ventured outside of your camera's auto mode and you don't know what aperture, shutter speed, "and all that stuff" mean, this guide is for you.
WHY LEARN THIS?
1. Your digital camera can get the exposure wrong, resulting in pictures that are too bright, too dark, or with lost detail. You can fix this if you understand exposure.
2. You can control the appearance of the image to match your vision (e.g., blurry background, motion blur, etc.)
WHEN IS A PICTURE TOO BRIGHT (OVEREXPOSED), TOO DARK (UNDEREXPOSED), OR JUST RIGHT?
Exposure is the amount of light allowed to fall on a sensor (or film). If what's white looks gray or important details in the shadows are lost, the image is too dark (underexposed). If what's black looks gray or important details in the highlights are lost, it's too bright (overexposed). Sometimes, a scene has extreme dark and bright areas so that preserving the details in one part of the picture will cause the loss of detail in another part. If so, you have to compromise by picking the important area in your picture (e.g., face), making sure that area has the right exposure, then hoping the best for the rest.
MEASURING EXPOSURE
To simplify light measurement, photographers think in terms of "stops" of light. Each stop higher is double the light. Each stop lower is half the light. 2 stops higher is therefore 4x the light. 3 stops lower = 1/8th the light.
CONTROLLING EXPOSURE
You control exposure with 4 variables: aperture, shutter speed, ISO, exposure compensation.
1. aperture: the size of the "hole" where light enters. Wider aperture allows more light. Aperture is specified in f-numbers. The *smaller* the f-number, the *wider* the aperture. The standard "f-stops," which are each one stop apart are: 1.4, 2.0, 2.8, 4.0, 5.6, 8, 11, 16, 22, etc. Note: Each f-number in the sequence is approximately a factor of 1.4 (square root of 2); an f-number that is 2 stops higher is double the f-number).
2. shutter speed: how long the sensor is exposed to the light. Longer shutter speed allows more light. The standard shutter speeds (in seconds) are 1 sec., 1/2 sec., 1/4, 1/8, 1/15, 1/30, 1/60, 1/125, 1/250, 1/500, etc. Each of those speeds are considered 1 stop apart (even though they're not exactly double).
3. ISO: sensor sensitivity setting. Higher sensitivity allows more light. Standard ISO settings are 100, 200, 400, 800, 1600, 3200, etc. (they are each one stop apart).
4. Exposure compensation: you can adjust the default exposure within +/- 2 or 3 stops, usually in 1/3 or 1/2 stop increments.
PASM: CHANGING THE VARIABLES
Most cameras have these exposure modes:
1. Auto mode (not present in professional cameras): camera guesses the proper exposure, guesses your intent (e.g., portrait shot, sport shot, etc.), and chooses the combination of aperture, shutter speed, and ISO based on its guess of your intent.
2. Program mode (P): like auto mode, the camera guesses the exposure. The camera doesn't guess your intent but instead picks an "average" combination of aperture, shutter speed, and ISO. The camera lets you change more variables than in Auto mode, such as the ISO, EV compensation, and whether flash is used.
3. Aperture priority (Av or A): the camera guesses the exposure. You choose the aperture, then the camera picks the shutter speed (and in some cameras, the ISO as well) to achieve its guess of the exposure.
4. Shutter priority (Tv or S): the camera guesses the exposure. You choose the shutter speed, then the camera picks the combination of aperture (and sometimes, the ISO) to achieve its guess of the exposure.
5. Manual mode (M): you choose the aperture, shutter speed, and ISO (some cameras may pick the ISO automatically) with the help of a light meter (which displays the camera's guess of exposure in real time).
P, A, or S mode are "semi-automatic" modes because it's still the camera that is guessing the exposure. If the camera guessed wrong (see above re overexposure, or underexposure) use EV compensation to increase or decrease exposure, or switch to manual mode.
CHOOSING BETWEEN EQUIVALENT EXPOSURES
There are many combinations of variables that result in equivalent exposure. You can get the same exposure if you adjust the aperture a stop higher (narrower) while adjusting the shutter speed a stop slower, etc. For example,
1/60 f/5.6 ISO 400 EV comp 0 is the same exposure as
1/30 f8.0 ISO 400 EV Comp 0.
However, aperture and shutter speed affect other things too, which gives you a reason to choose between equivalent exposures:
1. Depth of field: some pictures have a blurry background while others are sharp everywhere. The ones with a blurry background have a shallow depth of field, meaning the area that is in focus is narrow (sometimes within a few inches). This is useful for emphasizing the subject. A large depth of field is useful for landscape photos. Depth of field is affected by aperture (as well as the distance between the camera to the subject, the focal length, and the sensor size). Wider aperture = smaller depth of field.
Example of shallow depth of field (aperture here was f/1.4):

Example of large depth of field (aperture here was f/16):

Example of shallow depth of field (aperture here was f/1.4):

Example of large depth of field (aperture here was f/16):

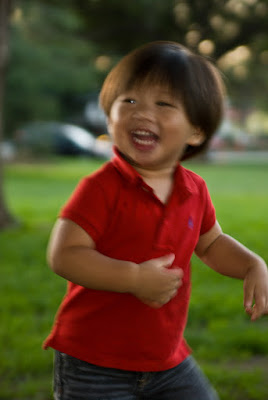
2. Motion blur: sometimes you want motion blur (e.g., picture of a moving car) while other times you want to freeze the image (e.g. child jumping in the air). Longer shutter speed = more motion blur.
Example of high shutter speed (shutter speed here was 1/1000):

Example of slow shutter speed (shutter speed of 1/15):

Example of high shutter speed (shutter speed here was 1/1000):

Example of slow shutter speed (shutter speed of 1/15):

3. Camera shake: if you don't use a tripod, your image could look blurry because of your hand's natural tremor. Faster shutter speed minimizes this problem. Rule of thumb for cameras: to reduce visible camera shake, use a shutter speed faster than 1/(focal length in 35mm equivalent). With a lens that's equivalent to a 50mm lens, shoot at 1/50 or faster. Some cameras and some lenses have image stabilization that mitigates camera shake somewhat, with varying degrees of effectiveness.
4. Noise: The higher the sensitivity (ISO), the more noise there will be (visible as speckles or grain).
Image with low noise (ISO was 200):

A noisy image (ISO: 800 -- actually this was a disposable film camera, so the correct term is "ASA"). See especially the grainy shadow areas:

4. Noise: The higher the sensitivity (ISO), the more noise there will be (visible as speckles or grain).
Image with low noise (ISO was 200):

A noisy image (ISO: 800 -- actually this was a disposable film camera, so the correct term is "ASA"). See especially the grainy shadow areas:

WHAT'S NEXT?
1. Take photos at varying exposure combinations to practice manipulating the exposure variables.
2. Learn about using the histogram of an image as a guide for exposure. When you take a picture, a digital camera can usually display the histogram of the image (a graph showing the number of pixels in each shade of gray, from pure black to pure white). If the pixels are at the leftmost edge of the histogram, it means that no detail has been captured and those pixels will simply be pure black. If the pixels are at the rightmost edge, no detail has been captured either and those pixels will look pure white. (To alert you that no details have been captured at certain parts of the image, many DSLRs can show you the "blown out" highlights as blinking highlights.) A good exposure will not allow important details to reach either the leftmost edge or rightmost edge of the histogram. Many digital cameras can also show a histogram not just for the gray channel, but also for the red, blue and green channels. If a pixel is within the middle of the gray channel but at the leftmost or rightmost edge of the red, blue or green channel, then there will be detail but the color will not be accurate.
3. Look at photo websites and look at the combinations used for pictures you like to get a general idea of how that photo was taken (long or short shutter speed? Wide or small aperture? etc.). This is usually shown by clicking on the EXIF information, "properties," or "more information." Sample: http://www.pentaxphotogallery.com/ Practice by guessing what variables you would use to achieve the same effect.
4. Learn about the various metering modes (matrix, average, center, spot). Choosing the metering mode lets you control how much of the scene the camera will look at when determining exposure. Matrix (the default setting) will allow the camera to look at the entire scene and use its programming to guess the correct exposure based on patterns. For example if there is a large amount of bright tones in the lower part of the scene, the camera might guess that you are taking a picture of snow and will try to render the bright tones as white instead of middle gray). Average mode (present in only some cameras) will also look at the entire scene but simply averages the amount of light rather than try to guess the correct exposure based on patterns. Center will look at only the middle of the scene. Spot will look at a very small portion of the scene (in the Nikon D300 for example, it will only look at an image circle that is about 3mm in diameter and represents 2% of what the camera can see).
5. Understanding exposure is only one aspect of good photography (albeit a fundamental one). Learn also about colors and white balance, composition, focal lengths and perspective, flash techniques, post-processing (adjusting the image on your computer), various types of photography (glamour, street, portrait, macro, etc.) and a gazillion other things.
5. Understanding exposure is only one aspect of good photography (albeit a fundamental one). Learn also about colors and white balance, composition, focal lengths and perspective, flash techniques, post-processing (adjusting the image on your computer), various types of photography (glamour, street, portrait, macro, etc.) and a gazillion other things.
OTHER INFORMATION/TIPS:
1. Low light photos - You may hear, "You need a fast lens." That means a lens with a wide maximum aperture (generally f/2.8 or wider). It's "fast" because you can take photos at higher shutter speeds (assuming you use the wider apertures). Some may say, "Get a DSLR." DSLRs have larger sensors than point and shoots, and are therefore more sensitive to light (you can use higher ISOs with less noise). Thus you can use faster shutter speeds at higher ISOs. Usually, there's at least a 2 stop difference between SLRs and a point and shoot camera (ISO 1600 on an SLR looks like ISO 400 on a point and shoot - so you could use a shutter speed 2 stops faster at the same aperture with the same amount of noise). However, don't assume that an SLR with a fast lens will automatically enable you to take sharp low light photos -- at wide apertures, the depth of field is very narrow so it's hard to focus on the right area especially when the subject is moving. There are other techniques for low light photos including natural-looking flash techniques.
2. Megapixels vs. Sensor size - All things being equal, a camera with more megapixels will probably have more noise than a similar camera with less megapixels if they have the same sensor size because the higher megapixel camera has to squeeze out more "information" from the same amount of light. A typical point and shoot has a sensor size that is 1/2.5" (some as large as 1/1.6"). However, entry-level SLRs have a sensor that is around 1.8", which is 10x larger in area than a 1/2.5" sensor. See here http://www.dpreview.com/learn/?/Glossary/Camera_System/sensor_sizes_01.htm That's why even a 6mp DSLR will produce images with less noise than a 10mp point and shoot at the same ISO.
3. Newer DSLRs generally have lower noise than older DSLRs.
3. Newer DSLRs generally have lower noise than older DSLRs.
4. DSLR vs. point and shoot.
A single lens reflex camera is one that uses a mirror between the lens and the sensor (or film) to show you what the sensor will see, then flips that mirror away when you take the shot to record the image on the sensor.
ADVANTAGES
Practically, the difference is that DSLR cameras have larger sensors compared to point-and-shoots and thus have better image quality especially at higher ISOs. Thus you can often take photos at higher shutter speeds (thus usually sharper photos).
DSLRs also have interchangeable lenses (you can buy lenses that are fast, ultrawide or very long telephoto). Many lenses for DSLRs are also sharper and have higher contrast than typical lenses used in point and shoots (to be fair, there are also poor DSLR lenses).
DSLRs usually also make it easier to manipulate exposure and other variables. "Serious" DSLRs will often let you change aperture, shutter speed, ISO, white balance, focus, flash sync, flash exposure, and other controls without going through a single menu and without removing your eyes from the viewfinder.
DISADVANTAGES
DSLRs are larger, more expensive and sometimes have a smaller zoom range for each lens. The latest superzooms have an 18x zoom range while the highest zoom range in an SLR lens is currently 15x. Some DSLR lenses don't even have a zoom (called prime lenses) but they are often fast and have excellent sharpness and contrast.
Until recently, most DSLRs couldn't display the image you're about to capture on the LCD screen (instead you use the viewfinder). Some DSLRs that do have "live view" can't focus as quickly when live view is activated.
Many DSLRs can't take videos (unlike virtually all point-and-shoot cameras)
4. Why does a camera guess the wrong exposure? Because it doesn't have the intelligence to know which objects are truly white or truly black. A camera doesn't know whether it's looking at a gray wall, a white wall under the shade, or a black wall with a lot of light shining on it. A camera guesses exposure by assuming a scene has the "average" amount of light, measuring the amount of light in a scene with a built-in light meter, then adjusting exposure so the scene reflects the average amount of light in an average scene (18% or 12.5% reflected light depending on whom you ask).
However, if a scene has a lot of white areas, it's supposed to reflect more light than the average scene (e.g., 36%). But a camera usually doesn't know that, so it adjusts the exposure to reflect the average amount of light (18% or 12.5%), which results in underexposure. Vice-versa for overexposed dark scenes. Some cameras have "scene modes" to compensate for unusual situations (e.g., for snow), and some may even choose the scene mode automatically but sometimes the camera guesses wrong.
5. Metering/exposing for highlights means adjusting exposure so that details in bright areas remain visible and not "blown out." Metering for shadows/lowlights aims to preserve details in shadows. With digital cameras, you can usually recover some detail in shadows but not in blown out areas therefore the usual advice is to meter for highlights. A "conservative" camera such as the Pentax K10D will tend to underexpose to preserve details in hopefully the entire image (with some post-processing for details in shadows).
6. Zone System. This is an exposure technique invented by Ansel Adams and Fred Archer. In this technique, tones of light are categorized in increasing brightness from Zone 0 to Zone X, each one stop apart, with Zone V being middle gray. Each scene will have areas that belong to different zones. For example, if you take a picture of a chessboard, the white squares will belong to Zone VII or VIII while the black squares will belong to Zone II or III. In the zone system, you would spot meter the area that you know the correct zone for and adjust exposure to render that area in the zone that you want. In the chessboard example, you could spot meter a white square then adjust exposure so that the white square is 2 or 3 stops above middle gray. Assuming you expose your target correctly, the rest of the scene will be rendered correctly.
7. Some point and shoot cameras don't have a variable aperture. Instead they use digital neutral density filters to darken the image digitally to simulate smaller apertures. In these cameras, changing aperture doesn't change the depth of field.
7. Some point and shoot cameras don't have a variable aperture. Instead they use digital neutral density filters to darken the image digitally to simulate smaller apertures. In these cameras, changing aperture doesn't change the depth of field.
Tuesday, April 13, 2010
In Hindsight: Soft Light on Shaded Subject with Bright Background


Saturday, December 26, 2009
Holiday Pictures Outdoors at Night
Google still hasn't resolved the spam issue but I noticed that without this blog, I wasn't taking pictures or improving my photography skills, so I'm back.
*********
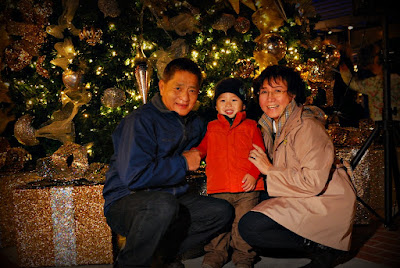
Lighting is absolutely essential for holiday photos. Specifically, there are at least three lighting aspects that are important for holiday photos: sufficient ambient light, moderate key light, and key light color temperature. In an outdoor holiday shot, the holiday lights are easily visible but aren't bright enough by themselves to illuminate the subject without using a flash. For our purposes, that makes things easier. Here's a step-by-step process I used for the photo above.
1. Sufficient ambient light.
a. I switched to manual exposure mode for greater control.
b. I chose an ISO that is as high as I'm comfortable with. In dim lighting conditions like this, the higher the ISO, the more exposure options you have available for your aperture and shutter generally speaking. However, if your ISO is too high, you run into two issues - noise and having too much flash exposure (when ISO is too high, even the minimum flash output may still be too bright). Here I chose 1000.
c. I chose the widest acceptable aperture. Because this was a group shot, I wanted to make sure enough of the subjects were sufficiently in focus, so I chose f/4.0. If this was a solo shot, I would have chosen f/2.8 (that's the widest aperture I have on my lens).
d. I took a test shot of the background lights with no flash and used my shutter speed to set the amount of ambient that I felt looked good (usually at a slight underexposure to keep the subjects more prominent than the background). In this case, I adjusted my shutter until I was satisfied with a shutter of 1/25.
2. Moderate key light.
With the exposure set for the ambient, I could now ask my subjects to get in the picture and pose. Again, in these conditions, the holiday lights wouldn't be enough to illuminate the subjects. Thus, we'll need to use a flash for the subjects.
a. If possible, use off-camera flash. On-axis flash (such as a popup flash) looks unnatural because there's no reasonable explanation for the direction of light. In the shot above, I used Nikon CLS to trigger my flash off-camera.
b. Whether you use off-camera flash or on-camera flash, it's crucial to avoid excess flash exposure. In TTL mode, decrease flash exposure compensation if the flash is too bright in the photo. Here, I did not feel the need to decrease the flash exposure compensation.
3. Key light color temperature.
Most holiday lights are yellowish in color. Flash is normally slightly blue. Without adjusting the flash's color temperature, the flash will look very different from the background lights and will look unnatural. The solution is simply to use a gel (here, I used a 1/4 CTO gel from the Rosco sampler pack taped onto the front of my flash. If you don't have a gel with you, you can instead make the color temperature warmer in postprocessing. The holiday lights will look more reddish, but at least the flash color won't be unnatural.

*********
Lighting is absolutely essential for holiday photos. Specifically, there are at least three lighting aspects that are important for holiday photos: sufficient ambient light, moderate key light, and key light color temperature. In an outdoor holiday shot, the holiday lights are easily visible but aren't bright enough by themselves to illuminate the subject without using a flash. For our purposes, that makes things easier. Here's a step-by-step process I used for the photo above.
1. Sufficient ambient light.
a. I switched to manual exposure mode for greater control.
b. I chose an ISO that is as high as I'm comfortable with. In dim lighting conditions like this, the higher the ISO, the more exposure options you have available for your aperture and shutter generally speaking. However, if your ISO is too high, you run into two issues - noise and having too much flash exposure (when ISO is too high, even the minimum flash output may still be too bright). Here I chose 1000.
c. I chose the widest acceptable aperture. Because this was a group shot, I wanted to make sure enough of the subjects were sufficiently in focus, so I chose f/4.0. If this was a solo shot, I would have chosen f/2.8 (that's the widest aperture I have on my lens).
d. I took a test shot of the background lights with no flash and used my shutter speed to set the amount of ambient that I felt looked good (usually at a slight underexposure to keep the subjects more prominent than the background). In this case, I adjusted my shutter until I was satisfied with a shutter of 1/25.
2. Moderate key light.
With the exposure set for the ambient, I could now ask my subjects to get in the picture and pose. Again, in these conditions, the holiday lights wouldn't be enough to illuminate the subjects. Thus, we'll need to use a flash for the subjects.
a. If possible, use off-camera flash. On-axis flash (such as a popup flash) looks unnatural because there's no reasonable explanation for the direction of light. In the shot above, I used Nikon CLS to trigger my flash off-camera.
b. Whether you use off-camera flash or on-camera flash, it's crucial to avoid excess flash exposure. In TTL mode, decrease flash exposure compensation if the flash is too bright in the photo. Here, I did not feel the need to decrease the flash exposure compensation.
3. Key light color temperature.
Most holiday lights are yellowish in color. Flash is normally slightly blue. Without adjusting the flash's color temperature, the flash will look very different from the background lights and will look unnatural. The solution is simply to use a gel (here, I used a 1/4 CTO gel from the Rosco sampler pack taped onto the front of my flash. If you don't have a gel with you, you can instead make the color temperature warmer in postprocessing. The holiday lights will look more reddish, but at least the flash color won't be unnatural.
Monday, November 2, 2009
Taking Halloween Pictures - Part 2
Part 1 here.
For Halloween, we took our toddler to California Adventure. We had a great time. We plan to go back next year.
The pictures weren't perfect but I was satisfied with some of the portrait shots, and overall, the pictures were noticeably better than those from last year's Halloween, thanks largely to better understanding of TTL flash.
What went right / suggestions for nighttime shots:
1. Handheld umbrella.
I used a handheld umbrella to take some posed shots. I used the umbrella as key and I got the light I wanted for the subject.

For this shot, I took the exposure in manual mode. I set aperture at its widest at 2.8 because I wanted a shallow depth of field. I started out with max sync speed to minimize the ambient on the subject, so the subject was lit only by the soft directional light from the umbrella, then would increase ambient from there as necessary (by using a higher ISO or slower shutter) but I liked how the shot looked so I left it there.
2. Using ambient backlight.
There were spotlights throughout the park. I took advantage of these spotlights to use them as rim lights for drama (to the extent the subjects cooperated). To do so, I just positioned the subjects where the spotlights were behind and above them.

In one area, there was a cool-looking spotlight shining through a "fog." I positioned my wife to block the spotlight itself, allowing just the corona of light to shine around my wife and our toddler.

Inside the park, Disneyland's security objected to my use of the handheld umbrella, at first claiming that it was professional equipment, then next arguing that it was a sharp object. Not wanting to ruin the fun of the evening, I decided to put the handheld umbrella away and just used the bare SB-800 handheld, in wireless mode. Using the flash off-camera helped avoid the flat lighting from using an on-axis flash as key light.
There were also some shots where I lucked out on chimping the exposure and got a soft-looking light, I believe because ambient was just at the right level (probably 1 or 2 stops underexposed) to act as an extension of the key light. I plan to investigate this further to do it more consistently.

4. CTO gel.
Especially when there is mostly yellowish ambient light, the bluish light from the flash is a dead giveaway that artificial light was used. The 1/4 CTO gel that I taped to my flash helped the flash look much more natural.
5. Manual mode.
I've been using program, aperture priority and shutter priority but I tried out manual exposure based on Neil van Niekerk's suggestions. It wasn't as difficult as I expected, even with often-changing light conditions. I didn't do it the right way though. I chose exposure settings purely by guesstimating, looking at the picture taken, and adjusting accordingly. For such an unscientific way of taking manual exposure shots, the shots weren't as far off as one might expect. The benefit of using manual exposure was more consistent exposures. I plan to practice using manual mode in the hope of being more aware of (and in control of) my exposure.
What could be better:
1. Chimping.
As discussed above, I chimped the exposure just using the LCD screen. I was aware that there were better ways of setting exposure, such as spot metering the white portion of our kid's costume and setting that to +1 or +2 exposure comp, or using the blinking highlights screen, or using the histogram. But I caved under time pressure and just adjusted exposure based on instinct and a quick review of the shots. Next time, I have to discipline myself to use one of the more reliable methods (probably the histogram method).
2. Flash blur from excess ambient light:

I set the exposure for ambient light at levels that I guessed were appropriate. What I neglected to take into account sufficiently was to underexpose the background. I was too concerned with having the background lights show up to avoid the black hole look. The truth is, with digital SLRs, I find it far easier to use postprocessing to correct background underexposure than overexposure. Next time, I will err on the side of underexposing the background instead of risking overexposure.
3. Flash exposure.
The TTL-based flash exposure wasn't as smart as I thought. It tended to underexpose white areas. This wasn't very obvious just reviewing the shot on the LCD screen but could have been easily observed from reviewing the histogram. Something to force myself to do next time.

Saturday, October 24, 2009
Comments on first family's photo
Yahoo news reported that the first family's first official photo was released. Here's the photo, taken by Annie Leibovitz. Of course the photo looks good and I like the expressions on their beautiful faces, but from a purely technical point of view, I'm a bit surprised that the lighting looks so simple and frankly underwhelming to me. Maybe it's "deceptively simple" and too subtle for me. It seems possible to duplicate the lighting by simply bouncing the flash behind and camera right. Or by a large umbrella or softbox. From the catchlight on the original size photo, I'm guessing Annie used a softbox. I can't tell whether a fill light was used. Doesn't seem like it. I'm wondering whether Annie used a hair light, because the first lady's hair has a shine, but the shine could have come from the key.
From the background it looks like ambient was killed (intentionally I assume). Looking at the exif, I'm kinda puzzled too. It says:
If I were to take my own version of this shot, I would have allowed more ambient light, because I think the darkness in the rooms in the background seems unnatural and to me off-putting. Or with Annie's unlimited resources, I would have placed another flash in the rooms at the back to light them up. The light from the flash also looks a bit cold. Perhaps it needs a gel. I might have also placed a gold reflector in front of them and bounced a bit of flash into it to add even more sparkle and warmth to their eyes. In terms of composition, I think I would tried a very slightly lower height to decrease the negative space on top. I also think I would have picked a room with a less somber color (given the current economy). In terms of choice of equipment, I believe the leader of the free world and his family deserve a shot from a medium format camera (digital or otherwise) for posterity.
From the background it looks like ambient was killed (intentionally I assume). Looking at the exif, I'm kinda puzzled too. It says:
- Canon 1Ds MkIII
- f/8, 1/125, ISO 400, 0 EV.
If I were to take my own version of this shot, I would have allowed more ambient light, because I think the darkness in the rooms in the background seems unnatural and to me off-putting. Or with Annie's unlimited resources, I would have placed another flash in the rooms at the back to light them up. The light from the flash also looks a bit cold. Perhaps it needs a gel. I might have also placed a gold reflector in front of them and bounced a bit of flash into it to add even more sparkle and warmth to their eyes. In terms of composition, I think I would tried a very slightly lower height to decrease the negative space on top. I also think I would have picked a room with a less somber color (given the current economy). In terms of choice of equipment, I believe the leader of the free world and his family deserve a shot from a medium format camera (digital or otherwise) for posterity.
Thursday, September 3, 2009
Dodging and burning family photos
What's dodging and burning?
Dodging and burning are the processes of lightening ("dodging") and darkening ("burning") the exposure of parts of a photo. The picture below illustrates the tremendous improvement in tonality and subject three-dimensionality that can be achieved with dodging and burning.

How do you do it?
There are many ways to dodge and burn, not just using the dodge and burn tools that come with many postprocessing software. Here's one way to do it in Picasa Premium to improve tonality.
1. Load the picture in Picasa, fix the basics first (white balance, saturation, exposure, crop, etc.), then click on the create tab.
Here's a sample picture:
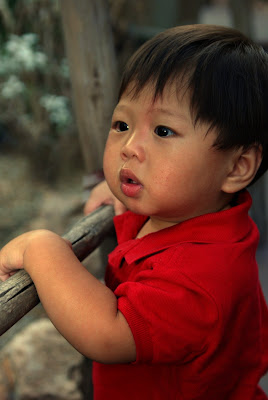
Here's a sample picture:
2. Under the Create tab, click on Advanced, and click on Curves.
3. Darken the subject. If the background is too bright, darken it as well.
- Click on the middle of the curve and drag it slightly to the lower right. Observe the change in the picture as you do this. Drag it to the point where the shadows you want to create are the right shade.
- If you want to darken both the subject and the background you're done with this step. If you want to darken just the subject, go on by clicking on the paintbrush icon beside the fade slider.
- In the Effect Painting dialog box, click on "reverse effect" checkbox. The image will revert to its original.
- Paint the subject with the darker exposure. First, make sure the Effect tab is selected (because you're "painting in" the shadow effect). Choose an appropriate brush size, select 0 for hardness and 100% for strength. Now paint the subject.
- If you want to, you can change the darkness by adjusting the curve.
4. Add the highlights.
- In the Effect Painting dialog box, click on the "Original" tab (because you're "undoing" the shadow effect from step 3). Choose an appropriate brush size, select 0 for hardness and around 66-75% for strength. Now paint just the brightest highlights. Generally I find it more effective to click repeatedly than to drag the mouse. The effect is easier to control and looks more natural.
- Reduce the strength to 33% to 50% and paint the next brightest highlights.
- Reduce the strength to 25% and paint the least bright highlights.
- If you wish, you can readjust the contrast of the created shadow by adjusting the curve.
Here's an exaggerated sample:
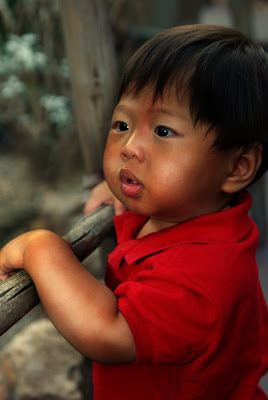
Here's an exaggerated sample:
5. Click Apply to finalize the curves adjustment. Save it. You're done.
Here's the result:

Here's the result:
Test your understanding of the above process: if you started out with an underexposed photo, how would the process change?
If you start out with an underexposed picture, then you can skip step 3. In step 4, adjust the curve to the upper left until it's where you want the highlight shade to be. Click on the paintbrush icon, click on the reverse effect checkbox, select the "Effect" tab (because you're "painting in" the highlight effect). Paint progressively from brightest to least bright highlight.
If you started out with an overexposed photo, how would the process change?
One method would be to "paint in" the shadows. I find that to be difficult, because it's harder for me to imagine the correct shadow placement. Instead, I would either fix the exposure first, then proceed as normal, or use a similar process as normal, except:
- I would drag the curve deeper.
- I would darken both the subject and background.
- When "painting in" the highlight, instead of starting out with 66% strength for the brightest highlights, I would start out much lower, depending on how overexposed the picture was.
With Picnik Premium, you can modify the process above to "paint in" different effects. For example, in our toddler's birthday album, I made the aquarium much more vivid by applying the Velvia preset in the curves, and using it to paint just the aquarium.

Where do you learn more about dodging and burning?
I'm still very new to this myself. The classic reference is Ansel Adams' the Negative but I haven't even seen or read it.
Please share your results, techniques and resources by posting links in the comments! Thanks.
Subscribe to:
Posts (Atom)