Yes everyone. This is a real post, around 2 years after my previous one. The reason for this post is that I wanted to share with you guys that, finally, after years of searching, I've found the perfect camera for family photos.
It's actually not one specific camera model but a type of camera. Rather than explain to you what the camera is, or why it's the perfect personal camera, I'm just going to share with you a video I made:
What do you think about it? Do you agree it is the perfect personal camera? Let me know in the comments! For more info about the Samsung Gear 360 2017, check out this post.
Saturday, July 7, 2018
Friday, April 8, 2016
What's New?

Hi everyone. Sorry for the long absence. I went down a rabbit hole, and it was deep. Way deeper than anything I've seen since I started learning about photography. So deep I haven't gotten out, and I don't know when or if I will.
Tuesday, March 1, 2016

Wednesday, February 3, 2016
Sony a6300 Announced; Preliminary Comments on a6300 vs. a6000 Differences
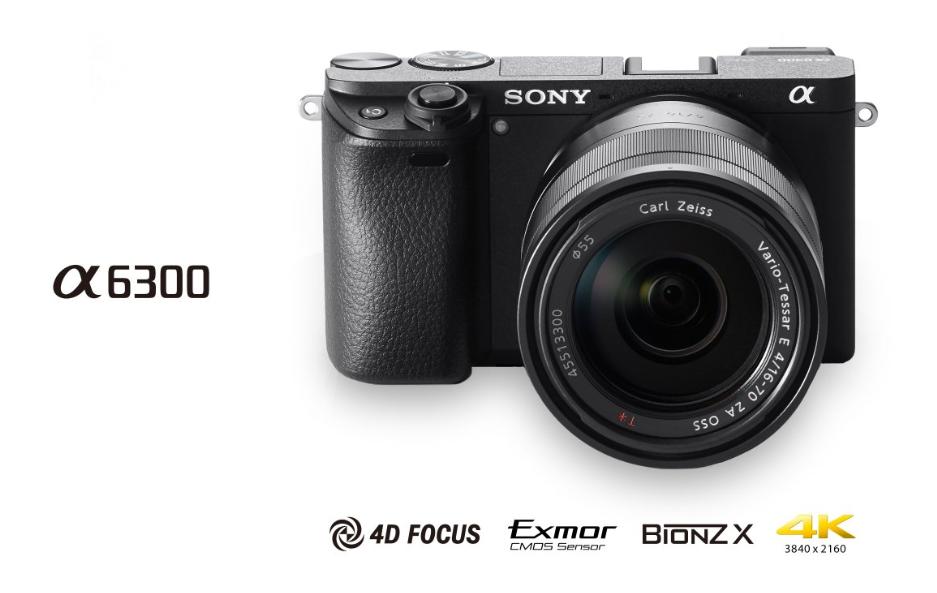
Sony's successor to the immensely popular a6000 is finally here. Sony announced the Sony a6300. Its headline features are:
- 425 phase-detection AF points with claimed focusing speed of 0.05 second.
- At shooting speeds up to 8fps, it has minimal viewfinder blackout, allowing the photographer to continue to see the subject.
- New 24.3 megapixel sensor with copper wiring.
- 4k video, SLog3 support, and microphone input.
- Available March 2016 for $999 (body only).
Sony's official page.
I've had the a6000 since launch and here are my thoughts on the a6300 compared to the a6000: I think the a6300 is more evolutionary than revolutionary. The new features are impressive, but they will make a greater difference for advanced amateurs than casual shooters.
- Autofocus: I expect the a6300 will have class-leading autofocus. However, I would want to know whether the very high number of phase-detection AF points might cause it to have poorer autofocus performance in low light, or might cause a slight decrease in image quality than otherwise. The Samsung NX1 and NX500 has 205 phase detection points, of which 153 are cross-type, and they are very good at tracking subjects in decent light but have slow autofocus in low light, which I suspect is due to the shading of the hybrid AF pixels to allow it to differentiate light direction. See here. The a6300, with 425 AF points, might have the same issue. But we won't know for sure until it is released and tested.
- Image quality: The copper wiring should reduce the noise in the image and therefore improve high ISO performance. However, the current class leaders for mirrorless, the Samsung NX1 and NX500, also used copper wiring. On top of that, the NX1 and NX500 had backside illuminated sensors, whereas the a6300 does not have backside illumination. Therefore I think that the a6300 image quality will likely be similar to (as opposed to better than) that of the NX1 and NX500.
- Minimal viewfinder blackout. This is an innovative feature for mirrorless cameras. On other mirrorless cameras, using continuous burst will cause the viewfinder to blackout, which means the photographer will be pointing the camera blindly at the subject during continuous shooting. The a6300 has minimal blackout - seemingly better even than an optical viewfinder of a DSLR based on Sony's press event. However, I don't think casual shooters care too much about EVF blackout. Therefore this feature appeals primarily to advanced amateurs and pros.
- 4k video, SLog3 support, and mic input. These are very welcome features for more advanced video production. However, most casual shooters don't have the hardware required for 4k video editing, and most casual shooters don't care to use an external microphone (even though it would greatly improve the video). Therefore, again this is a feature that will mean more for advanced amateurs and pros, instead of casual shooters. Another video feature of the a6300 is the option to record in SLog3 color space, which maximizes the dynamic range but requires color grading. Needless to say, SLog3 support is a feature that benefits advanced videographers.
Thursday, January 28, 2016

Tuesday, January 19, 2016
Ricoh Theta Review (Theta S and Theta m15)

Happy New Year! One of the trends in photography is 360-degree panoramic photos and videos, variously called photospheres, "virtual reality," or VR. Photospheres have been around for many years, but several recent developments have come together to make it much easier to produce and share panoramas, making them accessible to casual photographers and audiences.

While much of the spotlight in 2016 is on virtual reality devices such as the Oculus Rift and Playstation VR, part of the trend is the increasing number of 360-degree cameras that can capture photospheres.
One such device for capturing photospheres is the Ricoh Theta S. It is the third generation of the Theta, which first came out in 2013. The Theta S takes photos and videos with 360-degree horizontal and 360-degree vertical field of view. Unlike panoramic photos with some cameras and phones, the Theta S captures its photospheres with a single shot, making it possible to capture movement and action in real time.
Separate from the increasing interest in VR shots, I think the Ricoh Theta S is a very good camera for family photos and vacations. Many family photos are taken for documentary purposes, i.e., to memorialize events and places we've been to. Especially in this age of social media, photos help us share our stories with friends and family. The Ricoh Theta S serves that function very well.
One such device for capturing photospheres is the Ricoh Theta S. It is the third generation of the Theta, which first came out in 2013. The Theta S takes photos and videos with 360-degree horizontal and 360-degree vertical field of view. Unlike panoramic photos with some cameras and phones, the Theta S captures its photospheres with a single shot, making it possible to capture movement and action in real time.
 |
| Ricoh Theta S |
Christmas eve dinner #theta360 - Spherical Image - RICOH THETA
I had the original Ricoh Theta, the second-generation Theta m15 model, and I now use the third-generation Theta S. In this post, I review and compare the three models, with an emphasis on the Theta S. Note: For images here with the Ricoh Theta logo, such as the one above, you can click on the images to view the photosphere (as long as your browser supports it).
 |
| Ricoh Theta m15 |
Monday, December 7, 2015
Traditional Christmas Family Portrait with Natural Light

This weekend, I took a photo of our family for our Christmas card. In this post, I'll describe the thought process behind the photo.
Wednesday, December 2, 2015
Hot Rumor: Nikon Acquires Samsung NX System!
 |
| Samsung NX500 with 16-50 f/2-2.8 and the Nikon F-mount Fuji S5 with 28-105 AF-D. |
In what may turn out to be the biggest news of 2016, MirrorlessRumors.com claims that Nikon will acquire Samsung's NX mirrorless technology! It's just a rumor at this point, but I believe it makes so much sense that I think it is very likely to be true. Hit the jump to see why!
Wednesday, October 14, 2015
Sony RX1R II improvements over Sony RX1
There are lots of exciting news for Sony full frame today! There was the announcement of the Sony a7S II, which everyone saw coming. There was also an announcement of a firmware update to add 14-bit Uncompressed Raw, to be available October 19. Finally, Sony also announced the Sony RX1R II, the successor to the RX1 and RX1R.
People had been speculating about the RX1's successor but for a long time there was no news about it, and people shifted their attention to the a7RII. So when Sony announced the RX1R II today, it came as a surprise.
I had the Sony RX1 (reviewed here), and the RX1R II looks like an attractive upgrade with several improvements over the RX1.
IMPROVEMENTS
1. Sensor and variable OLPF. The RX1 had a 24 mp sensor, while the RX1R II has a 42mp sensor, similar to that of the a7RII. Other than the improvement in resolution, the RX1R II also has a variable optical low-pass filter, which essentially allows you to choose whether to shoot with a low-pass filter (to minimize moire) or without the filter (for maximum resolution).
2. Built-in EVF. The RX1 was criticized for not having an electronic viewfinder, except as an expensive accessory. The RX1R II has a built-in electronic viewfinder that pops up, a novel feature that first appeared on the Sony RX100 III.
3. Continuous autofocus (AF-C). The original RX1 had no continuous autofocus capability at all. The RX1R II has continuous autofocus and has an improved autofocus tracking capability. This should make it easier to track and capture moving subjects. In my opinion, this is a significant improvement, because the RX1's difficulty with moving subjects made it unsuitable for candid photos. If the RX1R II performs as promised, it becomes a good candidate for candid and family photos.
4. Faster autofocus. The RX1 wasn't slow to focus, but it wasn't that fast either. Although it would sometimes focus quickly, much of the time, it was not much faster at focusing than a good point and shoot such as the Panasonic LX5. The RX1R II has the same autofocus system as the a7RII, with 399 AF points covering almost all of the frame. Sony claims the new system is 30% faster than the autofocus of the RX1. To be honest, that does not sound very impressive, considering the RX1 wasn't that fast to begin with. However, I will withhold judgment until we have more information.
5. Tilting screen. The RX1R II adds a tilting LCD screen, which is very useful for taking photos at unusual angles. Regretably, the LCD screen cannot be flipped 180 degrees for a selfie mode, which can be very useful for family photos and candid shots.
WHAT'S MISSING
1. No built-in image stabilization. Although the RX1R II uses the same sensor as the a7R II, and the latter has built-in image stabilization, the RX1R II does not have optical image stabilization. That's unfortunate, but not a deal breaker in my opinion.
2. No curved sensor. Ever since Sony announced the development of a curved sensor, everyone had assumed that it would be used in the RX1's successor. A curved sensor would have improved image quality at the edges of the frame. On the other hand, it would be difficult to develop zoom lenses for it. Naturally, most people figured Sony would use it for a premium fixed lens camera such as the RX1. However, for whatever reason, Sony apparently did not implement its curved sensor in the RX1R II.
3. No touchscreen. As with other Sony cameras with an EVF, there is no touchscreen on the RX1R II. I'm still not sure why Sony can't follow Olympus, Panasonic, Samsung and other camera manufacturers in having cameras with both an EVF and a touchscreen.
4. Lost the popup flash. The RX1 had a popup flash which was useful in part because of the RX1's 1/2000 sync speed. The RX1R II's popup EVF now occupies the space that used to be for the RX1's popup flash. For flash users, it's not the end of the world because the RX1R II retains the hotshoe, and still has a 1/2000 sync speed.
5. No 4k video.
UNKNOWNS
1. Color fidelity. One of the strengths of the RX1 was its color fidelity. It had awesome colors and faithful reds (unlike some Sony cameras that have reds that look more orange). I'm hoping the RX1R II has similar fidelity, though I can't be sure without seeing more samples. However, Sony posted a sample photo of a maiko (geisha apprentice), and the red of her lipstick and her obi (sash) look pretty good.
2. Does the sensor outresolve the lens? The RX1's Zeiss 35 f/2 was superb. It was very sharp and in my opinion, it had the best bokeh of any lens I've used. The RX1R II appears to use the same lens. With the higher sensor resolution, I don't know if the images from this lens will look as sharp when pixel-peeped. However, even in the worst case scenario, we can expect the overall resolution to be improved.
Thursday, October 8, 2015
The Joys Of Owning An Olympus E-M1 (firmware v4.0)

For a long time, I wanted to post a review of the Olympus E-M1 and how it compared to the Olympus E-M5 I had before. However, I guess this is not relevant anymore with the release of the E-M10, the E-M5 II and the E-M10 II. Let me tell you the jump from the E-M5 to the E-M1 for me was quite significant, these are some of the major differences that affected my day-to-day use of the camera:
Subscribe to:
Posts (Atom)