1. What's the point of having different lenses? Can't you just move closer or further away?
At first glance, it may seem that having more than one lens is unnecessary. Shouldn't lenses give us the same appearance as what we see with our eyes? Then we could just walk closer to the subject if we want a close-up view, and walk farther back if we want a wider view.
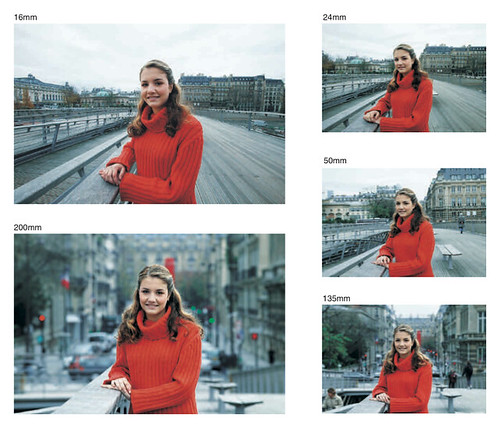
However, it's not that simple. Lenses with different focal lengths have different magnification, field of view, potential perspective, and depth of field. See below.
2. MAGNIFICATION.
Perhaps the most obvious difference between lenses of different focal lengths is the difference in magnification. All things being equal (including a constant distance between the camera and the subject), with a wide lens, the subject will look smaller, and with a telephoto lens, the subject will look larger.
On the other hand, if we move closer to the subject, the subject will also look larger than if we were further away, so wouldn't walking closer be the same thing as using telephoto lens? With respect to the magnification of a single subject with a blank background, it may seem that way. However, walking closer to the subject doesn't magnify everything uniformly. Closer objects get larger faster than further objects.
Experiment 1: "Magnification" from moving closer.
1. Find two objects of the same length. Place them apart from each other.
2. Step back, at least 3 feet away from the near object. Hold your hand across your face and compare the length of the near object relative to the length of your index finger. Compare the far object's length to your finger as well.
The near pen looks about 16% of the length from my thumb to the tip of my index finger. The far pen looks about 13% of the length from my thumb to the tip of my index finger.
3. Without moving your hand, walk forward so that the near pen appears about as long as your finger. Compare the far pen's length to the length of your finger.
The near pen is about 80% of the length from my thumb to the tip of my finger. The far pen looks about 16% of the same length.
Result: At the point when the near pen looked about as long as your finger, the far pen did not look nearly as long as your finger. Moving closer did magnify both the near pen and far pen but the near pen got magnified much faster.
Experiment 2: Magnification from using a longer focal length.
To illustrate the difference that a longer focal length makes in terms of magnification, we can setup the same experiment above, this time using a simulated longer focal length.
1. Find two pens of the same length. Place them around 2 feet apart from each other.
2. Step back, at least 3 feet away from the near pen. Form a circle with your thumb and index finger. Place this circle around your eye. This simulates the view of a camera with a 'normal' (not wide, nor telephoto) lens. Compare the length of the near pen relative to your circle. Compare the length of the far pen relative to your circle.
3. Without moving closer, move your circle closer to the two pens. This simulates the view of a camera with a telephoto lens. Compare the length of the near pen relative to your circle. Compare the length of the far pen relative to your circle.
Result: the magnification from a longer lens is uniform.
Conclusion: moving closer to the subject doesn't "magnify" everything uniformly. Closer objects appear larger faster than further objects. On the other hand, the magnification from a longer lens is uniform. Therefore, in terms of magnification, moving closer is not a substitute for a longer lens. Similarly, moving further back is not a substitute for a wider lens.
Compare these shots:
 |
| 50mm |
 |
| 150mm |
In both shots, the subjects stayed at about the same position. I took the first shot at 50mm. For the second shot, I moved backward several feet then used 150mm. The subjects look about the same size in the relation to the frame. However, the background looks very different -- the statue appears "larger" in the shot with the longer focal length.
See also this related post by mshafik:
http://betterfamilyphotos.blogspot.com/2011/03/tip-using-zoom-lens-as-compositional.html
3. FIELD OF VIEW
Another obvious difference between lenses of different focal lengths is the difference in field of view. Suppose you line up 180 bottles, side-by-side, around you in a semi-circle. (Don't worry -- this is just a thought experiment... I won't ask you to find 180 bottles :D ) With a telephoto lens (let's say 210mm), you would see only 10 bottles. With a wide lens (let's say 28mm), you can see around 66 bottles total. In terms of field of view, a long lens is like looking through a narrow tube.
The question is, if you had a tele lens, could you move back far enough that you would see 66 bottles? Yes you could. But your field of view would not change. Suppose in the semi-circle, when we were still using the wide lens, the leftmost bottle had behind it several feet away in the background a flagpole or something. That flagpole would be visible in the wide lens shot. However, if we move back with our tele lens far enough to see 66 bottles, that flagpole would not be visible.
Demo shots:
17mm - 2 pens visible, touching the edge of the image. Note the chairs visible in the background.
50mm without stepping back - 2 pens not visible:
50mm with step back - 2 pens visible, touching the edge of the image. Note, however, that the chairs are not visible in the background.
4. PERSPECTIVE and COMPRESSION.
We saw a bit of perspective in the magnification experiment, where we noted that far objects appear disproportionately smaller than near objects. The same principle applies within a single object -- the part that is farther appears disproportionately smaller, while the part that is near appears disproportionately larger. When the subject is near the relative differences between the near parts and far parts are large, thus there is greater distortion. When the subject is far, the relative differences are small, thus there is less distortion (and the subject appears 'flatter').
17mm:
50mm:
150mm:
How perspective relates to focal length: actually, focal length itself does not affect perspective. However, wider lenses generally allow us to be nearer to a subject (which in turn leads to greater perspective distortion), while telephoto lenses allow us to be further from the subject (leading to less perspective distortion).
5. DEPTH OF FIELD
Depth of field is the range of distances that looks sharp. A narrow depth of field is useful for keeping only a specific range in focus and everything else blurred. A deep depth of field is useful for making everything appear to be in focus (even though actually, there is only one exact distance that is exactly in focus). Depth of field is based on the distance from camera to the subject, the aperture used, and the focal length of the lens. (We'll talk about sensor size later.)
A lens with a longer focal length has a shallower depth of field. On the other hand, depth of field is also shallower when the camera to subject distance is short, so wouldn't moving closer also give a shallower depth of field? I tested this. Take a look at these shots:
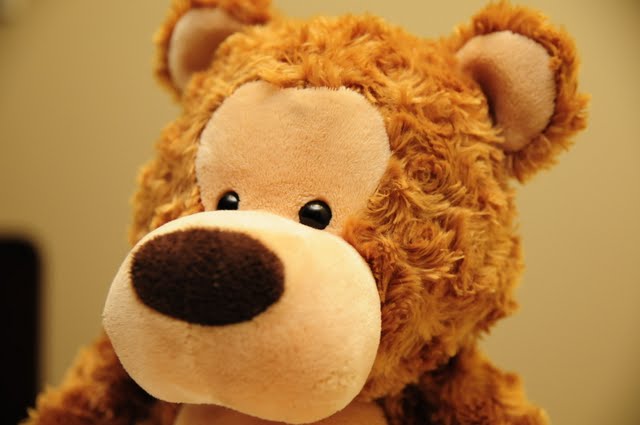
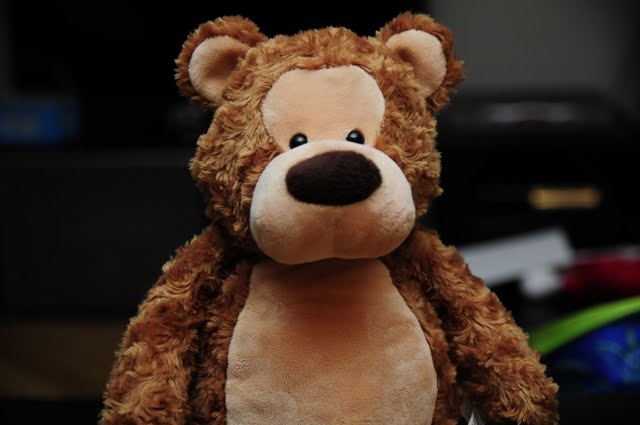
Shot 1 (tele lens): 150mm, f/2.8.
Shot 2 (normal lens but closer): 50mm, f/2.8. At a closer distance, the subject looks about the same size as with the tele lens. The depth of field also appears somewhat similar based on the blurriness of the objects in the background.
With respect to depth of field it appears you may get away with moving back and forth.
6. NORMAL VS. WIDE VS. TELEPHOTO
A normal lens is a lens that has a perspective of about the same as the human eye (taking into account sensor size). On a full-frame camera, this is about 50mm. A lens that is wider than field of view of a normal lens is a wide lens. Longer than that is a telephoto lens.
7. WHAT ABOUT CROPPING?
Is there any difference between cropping a wide shot and using a telephoto lens (ignoring the effects of the decreased resolution). If we crop an image from the middle, then there is no difference in magnification, field of view, and perspective. With depth of field, there seems to be a difference. Compare these shots:
50mm:
17mm (from the same distance) cropped:
8. WHAT ABOUT SENSOR SIZE?
Caveat: this is a somewhat controversial topic with many points of view from 'experts.' My rationale is below which I hope helps you to evaluate whether it is right or wrong.
Full-frame DSLRs have the same sensor size as 35mm film. APS-C sensor DSLRs have a sensor size that is about 2/3 as small as that of a full frame DSLR. Four-thirds and Micro-Four-Thirds cameras have a sensor half as small as that of a full frame DSLR. A full-frame lens would focus the same size image on the sensor no matter what the size of the sensor. However, because a small-sensor camera has a smaller recording surface, then only the middle part of the focused image is being used. The effect of using a small-sensor camera is the same as if you cropped a photo from a full-frame camera. This is essentially the same as #7.
If you have a full-frame camera with a 50mm lens, and then you crop the middle part so that it's like the field of view of a 75mm lens on the full-frame camera, the cropped image will look like the image from the same 50mm lens on a 1.5x crop camera in terms of magnification, field of view, and perspective. As for depth of field, there are some who say that if a full-frame camera is cropped to the same field of view, then the depth of field will be the same as well (see, e.g. statement #3 here
http://photo.net/learn/optics/dofdigital/ ). I thought so too but after the cropping test in #7, I'm not sure that is true.
9. CHOOSING FOCAL LENGTHS FOR COMPOSITION.
Because of the different characteristics of different focal lengths, they have unique uses for composition.
Wide lenses are often used to establish a sense of place. If you buy a ticket to go to Disneyland, you generally want to show in the photo that it was at Disneyland, and not just any random place. A wide lens captures more of the background and gives the viewer an idea of the location.
Telephoto lenses are useful for de-emphasizing the location or for focusing the attention solely on the subject. If you are someplace not so special, and there are many objects around that would detract from the photo, using a telephoto lens can help simplify the background.
Because of the differences between lenses of different focal lengths, ideally you should pick the right focal length first then position yourself for the right composition.