QUICK REVIEW OF MANUAL VS. TTL FLASH
With TTL, the camera guesses the flash exposure, then controls the flash output automatically to match that flash exposure. With manual, you control the amount of flash output to get the flash exposure you want.
BENEFITS OF LEARNING MANUAL FLASH
1. For setup shots, manual flash GUARANTEES predictability and repeatability. If the flash to subject distance doesn't change from shot-to-shot, and the aperture and ISO don't change, then the 'correct' flash exposure shouldn't change either, right? With TTL, the flash exposure may change if you change your composition and sometimes your colors (by zooming in, changing the subject's clothing, adding or changing the subject etc. etc.) even though the correct flash exposure shouldn't have changed. With manual flash, that variability is never going to be an issue. You always know what you're going to get.
2. With manual flash, I'm forced to pre-visualize the correct flash exposure. With TTL flash, there's always the temptation to accept the camera's guess of flash exposure because the truth is, with TTL, the flash exposure looks ok (from at least some point of view) most of the time. It's convenient but also easy to be lazy, instead of actively thinking about tone placement and the "look" that we want.
3. Awareness. If you only use TTL flash, you never know how much power the flash is using. Knowing the amount of power is useful to know how much more light is available if you want to use a smaller aperture or lower ISO. It's also useful for getting an idea of how much battery life you're using up (for some reason the SB800 and SB900 don't have battery life indicators).
4. Manual flash offers more bang for the buck. Manual flash is much cheaper than TTL in terms of the flashes themselves and the triggering options. Example of a wireless setup:
SB600 = $220. (If you don't have a commander-capable popup flash, add SU-800 commander $255.)
vs.
YN560 ($85) + RF-602 radio trigger transmitter and receiver ($30 on ebay) = $115. The incremental cost of adding additional flashes and receivers will be less (you only need one transmitter).
This is why I got a manual flash for my second flash (although I would have gotten an SB600 if I had extra money).
5. Sole control. With manual flash, you take out the camera's algorithms out of the equation. If the flash exposure sucks - it's your fault. If the flash exposure rocks - you da man.
6. Manual flash is usable with cameras that don't have hotshoes. Just get a manual flash with a built-in digital slave and you're good to go.
HOW TO USE MANUAL FLASH
The textbook way to use manual flash is to use a flashmeter. Another way is to estimate the distance from subject-to-flash and use the guide number equation. In reality, a number of manual flash users do without a flashmeter or calculator, and use trial-and-error intelligently.
Here's how I use manual flash:
1. I visualize the flash exposure.
2. I set the ISO, aperture and shutter speed for the conditions (underexposing if necessary). I may take a test shot (without flash) to confirm.
3. I set my best guess of manual flash power based on the ISO, aperture, and how I'm using the flash. If I'm using bare flash directly, then I will likely pick a low power like 1/64 or 1/32. If I'm using bounce flash, I will likely pick high power like full power or 1/2.
4. I take a test shot and check the result on the LCD and the histogram. (Note: the vertical lines on the histogram aren't totally random. They're about 1 stop apart.)
5. Based on the results, I estimate the amount of flash over- or underexposure in stops and adjust the manual flash power accordingly. If I want partial stops, I move the flash closer or further, and/or adjust aperture or ISO.
With this procedure, I usually get the flash exposure I want within 2 or 3 test shots. Here's a tip on how to get better at estimating flash over- or underexposure: use raw and learn postprocessing. When you postprocess as part of your regular workflow, you adjust exposure so often that you become better at estimating over- and underexposure. :) Oh, btw, plug in the exposure adjustment instead of using the slider.
This procedure is not as tedious as it may sound. Just think of it as really crummy TTL :)). With TTL we adjust the default flash exposure (0 FEC) based on the result we want. This is kind of like that, except that the default flash exposure may be way off.
Samples:
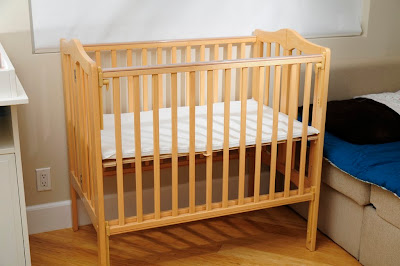
I used the above procedure for the shot at the top. A couple more sample shots using the same procedure:

Blogged here: http://betterfamilyphotos.blogspot.com/2010/08/real-estate-photos-part-1-strobist.html

Blogged here: http://betterfamilyphotos.blogspot.com/2010/07/selling-stuff-sexily-strobist-style.html
If you're a manual-only flash user, check out this related post: Super Manual Flash
Thanks, good information.
ReplyDeletethanks bro. :D
ReplyDeleteThanks guys.
ReplyDeleteBest regards,
Mic