Lesson 6: Hard Light vs. Soft Light; Bouncing the Flash

a family portrait lit by bounced light
For this lesson, you'll need an external flash that can be angled upward and swiveled. Alternatively, if your flash can't swivel or bounce, you can jump to Lesson 7 first to use the flash off-camera then come back to this lesson.
Light has several characteristics (such as intensity, color, direction, etc.). One of the most important characteristics of light is its quality -- hard, soft, or somewhere in between.
Hard light has well-defined shadows. Soft light has blurred shadows or sometimes even imperceptible shadows.
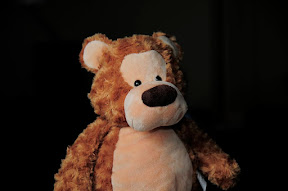
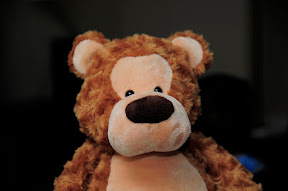
Example of hard light:

Example of soft light:

Soft light results from a light source that appears to be the same size as the subject or larger. Hard light results from a light source that appears smaller than the subject. In terms of size, what matters is not the actual size of the light source but its size as it appears to the subject, taking into account the distance between the light source and the subject. The textbook example is the sun, which is large but because it's 150 million kilometers away from us, it appears small and thus acts as hard light.
When taking photos of people, soft light is usually more flattering (making wrinkles less apparent), while hard light is considered more dramatic.
A hotshoe flash, by itself, produces hard light when used on anything other than small objects. However, even a small hotshoe flash can be used to produce soft light if the light is made larger. Indoors, the most effective way to make the light larger is by bouncing the flash. Bouncing the flash means aiming the flash to a large surface instead of directly at the subject so that the flash-illuminated surface is acts as the light source for the subject.
Two significant limits to bouncing: power and color. Bouncing requires a lot of power because the light has to travel to the bounce surface and then to the subject. In addition, most bounce surfaces are not perfect reflectors. Because of the power required for bouncing, you almost always have to use a high ISO (800 or more) and a wide aperture. (BTW, this is also what makes having a powerful flash useful.)
A second limit to bouncing is color. The bounced light will pick up the color of the bouncing surface. Sometimes, this isn't so bad. For example, a light beige surface can produce a warm-looking light on the subject. Other times, this is a serious issue, as with green walls. To mitigate the color problem, shoot in raw so that you can adjust color temperature afterward (you can adjust color temperature with jpegs as well, but anything more than a slight change will result in serious deterioration in the image quality).
Exercise 1: bouncing from the ceiling.
1. Find a room with a white ceiling no more than 20 feet high. Attach an external flash to your camera.
2. Take a baseline shot with the flash aimed at the subject. For ease of comparison, use a high ISO (800 or 1600) and the widest aperture available.

ISO: 800
Exposure: 1/250 sec
Aperture: 2.8
3. Take a comparison shot that uses ceiling-bounced light. Rotate the flash head upward about 45 degrees to a part of the ceiling that is in front of the subject. Use the same high ISO and wide aperture, then take the shot.

ISO: 800
Exposure: 1/250 sec
Aperture: 2.8
Exercise 2: bouncing from the wall
Light can be bounced not only from the ceiling but also from walls to create a more interesting lighting angle on the subject.
4. Find a room with a white or light-colored wall.
5. Take a shot that uses wall-bounced light. Swivel the flash head to a part of the wall that is in front of the subject. Use the same high ISO and wide aperture, then take the shot.
Compare the result to the baseline shot (straight flash) and the ceiling-bounced flash.

ISO: 800
Exposure: 1/250 sec
Aperture: 2.8
Exercise 3: color cast.
This exercise demonstrates the effect of a colored bouncing surface.
1. Find a wall or surface that is not neutral in color.
2. Use a white object as your subject.
3. Swivel the flash head to a part of the wall that is in front of the subject. Use the same high ISO and wide aperture, then take the shot. Note the color cast as evidenced by the object that no longer appears white.
Blue color cast from blue bounce surface:

Red color cast from red bounce surface:

4. If you have an image editor, you can use the color temperature adjustment function and click on the white object to neutralize the color cast. This will, however, also alter the color of the ambient light.
Red color cast removed:

TAKEAWAY: Bouncing softens the light by illuminating a large surface, which then acts as the light source. However it requires a lot of flash power and can create unusual color casts if the bounce surface is not neutral in color.
There are other ways of softening light, such as using a light modifier (umbrellas, softboxes, reflectors, etc.). However, unless the light modifier is large enough, the light will not be significantly softer. Using a large modifier will almost always require using the flash off-camera, which is covered in the next lesson.
Lesson 7: Using the Flash Off-Camera

a portrait lit by off-camera flash with a shoot-through umbrella
Aside from the intensity and quality of light, another very important characteristic of light is its direction. Properly used, the direction of light reveals texture and three-dimensional form.
When a flash is attached to the camera's hotshoe (i.e. "on-camera"), the light from the flash is usually limited to coming from one direction -- the same direction as the camera (i.e., "on-axis"). On-axis light is ineffective for revealing texture and form, and usually looks unnatural.
In order to use direction of light to reveal form, the light needs to come from an angle other than on-axis. We touched on this a bit in Lesson 6 when we bounced the flash from the wall. For maximum control over flash direction, we need to take the flash off-camera.
Example of subject lit with on-axis light:

ISO: 800
Exposure: 1/250 sec
Aperture: 2.8
Example of subject lit with off-camera light:

ISO: 800
Exposure: 1/250 sec
Aperture: 2.8
Using the flash off-camera has another significant advantage: it allows the use of larger flash modifiers, such as umbrellas and softboxes. Umbrellas require an umbrella bracket.
Example of subject lit with umbrella:

ISO: 800
Exposure: 1/250 sec
Aperture: 2.8
There are several ways to trigger the flash off-camera in TTL mode:
1. A TTL cord. Look for a TTL cord that is made specifically for your camera brand. One end attaches to your camera's hotshoe, and the other attaches to your flash.
2. All major manufacturers produce an external flash that can act as a commander for a second external flash (the "slave" flash). Canon and Nikon also produce dedicated flash commanders (ST-E2 and SU-800, respectively). All of these systems all use pulses of light to communicate with compatible slave flashes. Note however, each system differs in ability to adjust the slave and number of groups that can be controlled. At the time of this writing, Nikon and newer Olympus flashes allow remote FEC adjustment of up to 3 groups of slave flashes (as well as the ability to control them in manual mode). Canon and Sony flashes use ratios instead of FEC adjustment. Pentax does not yet allow remote adjustment.
3. Some camera bodies have a popup flash that can act as a wireless commander for a compatible external flash, allowing you to use a flash off-camera with just one external flash. This includes all middle- and high-end Nikon bodies with popup flashes (D70 and above), the Canon 7D, newer Olympus bodies (e-#20 and newer), certain Sony bodies, and certain Pentax bodies.
4. Radio TTL is available from a few third parties for certain camera brands. Pocket Wizard ControlTL is available for Canon (Nikon version TBA). Radiopopper PX is available for Canon and Nikon. Quantum Freexwire is available for Canon, Nikon and Olympus.
When the flash is off-camera, it can be positioned in any number of ways such as:
1. handheld;
2. on a flash bracket;
3. on a monopod or tripod;
4. on a flash stand;
5. on a light stand.
Exercise 1: On-Camera vs. Off-Camera
1. Find a subject with pronounced texture and form.
2. Take a baseline shot of the subject with the flash on-camera.

3. Take the flash off-camera, position it at least 45 degrees to the subject, on camera left or camera right. Take a shot and compare it to the baseline. Note the texture and form in each image.

TAKEAWAY: The direction of light can be used to reveal form and texture. On-axis light is the least effective direction for revealing form and texture
Lesson 8: Subject vs. Background; Key vs. Fill; Contrast

a photo with the background, highlight, and shadow independently controlled
In this lesson we learn to be more precise about flash exposure.
SUBJECT VS. BACKGROUND
When taking photos of people, you usually have both a subject and a background as important elements. In almost all cases, the background is lit by ambient, while the subject is lit by flash, or a combination of ambient and flash.
When ambient light is one of your light sources, it's generally a good idea to adjust for the ambient exposure first, then adjust the flash exposure as necessary.
Exercise 1: Background Brighter than Subject.
When the background is brighter than the subject, adding flash to illuminate the subject is relatively simple. In bright conditions, the challenge is for your flash to output sufficient light to match the ambient light. To reduce the ambient light level that your flash has to match, shoot at your camera's sync speed (the high shutter speed reduces the ambient exposure without reducing the flash exposure).
1. Find a location where the background is brighter than the subject (for example, the subject can be in shade).
2. For comparison, expose for the subject. Note the blown-out background.

ISO: 200
Exposure: 1/125 sec
Aperture: 6.3
3. For comparison, expose for the background. Note the underexposed subject.

ISO: 200
Exposure: 1/500 sec
Aperture: 6.3
4. This time we'll add flash. First, adjust for ambient light on the background. Usually, to keep the emphasis on the subject, the background should be underexposed relative to the subject (although this is not strictly necessary). To minimize the amount of flash power needed, set the shutter to sync speed. Adjust the ambient so that it's underexposed 0.3 to 1 stop. Take a test shot without flash and check the exposure of the background.

ISO: 200
Exposure: 1/1000 sec
Aperture: 6.3
(background 1 stop underexposed)
5. Add flash to illuminate the subject. If possible, use the flash off-camera. Start with an FEC of 0 (if you used exposure compensation to set the ambient, remember to zero out the FEC). Take a shot. If any of the highlights lack detail (i.e., are blown out), adjust the flash by decreasing FEC.

ISO: 200
Exposure: 1/1000 sec
Aperture: 6.3
Exercise 2: Background and Subject of Equal Brightness.
1. Find a location where the background and subject are of even brightness (ambient light falls evenly on both the background and the subject).
For comparison, all ambient:

ISO: 200
Exposure: 1/10 sec
Aperture: 2.8
2. Adjust for ambient light on the background. Unlike the previous situation, underexposing the ambient is practically a necessity to avoid overexposing the subject with flash. Adjust the ambient so that it's underexposed 1 stop. Take a test shot without flash and check the exposure of the background.
Ambient underexposed 1 stop:

ISO: 200
Exposure: 1/20 sec
Aperture: 2.8
3. Add flash to illuminate the subject. If possible, use the flash off-camera. Start with an FEC of 0 (if you used exposure compensation to set the ambient, remember to zero out the FEC). Take a shot. If any of the highlights lack detail (i.e., are blown out), adjust the flash by decreasing FEC.

ISO: 200
Exposure: 1/20 sec
Aperture: 2.8
SUBJECT: KEY VS. FILL
Let's leave the background aside for a moment and focus on the subject. The subject has a highlight and a shadow. The light that is the primary source of illumination for the subject is the key light. The light illuminating the shadow is called fill light. Typically, the function of fill light is to add enough light to the shadow so that shadow detail is visible. There are other functions for light (e.g. rim light, hair light) but key and fill are the most basic ones for portraiture.
When using flash in dim conditions, the key is almost always from the flash, while the fill is from ambient or a second flash. In bright conditions, the key can either be from ambient (in which case flash provides the fill), or it can be from the flash (in which case ambient or a second flash provides the fill).
Exercise 3: Using Flash as Key, Ambient as Fill
1. Find a location that is not brightly lit.
2. Adjust for ambient light on the subject. Because the ambient is acting as fill it should be intentionally underexposed. Try 1.3 to 1.7 stops underexposure. Take a test shot without flash. The subject should appear to be in shadow but detail should be visible. If detail is not visible, increase ambient exposure but keep the ambient underexposed.

ISO: 200
Exposure: 1/30 sec
Aperture: 2.8
3. Add flash as key. If possible, use the flash off-camera. Start with an FEC of 0 (if you used exposure compensation to set the ambient, remember to zero out the FEC). Take a shot. If any of the highlights lack detail (i.e., are blown out), adjust the flash by decreasing FEC.

ISO: 200
Exposure: 1/30 sec
Aperture: 2.8
Exercise 4: Using Ambient as Key, Flash as Fill
1. Find a location that is not brightly lit.
baseline (all ambient):

ISO: 200
Exposure: 1/10 sec
Aperture: 2.8
2. Adjust for ambient light on the subject. Because the ambient is acting as key it should be almost correctly exposed. Ambient should still be underexposed slightly so that when you add flash, the overall exposure will not be overexposed. Try 0.3 to 0.7 stops underexposure. Take a test shot without flash.

ISO: 200
Exposure: 1/13 sec
Aperture: 2.8
(0.3 stops underexposure)
3. Add flash as fill. When using the flash as fill, it need not be off-camera. Because the flash is the fill in this shot, the flash exposure should be underexposed. Start with an FEC of -1.3 to -1.7 (if you used exposure compensation to set the ambient, remember to zero out the FEC). Take a shot. If any of the shadows lack detail, adjust the flash by increasing FEC.

ISO: 200
Exposure: 1/13 sec
Aperture: 2.8
(pop-up flash used as fill at -1.7 FEC)
Compare: pop-up flash as key at 0 FEC:

ISO: 200
Exposure: 1/13 sec
Aperture: 2.8
Note: some flash systems automatically "know" whether the flash is acting as fill or as key, based on the ambient exposure. In these flash systems, there is sometimes little or no need to adjust FEC whether the flash is acting as key or as fill.
KEY VS. FILL VS. BACKGROUND
We can combine what we learned about balancing the subject and background exposure, as well as key vs. fill to balance all three: the key, fill, and background. It sounds tougher than it is. We do need another flash to do this, which can be the commander flash. In this 3-light setup (2 lights + ambient), the ambient generally illuminates the background, the main flash provides the key, and the commander flash commands the key as well as contributes fill.
The general procedure starts out the same as balancing the subject vs. the background. We just add one step (fill) to the process.
Exercise 5: Background Brighter than Subject (with Fill).
1. Find a location where the background is brighter than the subject (for example, the subject can be in shade).
2. Adjust for ambient light on the background. Usually, to keep the emphasis on the subject, the background should be underexposed relative to the subject. Adjust the ambient so that it's underexposed 0.3 to 1 stop. Take a test shot without flash and check the exposure of the background.

ISO: 200
Exposure: 1/250 sec
Aperture: 10.0
3. Add off-camera flash to illuminate the subject. Start with an FEC of 0 (if you used exposure compensation to set the ambient, remember to zero out the FEC). Take a shot. If any of the highlights lack detail (i.e., are blown out), adjust the flash by decreasing FEC.

ISO: 200
Exposure: 1/250 sec
Aperture: 10.0
4. Add fill light with the master flash. Because the master flash is providing fill light, it should be underexposed. Try an FEC of -2. Take a shot. If any of the highlights lack detail (i.e., are blown out), adjust the flash by decreasing the master flash's FEC.

ISO: 200
Exposure: 1/250 sec
Aperture: 10.0
(pop-up flash as fill @ -2 FEC. Note the clearer shadow detail)
Exercise 6: Background and Subject of Equal Brightness (with Fill).
1. Find a location where the background and subject are of even brightness (ambient light falls evenly on both the background and the subject).
2. Adjust for ambient light on the background. Unlike the previous situation, underexposing the ambient is a necessity to avoid overexposing the subject with flash. Adjust the ambient so that it's underexposed 1 stop or more. Take a test shot without flash and check the exposure of the background.

ISO: 200
Exposure: 1/15 sec
Aperture: 2.8
(ambient underexposed 1 stop)
3. Add off-camera flash to illuminate the subject. Start with an FEC of 0 (if you used exposure compensation to set the ambient, remember to zero out the FEC). Take a shot. If any of the highlights lack detail (i.e., are blown out), adjust the flash by decreasing FEC.

ISO: 200
Exposure: 1/15 sec
Aperture: 2.8
(key light added @ 0 FEC)
4. Add fill light with the master flash. Because the master flash is providing fill light, it should be underexposed. Try an FEC of -2. Take a shot. If any of the highlights lack detail (i.e., are blown out), adjust the flash by decreasing the master flash's FEC.

ISO: 200
Exposure: 1/15 sec
Aperture: 2.8
(fill light added @ -1.7 FEC)
CONTRAST
When using flash, one of the creative decisions you can make is to control the contrast between the highlight and the shadow.
Sample of high contrast shot:

Sample of low contrast shot:

Note that in low contrast images, the light can seem softer even though the actual quality of light (as evidenced by the sharpness of the shadows) has not changed.
In terms of lighting controls, the traditional way to control the contrast between highlight and shadow is to control the ratio of the key to the fill, starting with the fill then adding the key. The ratio is based on the intensity of the key as a multiplier of the fill, plus one (because the fill's light contribution also affects the key). If the key has the same intensity as the fill, the ratio would be 2:1 (the key is 1 +1 =2). If the key is 1 stop more than the fill (i.e. double), the ratio would be 3:1 (the key is 2 +1 =3). If the key is 1.5 stops more than the fill (i.e., triple), the ratio would be 4:1 (the key is 3 +1 =4).
For non-setup shots, it may be difficult to build contrast systematically. Fortunately, TTL allows quick control of contrast by adjusting fill.
Exercise 7: High contrast image
For this exercise, we'll create a high contrast image with virtually no fill light.
1. Select your camera's sync speed and choose an ISO and aperture that will underexpose the ambient by at least 2 stops.
2. Add flash as key, such that the highlight is correctly exposed (probably 0 FEC). If possible, use the flash off-camera. Note the strong contrast between the highlight and shadow.

ISO: 200
Exposure: 1/250 sec
Aperture: 2.8
Exercise 8: Low contrast image
For this exercise, we'll decrease the contrast in the previous high contrast image.
3. Readjust so that the ambient is underexposed by only 0.7 stops.
4. using the same flash angle as the previous exercise, add flash as key, such that the highlight is correctly exposed (probably 0 FEC). Note the lower contrast between the highlight and shadow.

ISO: 200
Exposure: 1/10 sec
Aperture: 2.8
TAKEAWAY: to decrease the contrast between highlight and shadow, increase the exposure of the fill light (i.e., increase ambient exposure if fill light is being supplied by ambient; increase FEC if fill light is from a second flash).
Lesson 9: Color; color temperature and gels

The color of light can affect not only the appearance and tone of the subject but also the emotion of the image. To do this lesson, you'll need gels for your flash. You can buy a set of gels from your camera store, or order one online. The Rosco Strobist gel set or swatch book is a good selection.
Exercise 1: tweaking the subject lighting.
Most people look better with slightly warmer light.
1. Take a baseline shot with flash.

2. Change the white balance to cloudy. Take another shot. Compare the skin tone with the baseline.

Exercise 2: color correction
When the ambient light is not neutral, it can differ significantly from the flash, making the flash use apparent. To remedy this, put a gel on the flash to match the ambient.
1. Find a location lit by warm incandescent lighting. For comparison:

ISO: 200
Exposure: 1/15 sec
Aperture: 2.8
2. Take a baseline shot with flash where the ambient is only slightly underexposed (try 0.3 to 0.7 stops). Note the difference in color between the flash and the ambient.

ISO: 200
Exposure: 1/15 sec
Aperture: 2.8
3. Attach a CTO gel on your flash.
4. Without altering the white balance, take a test shot. Note that flash and ambient now look similar, but the subject looks too warm.

ISO: 200
Exposure: 1/15 sec
Aperture: 2.8
5. Keeping the gel on the flash, change white balance to incandescent. Take a shot. Note that flash and ambient now look similar, and the subject does not look too warm.

ISO: 200
Exposure: 1/15 sec
Aperture: 2.8
Exercise 3: changing the background ambient color
You can use gels to change the color of background ambient. The background will be shifted to a color that is the opposite color of the gel on the flash. By opposite color, I mean the complementary color on the color wheel:
Red - Green
Orange - Blue
Yellow - Violet
1. Find a location that is NOT lit by incandescent light. Daylight is ok.
2. Take a baseline shot of a subject using flash where the ambient is only slightly underexposed (try 0.3 to 0.7 stops). Note the color of the ambient light and the subject.

ISO: 200
Exposure: 1/10 sec
Aperture: 2.8
3. Attach a CTO gel on your flash.
4. Keeping the gel on the flash, change white balance to incandescent. Take a shot. Note the blue shift in color of the ambient, while the subject looks neutral.

ISO: 200
Exposure: 1/10 sec
Aperture: 2.8
Lesson 10: Lighting depth of field

a photo with controlled lighting depth of field
In photography, we're accustomed to using depth of field to mean the range that's in focus. In lighting, depth of field means the range that has sufficient light. Lighting depth of field is an important concept to control lighting of backgrounds, and lighting of multiple subjects.
To understand lighting depth of field, we need to know about the inverse square law, which boils down to 2 aspects of light:
1. Light diminishes quickly. When you move away from light, you expect it to get weaker. What you may not expect is how quickly it diminishes. Let's say at 1 foot away from a light source, the amount of light is "X". If you were 2 feet away (i.e., twice as far) the amount of light is not 1/2 of X, but instead 1/4 of X. If you move 3 feet away (i.e., three times as far), the the amount of light is not 1/3 but instead 1/9 of X. If you move 4 feet away (i.e., four times as far), the the amount of light is not 1/4 but instead 1/16 of X. Etc. etc. To put it in non-mathematical terms, light gets weaker very quickly when you move away from it.
2. Exception: at far distances, light doesn't diminish as quickly. The second aspect of the inverse square law is that when you're far away from the light source, moving further away doesn't make as much of a difference. In the previous example, moving 1 foot was a big difference between 2 feet (1/4) and 3 feet (1/9). The light at 3 feet is only about 40% of the light at 2 feet. However, moving 1 foot from 20 feet to 21 feet isn't nearly as big of a difference: if you were at 20 feet, the light would be 1/400, while at 21 feet, the light would be 1/441 (which is 90% of the light at 20 feet).
Those two concepts comprise the inverse square law in non-technical terms. It can be further translated in lighting depth of field ("DOF") terms: a close light source has a shallow DOF. A far light source has a large DOF.
Exercise 1: Black Background
Want one of those portraits with black backgrounds? This exercise, which uses shallow lighting DOF, is for you!
1. Find a room with at least 10 feet of space or more (the longer the better), and which is dimly lit. A room with a darker wall is better and will require less space.

2. Take a baseline shot for comparison. Position the subject next to the wall. Position the flash as close to the subject as possible. Adjust flash exposure as necessary so that the subject is not overexposed. You can use an umbrella (aimed at the front of the subject) but don't bounce the flash (otherwise you may need a very large room to do this exercise). Take a shot. Note the amount of light on the background.

ISO: 200
Exposure: 1/250 sec
Aperture: 2.8
Exposure: 1/250 sec
Aperture: 2.8
(small reflective umbrella used)
3. Position the subject far from the wall. The wall has to be at least 3x as far from the flash as the subject (preferably 4x or more). If the flash is 2 feet away from the subject, the wall has to be at least 6 feet, and preferably 8 feet away or more from the flash. Position the flash as close to the subject as possible. Take a shot. Note the amount of light on the background.
ISO: 200
Exposure: 1/250 sec
Aperture: 2.8
Exposure: 1/250 sec
Aperture: 2.8
(small reflective umbrella used)
4. For comparison purposes, do the same shot as in #3, but this time bounce the flash. Note the amount of light on the background.
ISO: 200
Exposure: 1/250 sec
Aperture: 2.8
ISO: 200
Exposure: 1/250 sec
Aperture: 2.8
TAKEAWAY: A light source that is close to the subject has a shallow lighting DOF. Shallow lighting DOF can be used to create a difference in exposure between the subject and the background.
Exercise 2: Group Picture
This exercise uses large lighting DOF.
1. Find a room with at least 10 feet of space or more (the longer the better), and which is dimly lit.
2. Pick two or more objects (the more similar they are, the better). We'll pretend these are your subjects for a group picture. Place the objects about 3 feet apart to simulate the people who are at the edges of a small family picture.
3. Put the flash on either side of the camera, then take a shot. Note the difference in exposure between the subjects.

ISO: 200
Exposure: 1/250 sec
Aperture: 2.8
4. Move the flash far from the subjects, then take a shot. Note the difference in exposure between the subjects.

ISO: 200
Exposure: 1/250 sec
Aperture: 2.8
(Note: exposure was increased in post-processing)
5. For comparison purposes, do the same shot as in #4, but this time bounce the flash. Aim the flash to an area that is equidistant to the subjects.

ISO: 200
Exposure: 1/250 sec
Aperture: 2.8
(Note: exposure was increased in post-processing)
TAKEAWAY: A distant light source has a large lighting DOF. Large lighting DOF can be used to create even exposure between multiple subjects, or between the subject and the background.
Lesson 11: Bonus Lesson
You made it through lesson 10. There's good news and there's bad news. The good news is you've learned enough to have a good foundation of flash knowledge. The bad news is there's a pop quiz. Answers below.
Exercise 1: Dragging the shutter
The term "dragging the shutter" or "flash and burn" means using a slow enough shutter speed to allow the ambient light to register ("burn in"), as in this image, where the ambient light shows up in the background.

With TTL, is it necessary to use a slow shutter speed to allow enough ambient light in the image? If not, what other controls can be used to allow enough ambient light in the image?
Exercise 2: Troubleshooting
You're taking a photo of your friend at night with an external flash (off-camera in fact :) ) in TTL flash mode. The ambient looks ok but the flash on your subject is overexposed. You decrease FEC as much as you can but the flash still looks overexposed. Which of the following is the most likely cause?
a. the narrowest aperture on your lens is too wide
b. your shutter speed is too slow
c. your ISO is too high
d. your flash unit is too powerful.
e. TTL doesn't work in certain circumstances. Switch to manual flash.
f. This is too complicated. Let's just use ambient.
Exercise 3:
Suppose you have a subject and background that are evenly lit. You want the background to be underexposed 1 stop, and the subject to have a 2:1 key:fill ratio. What's the minimum number of flash units you would need and what settings would you choose?
Exercise 4:
Suppose you have a background lit by ambient, while the subject is shaded (assume 2 stops underexposure relative to the background). You want the background to be underexposed 1 stop, and the subject to have a 2:1 key:fill ratio. What's the minimum number of flash units you would need and what settings would you choose?
ANSWERS
Exercise 1: Dragging the shutter
Using a slow shutter speed to allow enough ambient light in the image works but it's not the only way to allow enough ambient light. You can also use a wider aperture or higher ISO. With TTL, choosing a wider aperture or higher ISO will not change the flash exposure (unless you go outside the minimum or maximum range of the flash).
Exercise 2: Troubleshooting
Let's analyze the possible answers one by one.
a. the narrowest aperture on your lens is too wide - although a wider aperture does allow more flash, this is not the answer for at least a couple of reasons. First, the camera usually doesn't adjust aperture to take into account the flash exposure. Rather, it's the other way around: the camera adjusts the flash output BASED ON aperture, ISO, and the preflash reflection to give the correct flash exposure. Second, I'm not aware of any lens with a minimum aperture that is too wide for a proper flash exposure.
b. your shutter speed is too slow - this is not the answer because shutter speed doesn't affect flash exposure.
c. your ISO is too high - this is a possible answer.
d. your flash unit is too powerful - technically this is a possible answer but it implies that nothing can be done to achieve a correct flash exposure, so this is an unlikely answer.
e. TTL doesn't work in certain circumstances. Switch to manual flash. - there are some situations that can fool TTL flash, but in any situation where manual flash can work, TTL flash exposure can be adjusted via FEC to achieve a correct flash exposure. In fact, sometimes, TTL has a wider working range -- the SB-800's manual mode only goes to 1/128 power whereas in TTL mode, it can output less power than 1/128 if the situation requires (within limits of course). So this isn't the answer either.
f. This is too complicated. Let's just use ambient. - you know I was just kidding, right?
The answer therefore is "c." Try decreasing the ISO while using a longer shutter speed (to maintain the ambient exposure).
Exercise 3:
This sounds more complicated than it is. The way I would do it is to set the ambient first. I'd adjust aperture, ISO, and shutter to get -1 stop underexposure. This would get that part of the requirement done. This would also result in the subject being underexposed 1 stop. The next thing I would do is add key light @ 0 FEC (zeroing out exposure comp if necessary). Now the highlight of the subject is correctly exposed. The shadow of the subject remains 1 stop underexposed. Well, that also implies that it's 1/2 of the highlight of the subject, so we have a 2:1 ratio right there. The answer is therefore: only 1 flash is needed. Settings: underexpose ambient 1 stop, add flash as key @ 0 FEC.
Exercise 4:
This is admittedly a bit more complicated than Exercise 3. Again I would set ambient first. I'd adjust aperture, ISO, and shutter to get -1 stop underexposure. This would get that part of the requirement done. This would also result in the subject being underexposed 3 stops. The next thing I would do is add key light @ 0 FEC (zeroing out exposure comp if necessary). Now the highlight of the subject is correctly exposed. The shadow of the subject remains 3 stops underexposed. To achieve a 2:1 key:fill ratio, I would need to make the shadow 1 stop underexposed. I can't use ambient to add to the fill or else the background would be affected. I will therefore need a fill light. The setting for the fill light is -1 FEC (i.e., 1 stop less than the highlight, which means 1/2 of the light of the highlight). The answer is therefore: 2 flashes are needed. Settings: underexpose ambient 1 stop, add flash as key @ 0 FEC, add a second flash as fill @ -1 FEC.
Congratulations! You're now done with the TTL Flash Tutorial. E-mail me for a diploma! just kidding. You may want to go back to the sample shots to figure out how they were executed. Feedback on this tutorial are welcome.
This is the best tutorial on the web. Period. Nothing even comes close to explaining this is such clear terms. The photos with each explanation makes it perfect. Many thanks,
ReplyDeleteSteve
Thanks Steve! I'm standing on the shoulders of giants.
ReplyDeleteBest regards,
Mic
thanks mic! awesome tutorial!
ReplyDeleteWow! This should be widely circulated. Thank you very much.
ReplyDeleteThanks! I hope people don't think yours is a paid endorsement. :)
ReplyDeleteExcellent, the best tutorial about flash. Thank you.
ReplyDeleteThanks Sergio!
ReplyDeleteBest regards,
Mic
Crystal clear lesson, I'll definitely give my flash another chance - and not just in a studio! More important, now I know a place to come back when I'll get puzzled again... Thank you for that!
ReplyDeleteTwo questions though, regarding off-camera flash drived by the built-in flash:
- If I use my built-in flash as master flash, I suppose I'll have to balance it against the external slave unit and the background (as in the ambient/fill/key example)? Or is it possible to use the commander to pre-flash only to communicate the body settings and only have the slave unit to actually cast light?
- If I want to balance built-in and external flash, as the FEC will affect both flashes, what are my best options? Using manual settings on the external flash? Reducing distance between external flash and subject?
Thanks goon. Good news:
ReplyDelete1. The popup flash can be set so that it only acts as a trigger. In the commander menu of your camera, change the popup from TTL to "--" which means inactive. The popup will still flash but will only use minimal power to avoid affecting the exposure. You can also get a Nikon SG-3IR which is pretty cheap but useful accessory to block the light from the flash while still allowing it to be used as a commander.
2. If you do want to use both the popup and a CLS slave, you can control their flash exposure independently. This is also done through the camera's commander menu. In fact, you can independently change the mode (TTL or manual) not just the flash exposure of the popup and the slave.
I've been assuming that you have a Nikon. If you have a Canon or Olympus I believe the answer is the same but I don't know the specific instructions for doing that. If you have a Canon let me know and perhaps my coauthor mshafik can answer your question.
Best regards,
Mic
I have a Sony A700... I've run through the operating instructions booklet but couldn't fine any mention to popup flash deactivation or to the modification of its exposure independantly from the external unit. And sadly, I can't use the SG-3IR because of the non ISO hot shoe.
ReplyDeleteAny help from a Sony strobist welcome... :)
Hi goon. Sorry I dont know much about Sony's wireless flash system. You can block the popup's light with an infrared filter. You can make one by exposing negative film to light then having it developed. I recall reading instructions somewhere on the net and i made one a long time ago for my p&s. I hope that works!
ReplyDeleteYou can also try using a ttl cord instead.
Best regards,
Mic
Thanks a lot Mic, I'll give it a try!
ReplyDeleteBest. Guide. Ever. More people should be informed of this site.
ReplyDeleteIsn't that so? I felt exactly the same way when I first discovered this blog, glad you benefited from the guide.
ReplyDeleteOn behalf of Mic, I authorize you to spread the word by all means. :-)
The Best tutorial... Serious appreciation, Mic. Just the way i wanted to learn.
ReplyDelete~A
Thanks! I appreciate your taking the time to give feedback. It helps motivate me and my coauthor to work on the blog.
DeleteBest regards,
Mic
This is infinitely better than much of the information for which others expect handsome payment. I wish I had found this earlier. I will share your URL widely. Thank you SO much for an unbelievably thorough yet concise and easily understood tutorial.
ReplyDeleteThanks Bev! Much appreciated. This tutorial in particular was inspired by other great learning resources such as Strobist.com's Lighting 101 (for manual flash).
DeleteI have tried to get the word out about this tutorial but I haven't been able to do it very well. I don't have a marketing budget. This blog is just a service by me and my friend mshafik. Any help would be much appreciated.
Best regards,
Mic
Oh, I almost forgot to acknowledge another important resource - Neil van Niekerk's Flash Tutorial http://neilvn.com/tangents/flash-photography-techniques/ That was where I first learned to use TTL and bouncing the flash properly.
DeleteBest regards,
Mic