Yes everyone. This is a real post, around 2 years after my previous one. The reason for this post is that I wanted to share with you guys that, finally, after years of searching, I've found the perfect camera for family photos.
It's actually not one specific camera model but a type of camera. Rather than explain to you what the camera is, or why it's the perfect personal camera, I'm just going to share with you a video I made:
What do you think about it? Do you agree it is the perfect personal camera? Let me know in the comments! For more info about the Samsung Gear 360 2017, check out this post.
Showing posts with label family photos. Show all posts
Showing posts with label family photos. Show all posts
Saturday, July 7, 2018


Monday, January 17, 2011
It's not about you
 |
| "Snapshot" |
Family photos are by definition personal. For a viewer who doesn't know the author or subject of the photo, it can be hard to recreate the context that makes the moment special.
One way that a family photo can transcend that barrier is by offering the viewer something beyond the personal aspect of the photo. That was my objective in the shot above. The literal subject is the couple and I have no doubt that the particular moment here was a memory worth preserving for them. However, for anyone who doesn't know them, the moment doesn't hold the same significance.
Although the couple is the literal subject of the photo, they are merely supporting actors for the intended main subjects of the photo - the landscape and the lighting - subjects that are accessible to almost any viewer.
I got the idea for this photo from some wedding photos made by Lito Sy ( http://www.litosy.com/ ), who has won several WPPI awards. The way I got the shot mirrored my intent. First, I composed the landscape shot. When I saw the couple, I tried to anticipate where they might be going. When they found a spot, I readjusted my composition, this time including them as an element, then took the shot.
Wednesday, May 26, 2010
Beware of Straws and Flowers (Basic)

I've ruined a number of shots by having a drinking straw or a flower seem to poke a subject's face or nose. It's fairly easy to avoid them when taking a shot of a single person but when there are several people in the shot, it's easy for me to miss the evil drinking straw or flower. These days I simply keep in mind as a rule of thumb that if there's a straw or flower anywhere nearby, I ought to be extra mindful of straws, flowers or other objects that may be eager to climb into nostrils!

Thursday, March 4, 2010
Family Photos that Stand Out
Recently, we were at the pediatrician for our child's appointment. At the waiting room, I was observing the many family pictures that patients had sent in. Out of the dozens of photos, there were a handful that stood out to me. What made them eye-catching in my view (no pun intended) was the lighting. The vast majority of the photos I saw were taken outdoors in daylight or sunset, and with fill flash. The decision to use flash seemed appropriate in many of those cases. For example, strong backlighting would have made faces too dark if flash had not been used. The problem for me was that the photos looked artificial because of the flash direction and to a lesser extent, flash intensity. The flash was often casting on-axis shadows that were very different from the shadows one expects from the apparent position of the sun. In other words, the flash came from either the pop-up flash or an on-camera flash, while the sunlight was coming from a direction other than from behind the camera. The flash was also often a bit too strong and would have looked more natural if it were reduced slightly in intensity. In some cases, the effect of the flash was so jarring that I speculate the photos may have looked better if they had been based on a proper exposure for the subject's faces using ambient light only (no flash) and allowing the background to blow out. By contrast (no pun intended), the outstanding outdoor photos had lighting that seemed natural. The photographers either chose ambient light conditions that didn't require a flash, or they used a flash consistently with direction of the ambient light. To my recollection all were off-camera lights, and many used short lighting. The takeaway here is that if you want family photos that are noticeably better than most in this age of digital cameras, proper lighting is key (ok pun intended). If you're new to lighting, please check out the TTL FAQ in this blog to get you started. |
Tuesday, March 2, 2010
Snow Day
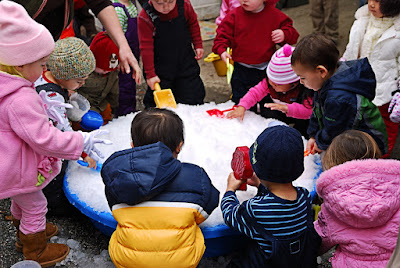
Recently, our toddler's pre-school held a "Snow Day." They brought in a snow making machine to make a bit of snow and a slide. It was fun to watch the kids' expressions as they played with the 'snow'. (My apologies to people in parts of the country that are freezing...) Although I brought a flash with me and was planning to use it to put a spotlight on our toddler (to separate him from the other toddlers), I decided not to use it because the ambient conditions were too good to improve upon. The snow was reflecting the light from the sky nicely and put a soft light on our toddler. If I had used the flash, it would likely have overpowered the soft light from the snow and looked artificial.  I was also expecting some metering problems, thinking that the snow would be rendered gray by the camera's automatic exposure (I was on aperture priority mode most of the time to try to isolate the intended subject -- our toddler). But the snow didn't fool the camera this time and was rendered white (except for shadowed areas), just short of blowing them out. At that exposure, the surrounding walls looked kind of gray, so I brightened them selectively during postprocessing to get a high-key look.  |
Monday, November 2, 2009
Taking Halloween Pictures - Part 2
Part 1 here.
For Halloween, we took our toddler to California Adventure. We had a great time. We plan to go back next year.
The pictures weren't perfect but I was satisfied with some of the portrait shots, and overall, the pictures were noticeably better than those from last year's Halloween, thanks largely to better understanding of TTL flash.
What went right / suggestions for nighttime shots:
1. Handheld umbrella.
I used a handheld umbrella to take some posed shots. I used the umbrella as key and I got the light I wanted for the subject.

For this shot, I took the exposure in manual mode. I set aperture at its widest at 2.8 because I wanted a shallow depth of field. I started out with max sync speed to minimize the ambient on the subject, so the subject was lit only by the soft directional light from the umbrella, then would increase ambient from there as necessary (by using a higher ISO or slower shutter) but I liked how the shot looked so I left it there.
2. Using ambient backlight.
There were spotlights throughout the park. I took advantage of these spotlights to use them as rim lights for drama (to the extent the subjects cooperated). To do so, I just positioned the subjects where the spotlights were behind and above them.

In one area, there was a cool-looking spotlight shining through a "fog." I positioned my wife to block the spotlight itself, allowing just the corona of light to shine around my wife and our toddler.

Inside the park, Disneyland's security objected to my use of the handheld umbrella, at first claiming that it was professional equipment, then next arguing that it was a sharp object. Not wanting to ruin the fun of the evening, I decided to put the handheld umbrella away and just used the bare SB-800 handheld, in wireless mode. Using the flash off-camera helped avoid the flat lighting from using an on-axis flash as key light.
There were also some shots where I lucked out on chimping the exposure and got a soft-looking light, I believe because ambient was just at the right level (probably 1 or 2 stops underexposed) to act as an extension of the key light. I plan to investigate this further to do it more consistently.

4. CTO gel.
Especially when there is mostly yellowish ambient light, the bluish light from the flash is a dead giveaway that artificial light was used. The 1/4 CTO gel that I taped to my flash helped the flash look much more natural.
5. Manual mode.
I've been using program, aperture priority and shutter priority but I tried out manual exposure based on Neil van Niekerk's suggestions. It wasn't as difficult as I expected, even with often-changing light conditions. I didn't do it the right way though. I chose exposure settings purely by guesstimating, looking at the picture taken, and adjusting accordingly. For such an unscientific way of taking manual exposure shots, the shots weren't as far off as one might expect. The benefit of using manual exposure was more consistent exposures. I plan to practice using manual mode in the hope of being more aware of (and in control of) my exposure.
What could be better:
1. Chimping.
As discussed above, I chimped the exposure just using the LCD screen. I was aware that there were better ways of setting exposure, such as spot metering the white portion of our kid's costume and setting that to +1 or +2 exposure comp, or using the blinking highlights screen, or using the histogram. But I caved under time pressure and just adjusted exposure based on instinct and a quick review of the shots. Next time, I have to discipline myself to use one of the more reliable methods (probably the histogram method).
2. Flash blur from excess ambient light:

I set the exposure for ambient light at levels that I guessed were appropriate. What I neglected to take into account sufficiently was to underexpose the background. I was too concerned with having the background lights show up to avoid the black hole look. The truth is, with digital SLRs, I find it far easier to use postprocessing to correct background underexposure than overexposure. Next time, I will err on the side of underexposing the background instead of risking overexposure.
3. Flash exposure.
The TTL-based flash exposure wasn't as smart as I thought. It tended to underexpose white areas. This wasn't very obvious just reviewing the shot on the LCD screen but could have been easily observed from reviewing the histogram. Something to force myself to do next time.

Monday, October 26, 2009
Introduction to Basic Lighting for Family Photographers
(version: 1)
Lighting is critical to producing a quality photograph of any genre, including family photos. This intro to lighting is intended not as a tutorial in itself but just to let you know the photographic possibilities from lighting.
1. What do you mean by "lighting"?
In photography, lighting is the artistic use of light and shadow in the photo.
2. Why is lighting important?
Here are some ways lighting affects your photo:
- Volume: A photo is flat. Proper lighting helps create the illusion of three-dimensionality.
- Emotion: the lighting in a photo by itself can have a powerful impact on the emotion or feel of the photo, even when other elements (such as composition and color) are unchanged.
- Beauty: some ways of lighting are more flattering for the subject than others. This applies not only to portraits but also to objects.
- Color: knowledge of proper lighting can help you to emphasize or deemphasize colors in the photo. For example, colors are generally more washed out in bright, direct sunlight.
- Composition: the patterns of light and shadow in a photo can themselves be elements of composition.
3. What are the basics I need to know about lighting?
For family photographers, you should at least know concepts about the characteristics of light (see #4), portrait lighting (see #5) and the overall lighting scheme of a photo (see #6).
4. Characteristics of light itself:
- Intensity - the brightness of the light source.
- Quality (hard vs. soft) - hard light casts high-contrast shadows with clear edges. Soft light is scattered and produces blurry or no shadows. Example: direct midday sun in summer without clouds produces hard light. An overcast day produces soft light. The larger the apparent size of the light source to the illuminated object, the softer the shadows will be.
- Direction - self-explanatory.
- Shape - is the light beam wide or narrow? Does it cast a pattern (for example, when you shine the light through the leaves of a plant or through a glass of water)?
- Color - the obvious examples are when gels or filters are used. But different sources of light also have different color temperatures. Extreme examples are candlelight (warm colored) or old fluorescent lights (greenish). Less obvious examples are shade (bluish) and flash (slightly bluish).
- Number of lights - actually increasing the number of lights or simulating such an increase (through time controls or reflectors or v-cards).
5. Portrait lighting
Portrait lighting is distinct from the lighting of other subjects (such as in product photography). Although family photographers on the run rarely have the opportunity to prepare the lighting setup for proper portrait lighting, family photographers can benefit from awareness of portrait lighting concepts to use more flattering light on subjects.
a. Light positions and functions in portraits.
- Key or Main - the light that produces the dominant highlight on the subject. The position of the key light varies depending on the lighting scheme (see #6 below). Note: in a few lighting schemes, there is more than one key light.
- Fill - illuminates some or all parts of the subject that are in shadow from the key light. Fill light may be omnidirectional, from the same direction as the camera (on-axis fill) or an extension of the key light (in which case it's about 90 degrees from the direction of the key light).
- Rim or kicker - a highlight on the contours of the subject generally used for subject-background separation. Rim light is generally behind the subject, and either above, to the side, or both.
- Background - light(s) illuminating the background.
- Hair - used to add a highlight on the subject's hair. Generally positioned above the subject.
- Catchlight - the pattern of light (if any) reflected in the subject's eyes. Not really a light position itself but something to be aware of in portrait lighting.
b. Basic portrait lighting schemes:
- Broad vs. short: when the subject's face is on a three-quarter view, broad lighting is where light illuminates the side of the face that is closer to the camera. Short lighting is where the light is illuminating the side further from the camera. If the subject's visible ear is on the illuminated side, it's broad. If not, it's short.
- Split: the subject is facing the camera and the key light comes from the side and illuminates only one side of the face.
- Loop: light comes from around 45 degrees from the subject's face. The nose casts a shadow pointing toward the corner of the mouth, in the shape of a loop. Can be broad or short. A fairly common portrait lighting scheme.
- Rembrandt: similar to loop, except the light is coming from a higher angle. The nose's shadow merges with the shadow below the cheekbone. There is a tell-tale upside down triangle highlight below the eye in the side of the face that is partially shaded.
- butterfly / paramount: subject is facing the camera. Light comes from above and in front of the subject. The resulting shadow of the nose is shaped like a butterfly.
6. The overall lighting scheme of the photo:
- Shadows and chiaroscuro: In lighting it's important to pay attention not just to the highlights but also the shadows. Chiaroscuro is the artistic technique of using highlights and shadows, often with strong ("dynamic") contrast, to create the illusion of three-dimensionality. Caravaggio's works exemplify chiaroscuro.
- High key vs. low key: high key photos use tones that are mostly brighter (think of those mac vs. pc ads) while low key photos are darker and have lots of shadows (as in the matrix trilogy).
- Specular - diffuse - shadow - transfer: in the real world, the highlight and shadow areas are not of even brightness and can be further differentiated. Specular highlight is the bright "shiny" part of the highlight. Diffuse is the rest of the highlight. Shadow is self-explanatory. Transfer is each area between each of the foregoing areas (specular-to-diffuse transfer, diffuse-to-shadow transfer). Check out the late Dean Collins' theory of 3d contrast.
- Motivation: the logic for the direction, intensity, quality and color of artificial light so as to appear as if the artifical light is natural. For example, if the sun is camera left (as evidenced by shadows in the background), adding light that comes from camera right will look unnatural. Here is a good explanation of motivation.
- Background vs. subject vs. foreground: the lighting of the background, subject, and foreground are often distinct and can be analyzed as separate elements of the photo's lighting scheme. Generally, to emphasize the subject, a common technique is to underexpose the background. Alternatively, the subject might be underexposed relative to the background for photos with strong backlighting (as in many of Rarindra Prakarsa's amazing photos).
- Light ratios: the difference in intensity between two areas of light in the photo (usually comparing the highlight and fill). If the highlight is 1 stop brighter (i.e., 2x brighter) than the fill and the fill light is omnidirectional and illuminates the entire subject, then the fill is 1 unit of light, while the highlight is 2 units of light (from the highlight) plus 1 unit of light (from the omnidirectional fill) for a total of 3 units, thus the ratio is 3:1. If the fill is not omnidirectional and illuminates only the shadow (this is less common), then the ratio is 2:1.
- Tonal range: the difference between the brightest tone and the darkest tone in the photo. Qualities to aim for (note: I'm still trying to figure this out): full range of black to white represented in the shot; a smooth transition between tones in the photo; a balanced distribution of tones that is neither dull ("A"-shaped histogram) nor contrasty ("U"-shaped histogram).
7. What can I do to control lighting?
- Observation: in my opinion the most important lighting technique is observation of existing light -- observing its characteristics, imagining ideas for using it, and determining whether and how to enhance it.
- Choice of time and place for the photo: you can increase the odds of having lighting conditions that match your intended lighting scheme by being mindful of the pattern of light at different times of the day, weather, and seasons.
- Positioning the subject: sometimes, you can control the position of the subject - in the shade, in the light, or somewhere in between, plus the direction they are facing, thus changing the direction of light relative to the subject.
- Choosing the shooting angle and direction: you might not be able to move the sun, but you can choose your shooting angle and direction to change the relative direction of sunlight.
- Light modifiers: all sorts of gadgets are used to alter the quality of existing light (e.g., a white bedsheet to act as a diffuser for sunlight) or artificial light (e.g., a portable softbox attached to a flash to soften its light). Check out diyphotography.net to get a glimpse of some creative modifiers.
- Flash: by giving you other sources of light besides existing ambient light, flashes can help you gain more control of the lighting in your photo. See TTL Flash FAQ.
- Exposure: exposure controls (shutter, aperture, ISO) can be used to alter the impact of the light on the photo. For example, a very fast shutter with shallow aperture and low ISO will virtually eliminate ambient light.
- Postprocessing: PP can be used to enhance, mitigate or simulate lighting. For example, dodging and burning techniques can make hard light look soft.
8. Where can I find additional resources on lighting?
- Strobist Lighting 101 and Lighting 102 - lighting concepts and techniques by professional news photographer David Hobby. David's shots often require set up (thus can't be as easily used by family photogs on the run) but the logic he uses is often applicable to on-location family photos as well.
- Neil van Niekerk's On-Camera Flash and planetneil.com Flash tutorial. Neil is a wedding photographer. His lighting techniques are often applicable to family photos.
- Bob Krist's Secrets of Lighting on Location. Shows how renowned photographer Bob Krist lit some of his on-location (as opposed to studio) shots. Many of the techniques and logic he uses are applicable to family photos. Although the book was written before the advent of digital cameras and modern flashes, digital technology has only made the techniques more usable and easier to apply.
- Allison Earnest's Sculpting with Light. A guide for portrait lighting.
- Light: Science and Magic. Lighting concepts. Much of the book deals with reflection and controlling how the light appears in the photo. Most lighting techniques are for product photography but some concepts can be applied to family photos.
- Dean Collins' videos (http://www.software-cinema.com/training). Dean was a master of lighting. Like Bob Krist's book, Dean's videos were produced before digital era. However, the concepts and ideas are still applicable.
- http://www.photoflexlightingschool.com/ - discusses a variety of lighting techniques.
- This blog. Search for the tag "lighting."
Saturday, October 24, 2009
Comments on first family's photo
Yahoo news reported that the first family's first official photo was released. Here's the photo, taken by Annie Leibovitz. Of course the photo looks good and I like the expressions on their beautiful faces, but from a purely technical point of view, I'm a bit surprised that the lighting looks so simple and frankly underwhelming to me. Maybe it's "deceptively simple" and too subtle for me. It seems possible to duplicate the lighting by simply bouncing the flash behind and camera right. Or by a large umbrella or softbox. From the catchlight on the original size photo, I'm guessing Annie used a softbox. I can't tell whether a fill light was used. Doesn't seem like it. I'm wondering whether Annie used a hair light, because the first lady's hair has a shine, but the shine could have come from the key.
From the background it looks like ambient was killed (intentionally I assume). Looking at the exif, I'm kinda puzzled too. It says:
If I were to take my own version of this shot, I would have allowed more ambient light, because I think the darkness in the rooms in the background seems unnatural and to me off-putting. Or with Annie's unlimited resources, I would have placed another flash in the rooms at the back to light them up. The light from the flash also looks a bit cold. Perhaps it needs a gel. I might have also placed a gold reflector in front of them and bounced a bit of flash into it to add even more sparkle and warmth to their eyes. In terms of composition, I think I would tried a very slightly lower height to decrease the negative space on top. I also think I would have picked a room with a less somber color (given the current economy). In terms of choice of equipment, I believe the leader of the free world and his family deserve a shot from a medium format camera (digital or otherwise) for posterity.
From the background it looks like ambient was killed (intentionally I assume). Looking at the exif, I'm kinda puzzled too. It says:
- Canon 1Ds MkIII
- f/8, 1/125, ISO 400, 0 EV.
If I were to take my own version of this shot, I would have allowed more ambient light, because I think the darkness in the rooms in the background seems unnatural and to me off-putting. Or with Annie's unlimited resources, I would have placed another flash in the rooms at the back to light them up. The light from the flash also looks a bit cold. Perhaps it needs a gel. I might have also placed a gold reflector in front of them and bounced a bit of flash into it to add even more sparkle and warmth to their eyes. In terms of composition, I think I would tried a very slightly lower height to decrease the negative space on top. I also think I would have picked a room with a less somber color (given the current economy). In terms of choice of equipment, I believe the leader of the free world and his family deserve a shot from a medium format camera (digital or otherwise) for posterity.
Thursday, October 22, 2009
Scan the Frame
Summary: I improved the composition of my shots by taking a moment to scan the frame.
The Issue:
Old habits die hard. When composing a shot, I usually frame the shot, move the focus point to the point of interest where I want to focus (usually the eyes), half-press the shutter then take the shot. Although I do think about the background and the rest of the picture, I tend to do so only while thinking of the shot, before I look through the viewfinder. The problem with that process is that I'm too focused on the point of interest and not sufficiently mindful about the rest of the picture when taking the shot. The result is that sometimes I inadvertently leave out important elements of the picture.
For example, this shot would have looked better with our toddler's hands visible in the frame.

Sometimes, I can crop to disguise the error. Other times, I can't, or I would have to crop very tightly.
The Solution:
Awareness of the problems created by my old habits led me to take a second to scan the frame just before taking the shot. It's not easy to resist the temptation to simply take the shot when our toddler is running around and suddenly has a great expression on his face. But taking a moment to scan the frame improved the composition of my shots and helped me to ensure that all important elements are there.


I'm also considering getting a wider-angle zoom like the Tamron 17-50 VC if I can find a way to fit it into our budget. :)
The Issue:
Old habits die hard. When composing a shot, I usually frame the shot, move the focus point to the point of interest where I want to focus (usually the eyes), half-press the shutter then take the shot. Although I do think about the background and the rest of the picture, I tend to do so only while thinking of the shot, before I look through the viewfinder. The problem with that process is that I'm too focused on the point of interest and not sufficiently mindful about the rest of the picture when taking the shot. The result is that sometimes I inadvertently leave out important elements of the picture.
For example, this shot would have looked better with our toddler's hands visible in the frame.
Sometimes, I can crop to disguise the error. Other times, I can't, or I would have to crop very tightly.
The Solution:
Awareness of the problems created by my old habits led me to take a second to scan the frame just before taking the shot. It's not easy to resist the temptation to simply take the shot when our toddler is running around and suddenly has a great expression on his face. But taking a moment to scan the frame improved the composition of my shots and helped me to ensure that all important elements are there.
Monday, October 12, 2009
Evolution of a family photographer
Although my photography skills still need a lot of improvement, I find it nice to look back once in a while to see some progress and chuckle at my naivete. As I look back, I also see how our baby has grown into a toddler in just a couple of very short years. I'm sure in the blink of an eye he'll be married and have his own kids.
I started out taking snapshots just like everyone else, without any knowledge of photography:

Like most people, I figured out that the deer-in-the-headlights look is not very flattering. So I turned off the flash:

Sometimes, though, the shots came out blurry:


Then one day, my bro (who had more experience in photography) asked me to buy a flash for him. First thing I thought was wow these flashes are really expensive for something so simple! Second thing I thought was, what's so useful about a flash? So my bro told me about how you can bounce the flash to the ceiling and get more natural looking light. I researched this some more and found Neil van Niekerk's planetneil.com blog. That convinced me to get an external flash with bounce and swivel, the Pentax AF540FGZ. By bouncing the light from walls (not just ceilings) I got shots like this:


I made all sorts of excuses to take off-camera flash shots with CLS, like this shot at a friend's party:


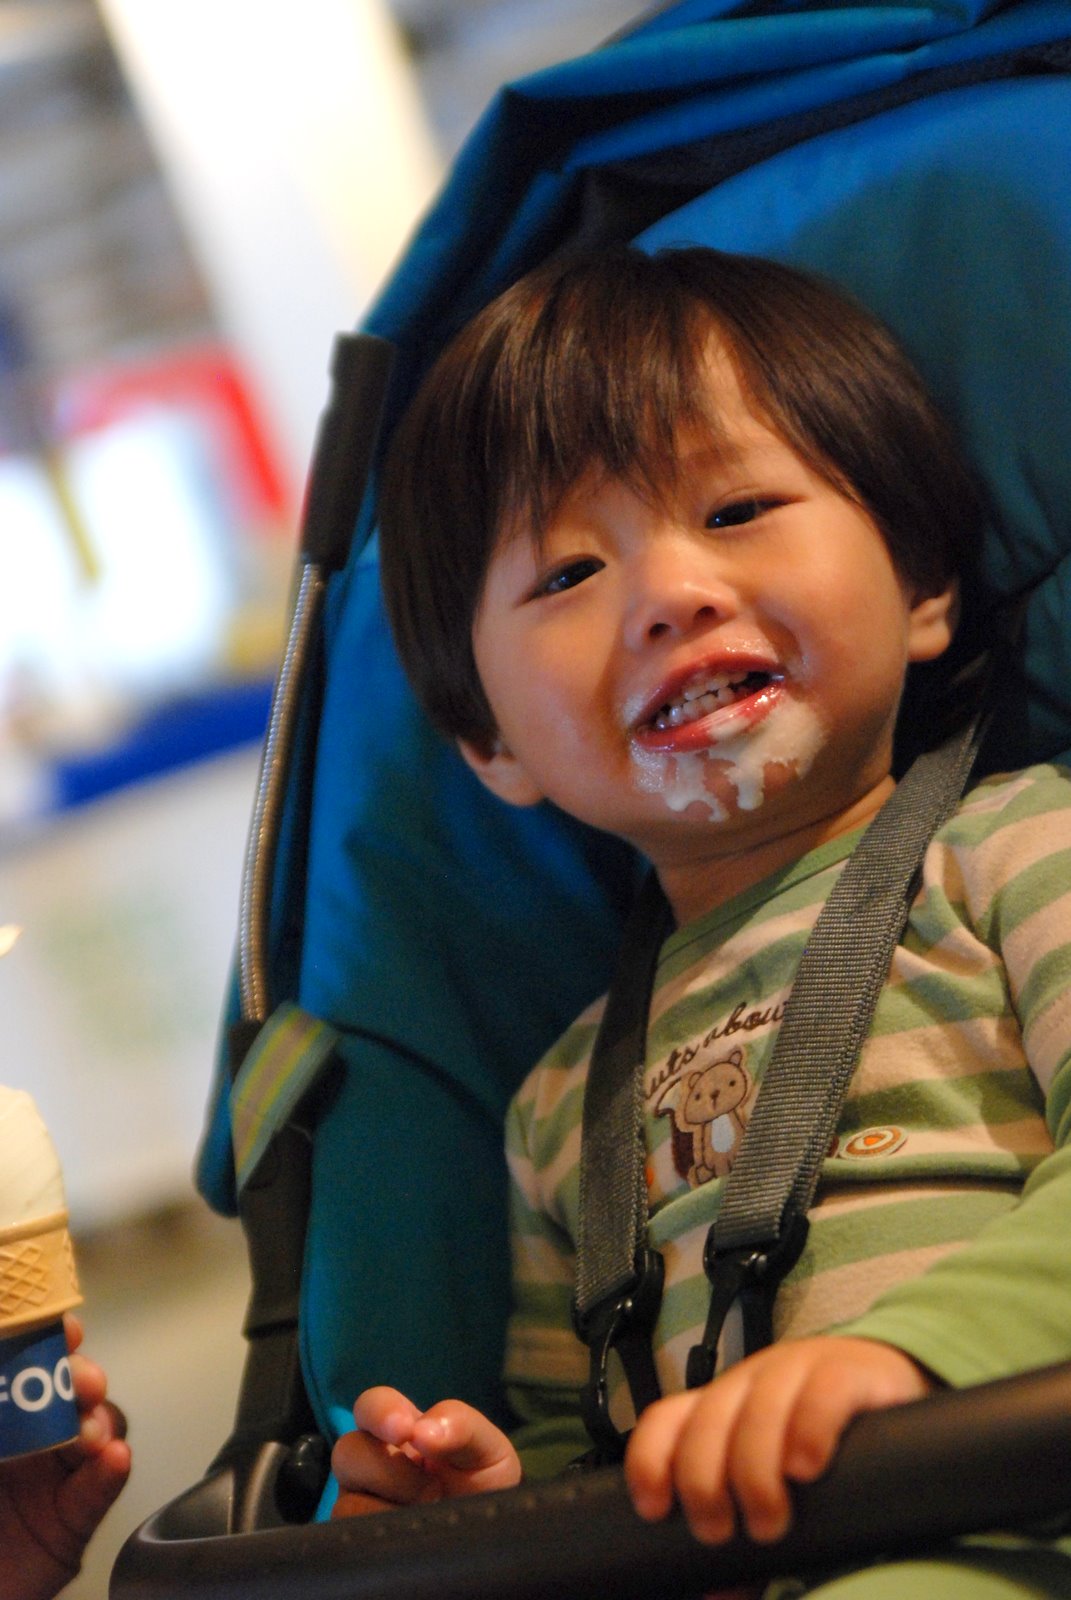
Then one of our friends had a birthday party for their daughter. Some of the shots were ok but some needed improvement. I was reminded of the limits of my photography skills. I also saw the need to do selective postprocessing adjustments, which I learned by playing around picnik.com.

To help keep me on my toes, I then created this blog and hence the roadmap. And that's where I've been ever since.

Subscribe to:
Posts (Atom)