
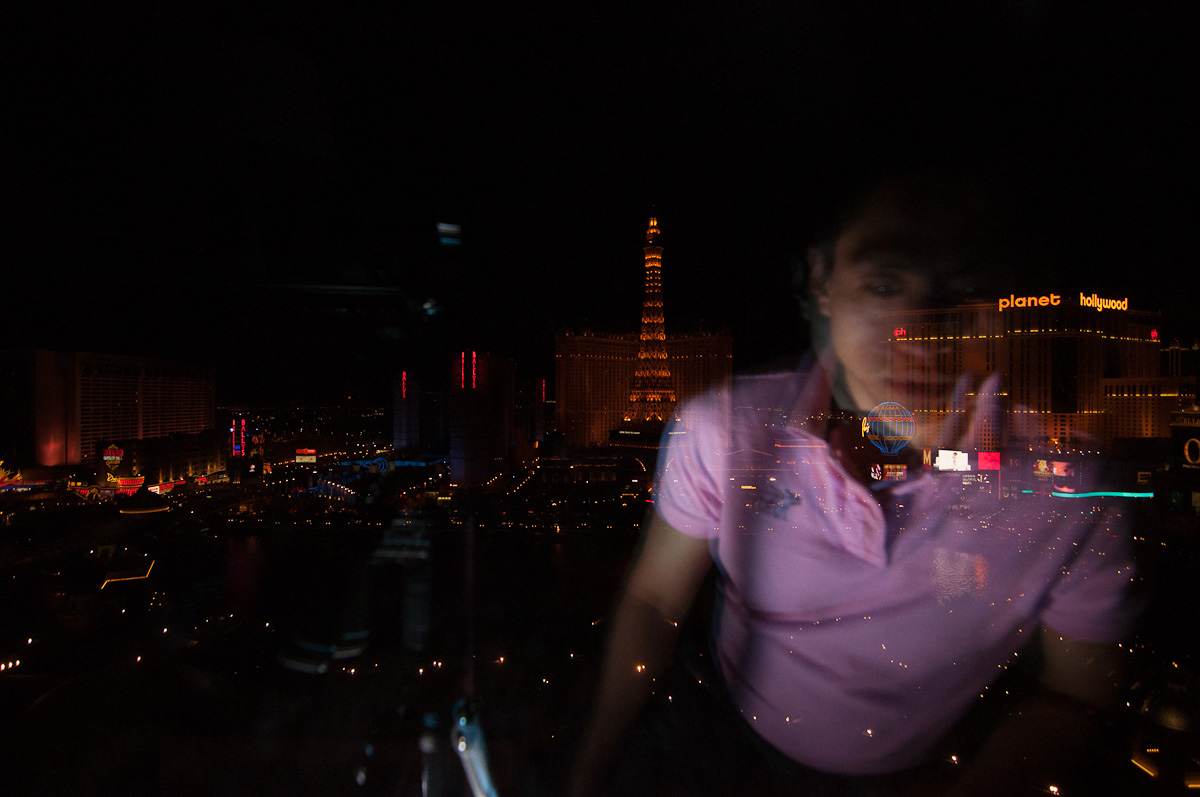
This was a self-portrait that I took on a recent trip to Las Vegas. It was much harder than I expected to get this shot but it was a useful exercise to practice lighting skills. In this post, I will discuss the steps I took to get the final result.
Step 1: Concept
I had taken a portrait with the Bellagio fountains before (blogged here) and this time I wanted to try something a little different.

Step 2: Composing the Shot
Here is what the window looked like:

I positioned the camera on a tripod and framed the shot of the fountain. For this shot, I used the Nikon D90 and Tokina 11-16 2.8. For low light, the D90 is way better than the S5 in terms of noise, plus I don't really need the S5's extreme dynamic range for this shot.
Step 3: Ambient exposure
Next, I set the exposure for the ambient light of the fountain. In this case, I set the shutter to a speed that was slow enough to capture some of the fountain's movement, but not so slow that the fountain would merely look like undefined mushy blur. I initially narrowed the aperture to f/5.6 to get both deep enough depth of field and better sharpness (usually, lenses are sharper when stopped down from wide open). At that aperture, ISO for the desired exposure would have been 800 - a little too high, in my opinion, for a setup shot. So I changed the aperture to f/4.0 and ISO to 400. That aperture might seem fairly wide for this kind of shot, but I was using a wide angle lens, so the depth of field would still be deep, and the Tokina 11-16 is sharp anyway at all apertures.
Step 4: Adding flash
I setup the flash below the window sill, to simulate the light coming from the fountain. The window sill would also block the reflection of the flash in the window. I wanted to soften the light but I couldn't use the full umbrella (the reflection of which would be so large that it couldn't be blocked by the low window sill), so I tried a partially collapsed umbrella.

Even collapsed, the umbrella was still showing up in the reflection. More importantly, it was spreading light everywhere, thus illuminating more of the furniture and floor around me, which were showing up as reflections.
I changed to a bare flash. I also had to readjust the flash intensity. I found that with bare flash, even 1/128 was too powerful, so I switched to TTL -3.0 FEC to minimize the flash intensity. (On some flashes such as the SB-800, TTL can decrease the flash intensity to a lower threshold than manual.)

The flash and umbrella were now gone from the reflection, but the floor, furniture, and tripod's reflection were still quite visible. The hard light of the flash from a low angle also created a horror-movie look.
To solve the horror-movie issue, I moved the flash off to the side. It would still look plausibly from the fountain's light. At the same time, since it was no longer directly under me, it looked less scary.

Step 5: Remove unwanted reflections.
I next wanted to work on minimizing unwanted reflections -- in this case, the furniture and tripod. Windows are similar to specular surfaces like mirrors and shiny metals. If you want a reflection to show up, light the object you want to be reflected (not the specular surface itself). Conversely, if you don't want a reflection to show up, the unwanted object should be in shadow.
Here, I wanted the light from the flash to hit only me. I didn't have a snoot or grid, so I just used a combination of the curtain and my camera bag to block the flash from illuminating the floor and furniture. I also turned down the desk lamp at the back. I also experimented with a higher shutter speed to reduce ambient to see whether any of the unwanted reflections were due to the room's light (as opposed to the flash).
The tripod's reflection was still showing up, so I did a little more experimentation on the flash's positioning and narrowing its beam so that it would illuminate only me.
Step 6: Taking the Shot
When I was satisfied with the reflections, I got ready for the shot. After some trial and error, I got a decent shot.

This one had some reflections in the upper part of the frame. The reflections were from the TV (my wife was still watching). Fortunately, because the reflections were in a relatively uncluttered area of the frame, I knew it would be easy to clone them out.
BTW in the final shot, I also adjusted the exposure for ambient, changing to a faster shutter speed (1/6) to get more definition from the fountain. I increased the ISO to 640 to compensate.
Step 7: Post-processing.
In Lightroom, I did the usual adjustments to the tone curve and such. I also brightened my reflection and warmed it up to make it look more similar to the color temperature of the fountain light.

Finally, I took the image to Photoshop Elements to clone out the the reflections from the TV. Voila. Here is the final result again.
No comments:
Post a Comment
Thanks for your comment. It will be published as soon as we get a chance to review it, sorry for that, but we get lots of spam with malicious links.