Showing posts with label umbrella. Show all posts

Monday, January 28, 2013

Silver umbrellas made obsolete by new octagonal softboxes


I was looking for a silver umbrella, but found out they are pretty much obsolete. That's because of the Westcott Orb and similar octagonal softboxes on eBay, Amazon, and elsewhere.  In this post, I review the CowboyStudio version of this octagon softbox.  In a first for me, the review will be in video form.

The video will cover these topics:
- Why you might want one for your lighting gear.
- Comparison with other octagon softbox designs.
- Demonstration of how the octagon softbox is mounted with a regular umbrella adapter, a speedlight bracket, and an Alien Bee.
- Advantages of the octagon softbox.
- Disadvantage of the octagon softbox and how to remedy it.
- Demo of its usage.

Thursday, June 14, 2012

Abstract Fun


In one of the rare times I put effort and setup a light stand and an umbrella to shoot my girls, I decided to make use of this burst of energy and shoot some artificial flowers that we bought recently to decorate the house. It has an interesting shape and some glittery material applied. Click through to read on.

Monday, December 12, 2011

Lastolite Trifold Umbrella - World's Most Compact Umbrella


I almost always shoot on-location, which makes portability is a significant issue.  Gear that is portable saves time, effort and money to bring gear to the shoot.  Perhaps more importantly, with compact gear I can bring more equipment with me and have more options when I shoot.

When Lastolite released the Trifold Umbrella, I was intrigued.  It was advertised as 36 inches, large enough to qualify as a versatile medium-sized umbrella, and yet small enough to be used handheld (particularly with the Lastolite Brolly Grip).  It was also described as "ultra compact" when folded, which could mean that it would actually fit it in my backpack, making it unnecessary to bring any other bag.  It seemed the perfect complement to the Brolly Grip.  I went ahead and ordered it and was pleasantly surprised.

Wednesday, November 23, 2011

Lastolite Brolly Grip Review: Soft Directional Light Anywhere


This is a preliminary review of the Lastolite Brolly Grip.  This unique lighting accessory allows you or an assistant to hold an umbrella, making it possible to get soft, directional light almost anywhere, without setting up.

In this review, I wanted to focus on using it by myself, without an assistant or light stand.  I also wanted to have a lot of sample shots to show the real-world potential of the Brolly Grip.

Wednesday, October 27, 2010

Pumpkin Patch Day (Basic)


Sit with me, dad!
Originally uploaded by mic_ty
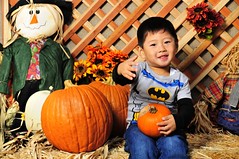
Our toddler had a pumpkin patch day at school. We had less than a minute to take a photo of him as kids took turns on this set.

The ambient light was not bad - it was open shade. I considered taking the photo with just ambient light but opted to use the 25" Creative Light shoot-through umbrella that I brought with me. I used an SB-800 on wireless TTL mode and covered the popup commander flash with an SG-3IR panel to avoid any harsh shadows from the popup flash.  I underexposed the ambient by a stop, and allowed TTL to expose normally.

As for the lens choice, I wanted to use the Sigma 50-150 but there wasn't much space in the small area for this shot, so I used the Tamron 17-50 VC.

Wednesday, September 15, 2010

The Last Umbrella You'll Ever Need?

Just saw this new 8-in-1 umbrella from Lastolite: http://www.lastolite.com/8in1umbrella.php

Functions as:
1. Shoot through - self-explanatory.
2. Shoot through with square mask - a top cover with a square-shaped hole can be put over the umbrella. Clever design. Presumably will have more control than a shoot-through but still not as much control as a softbox because of the shoot-through's convex surface.
3. Shoot through box - a reflective bottom layer can be attached to the shoot-through to make it function as a shoot-through umbrellabox / softbrella / brollybox. The light characteristics are about the same as shoot-through but with possibly higher efficiency and less spill on the opposite side.
4. Shoot through box with square mask.
5. White bounce (there's a top cover with white interior).
6. Silver bounce (there's a top cover with silver interior).
7. Umbrella box (bounce) with silver interior - Like #6 except there's a diffusion panel.
8. Umbrella box (bounce) with white interior - Like #5 except there's a diffusion panel.

The product is new enough that it's not yet showing up on my favorite retailers' websites. Hopefully the price is decent. Or else a Chinese-made clone will be inevitable. :))

Thursday, June 10, 2010

Creative Light Translucent (Shoot-Through) Umbrella - 25 inch

To improve the softening effect of the Propet handheld umbrella, I looked for a slightly larger umbrella.  I looked for a shoot-through because it can be placed closer to the subject.  With the increased size and the closer distance, the light would be much softer than the 19" reflective umbrella that came with the Propet bracket.  I also suspected that at my usual shooting distance, a shoot-through umbrella would probably be more efficient than a reflective umbrella (see test shots here).

I wanted to get the 60cm / 24 inch Gadget Infinity convertible umbrella for versatility but when shipping cost is added ($11), I found it just a bit too expensive for what it is.  Amazon offered the Creative Light shoot-through umbrella (25 inches) at a discount, so I got that one instead.  I'll put up a more rigorous review later.  For now here are my initial impressions:

Size
Folded length: 18 inches / 46 cm.
Diameter when opened (measured as a straight line from tip to tip): 24.5 inches / 62 cm.
Shaft diameter: 1/4 inch.  Fits the propet umbrella bracket very well (whew...!)

Build QualityCompared to my other umbrellas, build quality is fairly good.  The shaft is like the Propet umbrella, with a tapered and rounded tip, and will not crush easily (unlike the hollow steel shafts of some umbrellas, such as the Westcott convertible).  The tips of the ribs are rounded as well.  The ferrule is short and flat-tipped, which allows closer positioning to the subject.  The umbrella fabric is silk... Ha! Just testing if you're reading :) It's actually nylon.

When opened, the ribs stretch the fabric very tautly.  As a result, it was a slightly harder than my other umbrellas to open and when closed, it's a bit louder than usual (prompting my wife to think some device popped when she heard it).

Softness

As expected, the light appears to be much softer than the 19" reflective because it's larger and because it can be moved closer to the subject.


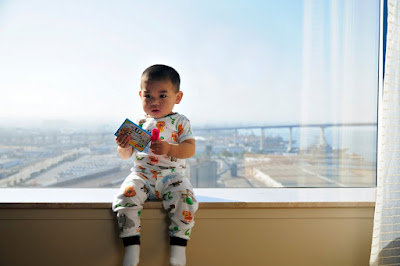
(third image edited to remove the reflection of the umbrella against the window)

I'll update this post when I test the efficiency and optimal flash zoom. I will also post comparison shots with the 19" reflective umbrella.

Tuesday, May 4, 2010

Ultimate Handheld Umbrella - Propet Umbrella Bracket

OK, I'm fessin up.  When I compiled a list of small umbrellas, I came across the unique Propet Umbrella Bracket on ebay.  After considering the advantages offered by its design, I went ahead and purchased it despite some reservations about the offered price.  That's why the link to that item shows that it wasn't available anymore :)  But as of the time of this writing, there's another unit being sold.

So I finally got the umbrella and did a few tests.  Although it isn't perfect, I think this is pretty close to the ideal handheld umbrella.


DESIGN
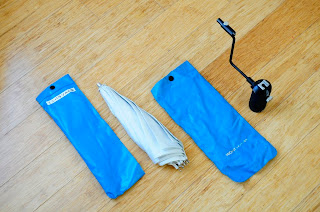


The Propet umbrella consists of a bracket ("Adapter G Type") and an umbrella ("Mini Parasol C Type").  It was manufactured by Propet Corporation (www.propet.co.jp), a Japanese company specializing in lighting products since 1977.

Bracket
The bracket consists of a short 1 inch tube to hold the umbrella which tube is attached to a grip at a fixed 90 degree angle via an L-shaped arm.  The bracket is made of a nonferrous metal (perhaps heavy duty aluminum?) and seems very durable without being too heavy. 

The tube for holding the umbrella is about 3/8 inch in diameter, has the usual screw to secure the umbrella, and fits standard umbrellas.  The tube is closed off on one end, therefore unlike typical umbrella brackets, you will have limited ability to adjust the umbrella's position within the holder.  The inability to adjust the umbrella position along the holder may make larger umbrellas too heavy to be handheld.

The grip has a grooved nonslip texture (like the grip of a handgun) and holds a removable tube with a cold shoe.

The cold shoe seems to be made of steel and has the standard ISO size that fits most hot shoe flashes (note: Sony/Minolta uses a different size hot shoe).  Because the cold shoe is made of steel, there may be a risk of shorting the flash.  However, the middle part of the cold shoe is empty to avoid contact with the pins on the flash hot shoe.  Some flashes have a locking pin to lock the flash into the hot shoe.  The cold shoe on this bracket does not have a hole to accomodate such a locking pin.  However, the SB-800 appears to stay fixed on the hot shoe when the locking pin is engaged.


The tube to which the cold shoe is attached can be adjusted in height so that the distance between the cold shoe and the height of the umbrella tube can vary from 1.75 inches to 3.5 inches.  At 3.5 inches, an SB-800's flash head will be almost squarely at the same height as the umbrella tube.  The bottom of the grip has a hole to mount it on a tripod (1/4" 20 threads per inch).  The bracket comes with a removable strap that is screwed on to the tripod mounting base, but my unit did not come with such a strap.

Umbrella


The umbrella is a reflective type, around 19.5 inches in diameter (measured as a chord from tip to tip on the underside of the umbrella).  When folded, the umbrella measures less than 12 inches long.  The umbrella is among the smallest I've found for photographic umbrellas.


The umbrella canopy material is not the typical nylon used in umbrellas.  Instead, the canopy is made of a woven synthetic fabric (I'm guessing polyester) and looks more like a parasol.  The top of the canopy appears white, while the bottom looks shiny.  Although the canopy looks more well made than a typical nylon umbrella canopy, it also looks like it can be damaged more easily, and sharp objects may snag instead of sliding off it.

The umbrella tips are rounded as is the umbrella tube, which I thought is a nice touch. I'm in favor of anything that can reduce the chance of scratching my lens, my camera or my kid.

PERFORMANCE
Effectiveness at Softening Light
I was concerned about the umbrella's ability to soften light due to its small size.  I found however, that the umbrella is far more effective at softening light compared to many flash modifiers I've tried.  Here's a test shot. Although I held the umbrella as far away from me as I could, the shadows (especially those on the wall) are still very soft

Flash zoom
I tried to determine the optimal zoom for the flash to cover as much of the umbrella as possible without spilling light unnecessarily into the background. I found that 105mm covers just as much of the umbrella as 24mm.  In the shots below, flash was set manually at 1/128.


Efficiency
Compared to a bare flash, the light loss is approximately 3 stops.  With an SB-800 at full power and a distance of around 7 feet from the subject, it is possible to get enough light at ISO 200 at f/5.6 (there was slight reduction of power because I forgot to remove the 1/4 CTO gel from my flash).

My testing method was to fire the bare flash at full power at 200 ISO and at 1/250 sync speed, then find the aperture that will result in the histogram maxing out without lost highlights.  I got f/16.  From the same distance as the bare flash, I fired the flash at full power with the umbrella, also at 200 ISO and 1/250 sync and tested various apertures to get the same peak as the bare flash histogram.  I got f/5.6, a difference of 3 stops from f/16.  Note: I did not move the umbrella closer than with the bare flash because I reasoned that for handheld use, the flash would be held at the same position.


SUMMARY
Strengths:
  • Much more effective at softening light than most other speedlight modifiers.
  • Aims flash head at umbrella's center for greater efficiency
  • Tripod mounting hole allows bracket to be mounted on tripod or light stand.
  • Design does not restrict flash head rotation.  Flash head can be rotated to allow concurrent use without the umbrella (e.g. for bouncing).
  • Very compact umbrella size yet still effective at softening light.
  • High quality construction and materials.
Weaknesses:
  • Hard to find.  Even the manufacturer's own website doesn't seem to list this item.  Possibly discontinued.
  • Umbrella canopy material looks like it can be damaged much more easily than nylon.
  • When umbrella is fully inserted, the umbrella cannot be closed fully.  Umbrella's runner should have been shorter, or the tube could have been slightly longer.  Workaround: I don't insert the umbrella fully, allowing me to close the umbrella with the bracket attached.
Neutral:
  • Removable cold shoe creates potential for modular components. However, no such components appear to be available anywhere.
  • Adjustable cold shoe height can accommodate flashes of varying sizes but lowest cold shoe height may still be too high for tall flashes or flashes that are mounted on accessories such as TTL cord or radio trigger.
  • Cold shoe has space to avoid contact with pins on flash but cold shoe material is conductive (might short the flash). Workaround: put tape on the cold shoe.
  • Locking pin on flash seems to work but is not secure because there is no hole for the locking pin. Workaround: attach a strap to the flash just in case the flash falls off.
Conclusion:
This is one sweet modifier.  It gives you the ability to have soft, directional lighting anywhere in a very compact package. It doesn't have glaring weaknesses, except maybe I won't have any excuses any more for not consistently producing decent shots. :)

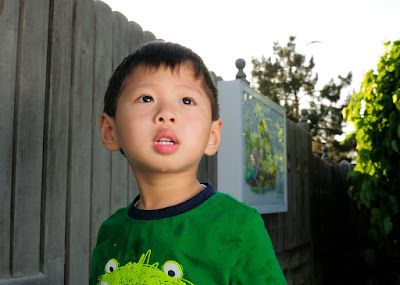
Test shot taken outdoors, daytime, in open shade. D300 + Tamron 17-50 VC, manual exposure with matrix metering, 1/250, f/9, ISO 200, ambient underexposed 2 stops; SB-800 w/ umbrella triggered via CLS in TTL -0.3 FEC. popup flash covered with SG-3IR. Post processing via picnik.com: straightened and cropped slightly, reduced exposure slightly with a curves adjustment, removed hot spots on my (oily) face with the shine-be-gone tool, added vignette. Note: the shadow on the lower left part of the image is my shadow from the umbrella (not postprocessing).

Want to buy one but can't find one available? Or you don't want to buy one just yet?  Perhaps you can try this handheld umbrella from parts that you probably already have.

Update: "real world" sample shot here.

6/10 UPDATE: posted sample shots of the Propet bracket used with a 25" shoot-through here


Saturday, April 17, 2010

Handheld Reflective Softbrella vs. Handheld Convertible Umbrella

For my handheld umbrella, I had been using a Westcott 43" convertible umbrella (which can be used either as a shoot-through umbrella or a reflective umbrella).  To try to improve the efficiency of the umbrella (in terms of light output), I got a softbrella (aka umbrellabox, umbrellasoft, brollybox, softbox umbrella, umbrella softbox). Recently I decided to test the efficiency of the softbrella against my old convertible umbrella and was surprised with the results.


ABOUT SOFTBRELLAS

A softbrella is a hybrid between an umbrella and a softbox.  It is constructed like an umbrella, but it has a panel to cover the underside of the umbrella.  As with umbrellas, there are two main types of softbrellas: reflective and shoot-through.  In the reflective softbrella design, the underside of the umbrella is reflective and the panel covering it is designed for diffusion.  In the shoot-through softbrella design, the umbrella's top surface material is designed for diffusion, while the interior part of the underside panel is reflective and the exterior part of the panel is usually black.


In theory, a shoot-through softbrella offers greater efficiency than a shoot-through umbrella because at least some of the light that would otherwise be wasted on the non-shooting side of the umbrella is recovered by the underside panel and reflected back into the umbrella.  A shoot-through softbrella also would minimize the spill on the non-shooting side (which can affect the background lighting).  

On the other hand, a reflective softbrella should be less specular than a reflective umbrella, and would be more convenient to set up compared to a softbox.

SHOOT-THROUGH OR REFLECTIVE SOFTBRELLA? 
A shoot-through's advantage is that you can bring it much closer to the subject, which is important because of the inverse square law.  However, for handheld use, I chose a reflective softbrella because it makes the angle makes it possible to use it handheld for backlighting or rim lighting (on the other hand, rim lights and backlights usually use hard not soft light).


SOFTBRELLA EFFICIENCY VS. CONVERTIBLE UMBRELLA
Up to this point, I assumed that a softbrella was significantly more efficient than a convertible umbrella. I decided to test that assumption.

Testing protocol:
I tested the maximum light output from a handheld shoot-through umbrella vs. a handheld reflective softbrella.  I don't have a light meter, so take my results with a grain of salt.  Testing method: set flash at full manual power, zoom the flash at full (105mm), set camera to sync speed 1/250, ISO 100, then compare the apertures between the umbrella and softbrella that yield an exposure that is identical (as measured by the histogram).  I took the shots in raw format, and used ViewNX as the raw converter.  This is supposed to be a 'real world' test, so I wanted to factor in the shoot-through's 'real world' advantage of being able to be positioned closer to the subject, so in both cases I positioned the umbrella and softbrella as close to the subject as possible without obstructing the camera's view.  As previously discussed, this is an advantage for the shoot-through because of the inverse square law.
I tested at a portrait focal length of 50mm (75mm in 35mm terms) and a normal focal length of 35mm (52.5mm in 35mm terms), with the camera on a tripod, and I used an approximately infant-sized stuffed toy as a subject.

AT 50MM (75MM) PORTRAIT DISTANCE
At 50mm, I was shooting about 4 feet from the subject.  Judging from the highlights of each exposure, I found that a shoot-through umbrella was actually more efficient than a reflective softbrella.  Specifically, with the reflective softbrella, the highlights were at the edge of the histogram at an aperture of f/7.1.  With the shoot-through umbrella, the highlights were at the edge of the histogram at an aperture of f/9.  This implied that the shoot-through had a 2/3 stop advantage. 

Out of curiosity, I also tested the convertible umbrella in reflective mode.  In reflective mode (without the black cover), the highlights were almost at the edge of the histogram at an aperture of f/7.1 as well, which implied that it had almost the same efficiency as the reflective softbrella.

Here are the images (converted into JPEG):

softbrella at f/7.1

shoot-through at f/9

reflective umbrella at f/7.1

Note that the light pattern is more evenly spread with the reflective softbrella and reflective umbrella than with the shoot-through.

AT 35MM (52.5MM) 'NORMAL' DISTANCE

At 35mm, I was shooting at about 6 feet from the subject.  With the reflective softbrella, the highlights were almost at the edge of the histogram at an aperture of f/7.1 (note: I believe the aperture of the softbrella test shot is identical to that of the 50mm shot because the white wheels, which reflect light more efficiently, showed up in the wider shot).  With the shoot-through umbrella, the highlights were at the edge of the histogram at an aperture of f/8.  Therefore, even at a more typical shooting distance, the shoot-through was slightly more efficient than a reflective softbrella.  Here are the images:

Softbrella at f/7.1

Shoot-through at f/8

CONCLUSION:
For handheld use, a reflective softbrella does not appear to be more efficient than a convertible umbrella when taking into account the shoot-through's ability to be positioned closer to the subject.  Factoring in the additional conveniences of the convertible shoot-through (which is collapsible -- even with the umbrella swivel and flash attached, and also usable as a reflective umbrella), it appears that for use as a handheld umbrella, a convertible umbrella is superior to a reflective softbrella.  I didn't have an opportunity to test a shoot-through softbrella, which might be more efficient than a convertible umbrella.

Tuesday, April 13, 2010

In Hindsight: Soft Light on Shaded Subject with Bright Background

This is the first of a series of entries where I examine some of the older pictures I took and analyze what I would have done differently.  My goal is to allow readers to learn from my mistakes.
Issue: Lighting
Situation: bright background; subject is in the shade.  Our hotel had a nice view and I wanted to capture the scenic background while illuminating the subjects with soft light.
How I did it then:
f8.0, 1/100, +0.7ev, iso 400, bounce to ceiling (camera rear left)
I believe my concern was to get sufficient depth of field to capture the background, so I think I used aperture priority and selected an aperture of f/8.  I probably bumped up the EV because my test shot was too dark.  I tried to get soft light by bouncing the on-camera flash to the ceiling.  Bouncing the flash in turn required bumping up the ISO a bit to 400.
Result:

From a lighting perspective the problem with the image is that the subjects are very underexposed.  The aperture of f/8 seems ok for the situation because most of the shot is in focus.  However, the shutter speed of 1/100 is not optimal.  The ambient could have been made darker without decreasing the flash power by setting the shutter speed at the sync speed (1/160 for the Pentax K100D).  Adjusting the EV was also not optimal because it would increase the exposure from both ambient as well as the flash.  It would have been better to adjust the flash exposure compensation to increase the flash exposure without increasing the ambient exposure.
How I would do it today:
The main issue with this scenario is the strong contrast between the background and the shaded area of our hotel room.
1. Due to the very wide range of contrast, I would need the most dynamic range I can squeeze out from my camera.  I would do this by using RAW not jpeg.
2. In terms of exposure mode, I would probably choose shutter priority or manual mode in order to select the maximum sync speed. At the sync speed, the flash has the maximum relative power over ambient.
3. Knowing I need to squeeze the most from the flash, I would set the flash on manual at full power instead of using TTL.  To maximize the flash power further, I would zoom the flash as much as possible.
4. To get soft light, I would have used an umbrella or softbox, which is more efficient than bouncing off the ceiling.  If that was not available, then bouncing would be an acceptable alternative.
5. Between aperture and ISO, I would prioritize aperture in order to get a reasonable depth of field.  I would choose the smallest aperture available that would get a reasonable exposure of the background.  To further maximize depth of field, I would focus on the hyperfocal distance.
6. Having set the shutter speed and aperture, I would choose the lowest ISO where I can get a reasonable exposure.
7. If necessary I would bring up the lighting on the subjects in post processing.
With the process above, the lighting would have looked kind of like this:

ISO 100, 1/200, f/4.5, flash with shoot through umbrella, triggered via CLS.
Other solutions:
It's also possible to take this shot with two exposures: one where the background is properly exposed and there is no subject, and one where the subjects are in the picture, properly exposed, blowing out the background.  With the blown background, it's easy in postprocessing to replace the background with the correctly exposed background.

Monday, November 2, 2009

Taking Halloween Pictures - Part 2


Part 1 here.

For Halloween, we took our toddler to California Adventure.  We had a great time.  We plan to go back next year.
The pictures weren't perfect but I was satisfied with some of the portrait shots, and overall, the pictures were noticeably better than those from last year's Halloween, thanks largely to better understanding of TTL flash.

What went right / suggestions for nighttime shots:

1. Handheld umbrella.
I used a handheld umbrella to take some posed shots. I used the umbrella as key and I got the light I wanted for the subject.
For this shot, I took the exposure in manual mode.  I set aperture at its widest at 2.8 because I wanted a shallow depth of field.  I started out with max sync speed to minimize the ambient on the subject, so the subject was lit only by the soft directional light from the umbrella, then would increase ambient from there as necessary (by using a higher ISO or slower shutter) but I liked how the shot looked so I left it there.

2. Using ambient backlight.
There were spotlights throughout the park.  I took advantage of these spotlights to use them as rim lights for drama (to the extent the subjects cooperated).  To do so, I just positioned the subjects where the spotlights were behind and above them.
In one area, there was a cool-looking spotlight shining through a "fog."  I positioned my wife to block the spotlight itself, allowing just the corona of light to shine around my wife and our toddler.

3. Off-camera flash.
Inside the park, Disneyland's security objected to my use of the handheld umbrella, at first claiming that it was professional equipment, then next arguing that it was a sharp object.  Not wanting to ruin the fun of the evening, I decided to put the handheld umbrella away and just used the bare SB-800 handheld, in wireless mode.  Using the flash off-camera helped avoid the flat lighting from using an on-axis flash as key light.

There were also some shots where I lucked out on chimping the exposure and got a soft-looking light, I believe because ambient was just at the right level (probably 1 or 2 stops underexposed) to act as an extension of the key light. I plan to investigate this further to do it more consistently.
4. CTO gel.
Especially when there is mostly yellowish ambient light, the bluish light from the flash is a dead giveaway that artificial light was used.  The 1/4 CTO gel that I taped to my flash helped the flash look much more natural.

5. Manual mode.
I've been using program, aperture priority and shutter priority but I tried out manual exposure based on Neil van Niekerk's suggestions. It wasn't as difficult as I expected, even with often-changing light conditions. I didn't do it the right way though. I chose exposure settings purely by guesstimating, looking at the picture taken, and adjusting accordingly.  For such an unscientific way of taking manual exposure shots, the shots weren't as far off as one might expect.  The benefit of using manual exposure was more consistent exposures.  I plan to practice using manual mode in the hope of being more aware of (and in control of) my exposure.

What could be better:

1. Chimping.
As discussed above, I chimped the exposure just using the LCD screen.  I was aware that there were better ways of setting exposure, such as spot metering the white portion of our kid's costume and setting that to +1 or +2 exposure comp, or using the blinking highlights screen, or using the histogram.  But I caved under time pressure and just adjusted exposure based on instinct and a quick review of the shots.  Next time, I have to discipline myself to use one of the more reliable methods (probably the histogram method).

2. Flash blur from excess ambient light:
I set the exposure for ambient light at levels that I guessed were appropriate.  What I neglected to take into account sufficiently was to underexpose the background.  I was too concerned with having the background lights show up to avoid the black hole look.  The truth is, with digital SLRs, I find it far easier to use postprocessing to correct background underexposure than overexposure. Next time, I will err on the side of underexposing the background instead of risking overexposure.

3. Flash exposure.
The TTL-based flash exposure wasn't as smart as I thought. It tended to underexpose white areas.  This wasn't very obvious just reviewing the shot on the LCD screen but could have been easily observed from reviewing the histogram.  Something to force myself to do next time.

Sunday, October 11, 2009

Upping the ante by adding soft light to your rim light


So, you've skillfully positioned your subject to have the sun act as the rim light. That's a great way to put some drama in your shot. But there's no reason to stop there.  If you didn't use your flash for the rim light (or if you have an extra flash handy) you can use a handheld umbrella as directional fill to get a cross-lit effect.  The hard rim light (from the sun or a flash) plus the soft key light (in our case, from an umbrella) is a lighting scheme that emulates the look of a studio shot like this shot of a fireman by Joe McNally, and you can do it on the run without setting up.

In the shot above, I waited for our toddler to come into a spot where the sun was angled as rim light above and behind where I wanted to take the shot.  I had a handheld reflective umbrella-softbox (aka softbrella or umbrellabox) ready to be triggered via CLS. I shot in shutter-priority at the maximum sync speed (1/200 for the D80) to diminish the ambient and allow the light from the flash to become dominant as the key light. EXIF: f/2.8, 1/200, ISO 100.  Flash was on TTL at 0 FEC. The focus was not exact (it's a bit behind the eyes), which I tried to remedy in post processing by increasing sharpness, and increasing local contrast ("clarity" in photoshop).

In the shot below, the sun was above and behind the subject to the camera's left.  The handheld softbrella was camera right. For the exposure, I tried Neil van Niekerk's approach of using manual exposure mode, figuring that because I was underexposing the ambient anyway, then I didn't need to worry about getting exposure exactly right.  I chose 1/200 (max sync) and f/4.0 (where the lens has a higher MTF to get a sharper shot, and with a slightly greater depth of field to have more room for correct focusing).


At ISO 100, that was about 1 stop underexposed, which is fine because the flash was going to be the key light anyway.  Flash was on TTL at 0 FEC.  Although the ambient was underexposed by 1 stop, there was no need to adjust FEC.  If I had been on shutter priority, and had dialed in -1 exposure compensation, then I would have had to increase FEC by 1 stop to get the same flash exposure because with Nikon TTL, the exposure compensation setting affects the flash exposure as well.

Next time I have a similar opportunity, I would like to angle the umbrella so that its light is coming even more from the side, making the directionality of the light more apparent.

Monday, July 27, 2009

Birthday invitation part 2: the shot

So we got to the park and I had to rush to catch the last rays of sunset. I pulled out my lightstand, attached a convertible umbrella in shoot-through mode. I found a tree with some sunlit grass in the background and positioned the light stand near the tree and tried to cajole our son into running around the tree into the direction I wanted. But he was just running everywhere and wasn't anywhere near the position I was thinking of.

With time running out, we tried to improvise and just went for a less specific shot of him near the tree. Before taking the shot, I made sure I was in RAW mode to give me maximum latitude for postprocessing. I set ISO at 200 as an approximation of what I thought to be the appropriate ISO for the amount of light available. I set the metering mode to matrix, and set the exposure mode to Program because I was in a hurry. I wanted the umbrella to be the key and the ambient to the be the fill, so I
1. set exposure compensation to -1.3 stops
2. set flash exposure compensation to +1 stop.
With the Nikon flash system, the exposure comp affects the flash metering as well, so to keep the flash exposure normal, I would have had to add +1.3 stops. However, I intentionally underexposed by 1/3 of a stop to avoid blown highlights.

It would have also been possible to use the ambient as key and the flash as fill, but that combination would have made the background less saturated with color.

Straight out of the cam, the shot needed improvement.


With respect to composition, I was a bit surprised, because I usually make a conscious effort not to put the subject in the exact middle, but that's where his face was. Too bad - it would have been nicer to see his shoes... The colors were also off - not at all what the scene looked to my eyes. (Just a couple of minutes of postprocessing can fix that, as I discuss in my next entry.) But it was more or less ok.

With at least one "safe" shot in my pocket, I was free to experiment. We let our son play in the grass. With him running around, I all but abandoned the light stand. I was pleased with how some of the shots turned out after a little postprocessing.


I liked the light in this one, but shutter speed was way too slow, so the image came out blurry. Mental note to bump up ISO next time.

Saturday, July 11, 2009

H2U indoors

Part 1 of this series here.

When I want soft, directional light, I like to bounce light against walls behind me or to the side (I learned to bounce flash this way from www.planetneil.com). Usually the reflective surface of the walls is relatively large, producing soft light. Sometimes it's just not possible to bounce the flash this way, even indoors, for any number of reasons. The walls could be too far away, the walls could be too dark, or they have a strange color. Sometimes, bouncing off walls illuminates a larger area than I intend.

When bouncing from walls is not practical or desirable, I've gotten soft directional light from an H2U:


Nikon D80, Tamron 28-75, 1/200, f/2.8, ISO 400, exposure mode: shutter priority, metering mode: evaluative, flash: i-TTL. IIRC, exposure comp 0, flash exposure comp 0.

I was holding the h2u with my left hand approx. 45 degrees from the subject. I intended to use the h2u as key light, so I set shutter speed to sync speed, which maximizes the flash's ability to overpower the ambient. The flash was on i-TTL, triggered by CLS. Because this was on TTL, the way to increase the ratio of ambient to flash would have been to use a slower shutter speed, a higher ISO, or a larger aperture. Vice-versa to decrease ambient.

I also experimented with the h2u for quick setups without a light stand. In these examples, I
wanted to light from the side for a little drama. I just placed the umbrella roughly to side of the subject (not handheld anymore :) ). I liked the resulting effect of lighting from the side, but in retrospect I should have allowed more ambient light.


In the shots above, I also used the popup flash at -2 flash exposure compensation just to give a bit of lift to the shadows that would be caused by the light from the side.

Setup shots:

Sunday, July 5, 2009

Handheld umbrella - an excellent light modifier

I've tested what I think is a very useful light modifier - a handheld umbrella.  I'm not claiming to be the first to come up with the concept. Renowned photographer Bob Krist mentioned it in his blog in April 2009. Here's my preferred implementation of the handheld umbrella concept, which I'll call H2U for short (pardon the crappy pictures of the device):


I used the following components:
umbrella - Westcott double-fold 43" convertible umbrella  (got mine here)
umbrella swivel (got mine here)
Nikon AS-19 speedlight stand (the one that came with the SB-800)
and the flash (SB-800).

The umbrella swivel I have has two studs - one male and one female. I switched them from their normal positions to use the male stud on the tilting portion of the swivel. I connected the stud to the bottom of the AS-19, which has a tripod socket. Next I tilted the swivel to as close as 90 degrees as possible (note: the AS-19 is positioned sideways, with the Nikon logo facing away from the swivel handle). Finally I connected the SB-800 (with the head positioned to bounce vertically) to one of the cold shoes for an SB-R200. When all is done, the SB-800 is positioned very close to the axis of the umbrella, and I can use the non-tilting part of the swivel as a sort of handle. If I need to use the umbrella with a lightstand in a jiffy, I can do that via the female stud on the non-tilting portion (although the umbrella won't be tiltable).

The advantage of using an AS-19 is that it has a receptacle for the SB-800's locking pin, so I feel it's more secure. Without an AS-19, it's possible to use instead the cold shoe that came with the swivel (hopefully your swivel was supplied with one). The problem is that my cold shoe won't hold the SB-800 in place. If I had to do it this way, I would position the SB-800 with the back against the umbrella's handle to sort of prevent the flash from sliding off.

Advantages:
Larger light source (hence can produce softer light) than most portable modifiers (I'm talking about the various forms of plastic modifiers that can be attached to a flash.
Once the components are assembled, deploying the system is pretty fast - you just open the umbrella.
If a collapsible umbrella is used, it's reasonably portable when folded.
Cost - If you already have an umbrella, you probably also have a swivel and could assemble it without buying anything new.

Disadvantages:
  • Sometimes gets attention from onlookers.
  • Even when collapsed, it's bigger than a typical modifier.
  • Hard to use from camera right.

So how well does this modifier work? I tested it in one of the most demanding lighting situations - outdoors, midday sun in summer, no clouds. Here are the shots I got:

Example 1


Example 2


In both shots, I asked my wife to stand in a shade (to avoid having to overpower the very bright ambient). I held the H2U camera right as key light. I triggered the flash with CLS. I shot in RAW to give me as much leeway as possible. The shots aren't great but I think they prove the usefulness of the H2U. I think the end result is close enough to what I had in mind in terms of lighting (although I had to do quite a bit of postprocessing to try to save the background - and I am unskilled at postprocessing).

Ideally, if I had a flash with sufficient power (and/or a camera with a really high sync speed), I could have brought down the ambient exposure by 1 or 2 stops, then used sufficient flash power to light the subjects. Like this shot by Neil van Niekerk. I tried this but the shot came out underexposed. To be fair, I had the flash with the wide angle diffuser to cover the entire umbrella, and I was trying to use the reflective underside of the umbrella without putting the black cover (though I'm not sure how much the black cover would have helped). Maybe next time I'll try a more efficient non-convertible reflective umbrella and I'll zoom the flash head. It would also have been nice to put the subject at the edge of the shade to use the sun as rim light, but here I opted to prioritize the composition. And my wife was getting impatient. :)

You may have noticed the light is coming from the camera right. I held the H2U with my right hand while I took the shot holding the camera with my left hand, pressing the shutter with my ring finger. It's not so easy to do that and depending on your camera/lens combination, that might not be feasible. An alternative is to use a remote (holding the remote and H2U with your right hand, and holding the camera with your left).

I also tried the H2U indoors to simulate situations where bouncing is for some reason not possible such as really dark or really far/high walls and ceilings. I'll discuss how those shots turned out here.

Update 4/17/10: I recently tested a handheld convertible umbrella against a handheld softbrella for efficiency.  These are the results.
Update 4/25/10: here is a list of small umbrellas that are convenient for use as a handheld umbrella.

Update 5/4/10: I reviewed what may be the ideal handheld umbrella here.