 |
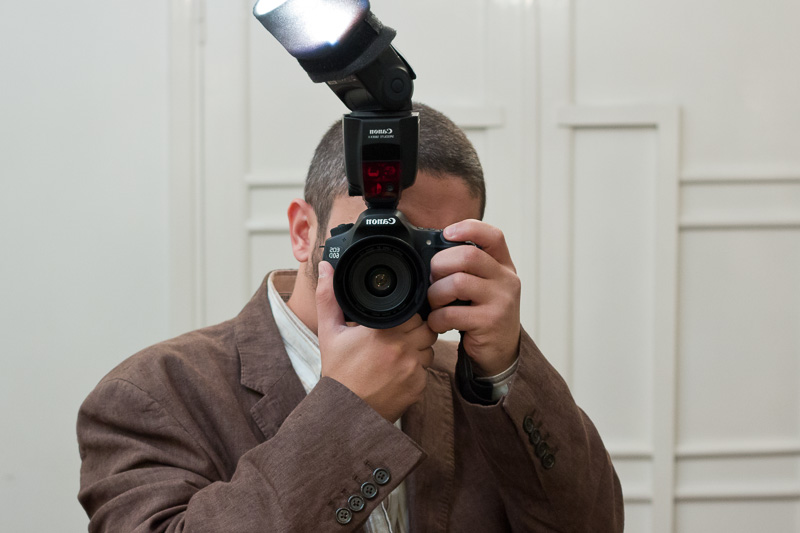
| Self Portrait - Canon 60D, 35mm f/2, 580EX II |
I never posted about my shooting or processing techniques, but according to our reader comments, this is a requested post, so here it is, this will be part 1, my own shooting technique, as a Canon user. Now that I think about it, it makes perfect sense to write about this topic, which is one of my favorite reading material, along with post processing and "what's in my camera bag?" posts.
Here's how this will go, in this first part, I will talk about the general camera settings I use, next, I will describe some different shooting scenarios (the most usual ones I face) with examples, and tell you how I handle them.
DISCLAIMER: I am not a professional photographer, i.e. I don't earn money from photography, not even this blog, I learn and buy photography equipment to take great photos of my growing up girls, and because I like it as a hobby. You could call me an advanced amateur/hobbyist.
GENERAL CAMERA SETTINGS
This will be described from a Canon DSLR point of view, Nikons or other brands for that matter, might have the same settings under different names, consult your user manual or ask in the comments and we'll do our best to answer.
These are my typical camera settings for 95% of the time, and the first things I setup when I get my hands on a new camera:
Back Button Focusing: check my detailed explanation here, but to make it short I don't want the camera to focus every time I press the shutter button. I usually use the middle (*) button for focusing, the AF-ON button is quite far away, and I set it for AE Lock instead.
Select AF Point Directly: because I don't focus and recompose, I change the AF point I am using all the time, I love to move the joystick (or press the 8-direction pad, for you 60D users) directly to change my AF point, without pressing any other buttons first. It is much more versatile this way, and a press in the middle chooses the center AF point directly.
Single Point AF: I don't focus and recompose ever, except in very rare shooting situations, with the shallow DoF of fast lenses and now full frame sensors, I never got pixel-level sharp results with focus and recompose. I always put one of the focus points on the near eye of my subject, and if required I crop the picture in post to get the desired composition. My 60D had 9 cross type AF points, so shooting like that was always accurate, the 5D Mark II however had crappy outer AF points, but I patiently used them anyway, and now with the 5D Mark III, I live in a 41 cross type AF points all over the frame, splendid!
AI Servo: this setting, in conjunction with back button focusing, is an excellent way to shoot kids. I select the required focus point, and hold the back button to focus, if my subject is stationary, it will act as one shot AF, maybe even more accurate, however if my subject is moving (which my kids always do), the focus point will track them, and that way I never change focus settings. The Mark III however seems to change all my focusing habits, I will report about that in my review, one thing I just discovered while writing this article, low light focusing, the 5D Mark III can focus down to -2 EV, so I tried to focus in very low light (ISO 6400, f/1.4, 1/15 sec) and it failed to focus although I could see through the finder, it just kept hunting, however I thought to try focusing using one shot AF and to my surprise it locked focus easily, weird, maybe I will be using AI Focus in the future (switches automatically between One Shot AF and AI Servo if the subject moves), we'll see how it turns out.
Hi-Speed Continuous Drive: since I am usually tracking moving subjects, I want the camera to be ready anytime for fast shooting, I don't understand the slow speed continuous drive, I can control that with my shutter finger. I don't want to miss a shot because I have to fiddle with some setting. Again, the 5D Mark III is changing my behavior, the silent mode is really silent, and I love being discrete, so I am using it at high speed, which in my case is 3 fps.
Evaluative Metering: I used to shoot center-weighted metering full time with my G11, 550D and 60D, I got the most consistent (not accurate) results that way, but it required lots of use of exposure compensation. However, I learned by chance that when using the evaluative metering on Canon DSLRs, it will give more metering weight to the selected AF point, I never knew that before, so when I tried it on the 5D Mark II, I found I could get more accurate results most of the time, and it certainly solved the always needed exposure compensation issue for me.
Aperture Priority Mode: I shoot in this mode 90% of the time, I select the suitable aperture for the required depth of field.
Manual ISO: rarely do I use Auto ISO, I select my own aperture, half press the shutter to see the resulting shutter speed, and adjust ISO as necessary, I use the lowest ISO possible most of the time. After a few years of shooting experience, I can now tell in certain lighting what will the shutter speed be based on a certain aperture and ISO.
RAW: I shoot RAW because I can tweak my white balance and carefully control the sharpness and details that I want, check this article for more details.
Auto White Balance: since I got the 60D, I have been an auto WB user, the camera nails it 90% of the time, it is really good except under tungsten lighting where I need my WB to be 2500k, and since I am shooting RAW anyway, I can tweak the WB in post.
Beep Off: I hate it, and it draws too much attention (event photographers, take note), if I'm using one shot AF, I can see the green dot in the viewfinder confirming focus.
LCD Image Review - Off: I don't like the camera to display every picture after I take it on the back LCD, and when shooting in the dark and the LCD turns on brightly, it dazzles your eyes. Some times I set it to 2 seconds when I want to have a quick look at the image or the histogram after I take the picture.
LCD Preview - Histogram: I don't judge the picture by how it looks on the back LCD, but rather use the histogram to determine if I'm correct or I need to adjust something.
LCD Preview - Blinkies: I also set the blinkies on, if you have blown out highlights they blink in the preview image, this way you can quickly determine if the blown out highlights are in an important part of the picture.
One Touch 100% Zoom: I didn't have this option before until I got the 5D Mark III, one press on the zoom button goes all the way to 100% magnification on the selected focus point so that I could judge the focus.
Custom Settings (C1, C2 & C3): I use one of these modes to store the following settings so that when I give my camera to someone else, they can get good pictures, I set the "focus on" to the shutter button, auto ISO, all AF points active, single shot drive, aperture priority and f/8. It works.
SHOOTING SCENARIOS
Before I delve into the examples, here's one more personal preference of mine, I shoot available light portraits 90% of the time, I find that carrying lighting equipment is a hassle, and I usually prefer to go out of the house with the camera and just one prime lens, The only zoom lens I currently have is the 24-105 L, and I only take it when I know I'll need a wide angle.
 |
| Available Light Portrait, 60D & 35mm f/2 |
Here's my first example, I used the upper middle focus point to focus on his right eye (left eye in the picture), and snapped away. I don't give any importance to the background blowing out in that case, as long as my subject is correctly exposed, let the background go to highlight hell, it's out of focus anyway.
 |
| Cute Girl, Canon 60D & 85 f/1.8 |
Another available light portrait, when shooting in direct sunlight, I try to keep my subjects standing in open shade, like this one, one thing to take care of, is to make sure the left part lit with the sun is not severely over-exposed, with experience, you'd be able to tell how much your camera will be able to recover. Focus was on one of her eyes.
 |
| Hair Spray, Canon 60D & 85 f/1.8 |
Here I did the same as above, but I knew I'd have to push the shadows open because of the high contrast, it works, I stopped down a bit for more depth of field, and chose a high ISO (400?) despite the strong light to get a high enough shutter speed to freeze the water droplets.
One thing I learned from shooting on a beach with the sea as a background, when shooting on aperture priority and evaluative metering, I usually increase the exposure compensation by 1.7 ~ 2 stops.
 |
| Happy Strawberry, Canon 5D Mark III & 100 Macro L |
Same as the first picture, focus on the near eye, and the evaluative metering did the rest, that macro has some nice bokeh.
 |
| Contemplation, Canon 60D & 85mm f/1.8 |
Same scenario, but lighting is from an open window, I love it's softness and gradual transition from highlights to shadows.
 |
| Bad metering, Canon 60D & 85mm f/1.8 |
 |
| Solved with a Canon flash in the Lumiquest SBIII |
Now we move to artificial lighting, as you can from the first picture, the camera's meter was fooled by the bright background, and our subject was living in shadows. In the second picture, I left my camera in aperture priority mode, and used my Canon 580EX (HSS active) with a Lumiquest SBIII to the camera left and fired away, the camera and the flash figured out the correct amount of light required using E-TTL. The speedlite was triggered by the camera's popup flash.
The picture doesn't quite scream "lighting", but rather a subtle effect, unlike the next one.
 |
| Obvious Lighting, Canon 60D & 35mm f/2 |
Here I wanted to express the lighting effect more, my friends did like it and their comment was "looks like it was shot in a studio", my camera was still on aperture priority mode with the same flash and Lumiquest softbox, but this time I dialed in a -1 exposure compensation, this, in Canon cameras, reduces the ambient exposure by one stop, and the flash did the rest of the lifting. What I really like here, is how soft the SBIII lighting is in relation to its small-ish size.
 |
| Old Man, Canon 60D & 35mm f/2 |
Now we move indoors, my favorite and most used technique is Neil VN's on-camera bounce flash technique, it is very simple, quick and effective. In these situations I use manual exposure mode, I set my desired aperture (for depth of field control) and shutter speed (less than or equal sync speed, depending on subject motion and ambient light level), then set any ISO and take a test shot without flash.
I usually try to keep the ambient 1 or 1.5 stops under exposed, this way it is still registering enough lighting, but not enough to decide the color temperature or the lighting position, then I turn on my flash on E-TTL and bounce it to the required direction (usually to my right or left, and behind my back), your new light source is the patch of light where your flash is hitting. set the white balance the same as the flash since this will be the dominant light in the final picture, if the flash power is not enough, I will increase the ISO or open the aperture a little.
If you look again at the picture, it is not that apparent I was using a flash, the secret is not to underexpose the ambient by much, and to bounce in an area reasonably far away from your subject, that it won't be totally obvious.
 |
| Would you imagine this was lit with flash? Canon 60D & 85mm f/1.8 |
Here I used the exact same technique, but underexposed the ambient very little, less than one stop, the flash is acting as a fill light.
 |
| Mr. Zizo, Canon 5D Mark II & 50mm f/1.4 |
Same as above, the flash was bounced from a far away ceiling. By keeping the ambient levels apparent, you make the picture more natural looking.
 |
| Smile! Canon 60D & 85mm f/1.8 |
The final bounce flash picture, same as above, but more obvious since the ambient was very low, and 80% of the lighting is bounce flash.
 |
| Jet Ski, Canon 5D Mark III & 200mm f/2.8 L |
This final picture has no flash, but what's different is that I used manual exposure mode, which makes perfect sense in this scenario, the jet skis were moving fast and in different positions regarding the sun, and I wanted to get consistent exposures, so I switched to manual mode, adjusted the settings so that I got my histogram barely touching the right side, and then I blasted away at 6 fps. :-)
Well, that marks the end of part one, in part two Michael will tell us about his own shooting technique from a Nikon user point of view. I hope you've enjoyed this post as much as I did writing it, and I'd love to see any questions, suggestions, requests in the comments. Shoot away.
BTW, what do you think of the new layout, with the airy theme, larger pictures (no need for clicking anymore) and all?
RELATED POSTS
Canon 60D Review
Canon 35mm f/2 Review
Canon 85mm f/1.8 Review
Canon Speedlites Review
TTL Flash Tutorial
RAW vs JPEG
Back Button Focusing
Excellent, very useful article! ! Can't wait the second part!
ReplyDeleteThat's nice to hear, Mic will do part 2, then I'll do the post processing article.
Delete