
OK, this post has a little something for beginners and intermediate shooters alike. :)
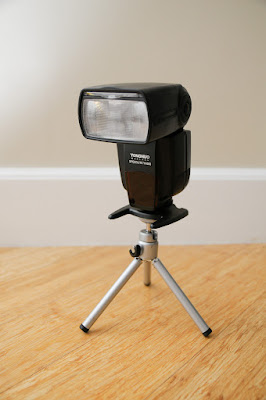
Tip: consider using a cheap mini-tripod with a ballhead like the one pictured above to position your off-camera flash. You won't get much difference in terms of height but what you do get is a little more flexibility in positioning the flash head, especially being able to tilt the flash downward more than 7 degrees.
That's it folks - enjoy your weekend... Just kidding. Hit the jump.
The shot above is pretty simple and I thought I'd be done in a minute and work on my taxes. Instead, it took me a little more than an hour to do, with about 50 test shots. I suppose experienced strobists might not even flex their photographic muscles in the slightest with that shot. But, you know, this is Better Family Photos: Techniques, Tools and Resources for Family and Candid Photography. I take mostly people photos and not a lot of product photos or setup shots.
Anyway, the first shot looked like this:
Then I thought the shadow side of the flash looked a little too flat. I thought it would look nicer if the corners on the side of the flash had a specular highlight, analogous to a rim light. From that point, things snowballed until I got the final shot which was pretty close to what I had envisioned:
- The flash has prominent highlights on the corners. I initially placed a flash on camera right which did produce highlights but they illuminated the side a bit too much, diminishing the impact of the highlight. Instead I got a reflector, then aimed it for maximum highlight. I blasted the reflector with an SB-600. I also put a 5 degree grid on the SB-600 to minimize spill on the background and on the flash itself. A bright continuous light source would have made things much easier.
- I wanted the flash to look like it was firing but I was concerned it would be too bright or would cause flare. Instead, to make the flash look like it fired, I aimed an SB-800 at the floor. The light would reflect back at the flash head and into the lens, making the flash head look like it fired. In addition, the light from the floor would look like light from the YN560.
- I was wearing a red shirt that was reflecting into the flash head. To disguise my reflection, and to create more contrast in the flash head, I draped a black cloth over me.

No comments:
Post a Comment
Thanks for your comment. It will be published as soon as we get a chance to review it, sorry for that, but we get lots of spam with malicious links.