
I was reasonably satisfied with our pumpkin and wanted to take shots of it when we got home. Originally, I took a simple shot with a snooted SB-800 firing through the hole on the top of the pumpkin to illuminate the interior. I didn't gel the SB-800 because I supposed the light would pick up the yellow color of the pumpkin interior. I shot at sync speed, base ISO and f/8 to get a reasonably back background. I also placed a reflector below the pumpkin to get some uplight. For my lens, I chose the Sigma 50-150 2.8 to isolate the subject.
I felt that the shot didn't do justice to our first pumpkin. I looked through Flickr's strobist group for pumpkin photos for inspiration and was humbled. I wanted to show some respect for my fellow photographers/strobists by doing a photo that was at least a bit more creative than my first attempt.
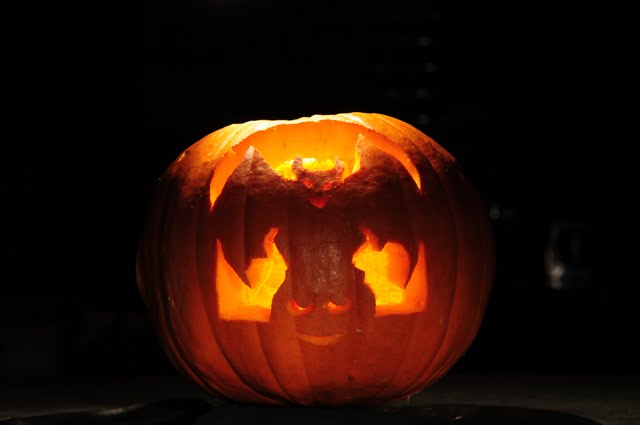
I thought it would be good to show the reversible design of the pumpkin. First, I placed an SB-800 in a ziplock bag and stuffed it inside the pumpkin. I then placed the pumpkin on a black table with a glass surface and took a test shot.

It looked like the idea had potential. I also liked the way the flash made the pumpkin glow. I cleared up the table and wiped it clean and took another test shot, this time using a YN-560 to experiment with a green gel as a spooky background light.

The background light looked ok but I thought it would be better to use it as rimlight instead. I placed it on camera left, and with the wall on camera right, the light would bounce back to create a rimlight on the opposite side as well. I also used a longer focal length to reduce the field of view to hide the wall on the right:

In postprocessing (with Corel PSP X3), I decided to use levels to make the shadows stronger for a more sinister look, which became the final result (after some cloning and spot healing to remove dust on the glass).
No comments:
Post a Comment
Thanks for your comment. It will be published as soon as we get a chance to review it, sorry for that, but we get lots of spam with malicious links.