
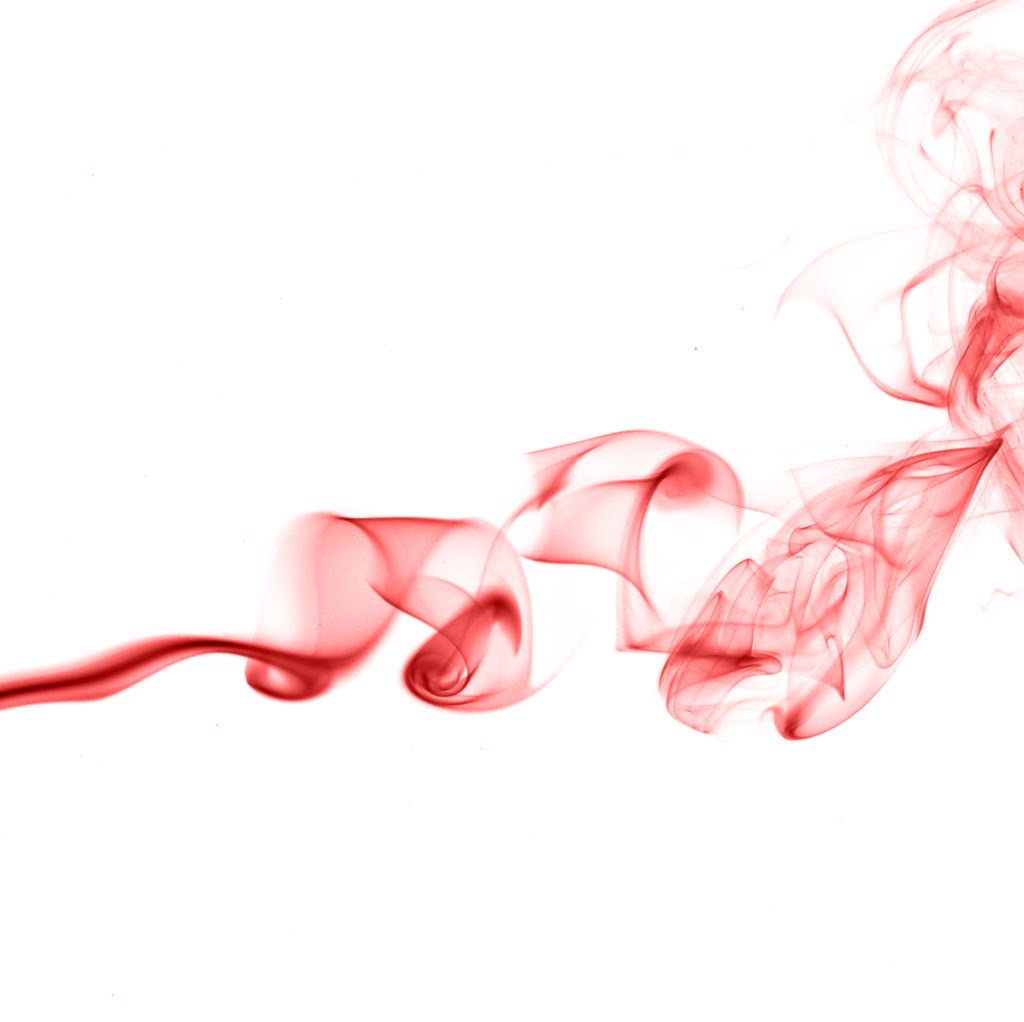
[What's this got to do with family photos per se? Nothing. It's just for lighting practice and for fun.]
Not too long ago, I put up a post re smoke photography. After thinking about it a while, I identified these as the most important factors for a technically good smoke photo:
1. sharpness - this is primarily from the smoke being in focus.
2. clean background - ideally the background is pure black (prior to postprocessing).
Of course there are other factors for a good smoke photo such as manipulating the smoke into an interesting form, but on a purely technical level, those are the most important ones. If you expected that your camera makes a difference, you'd be right. But you may be a bit surprised that arguably the best camera for the job, believe it or not, is a point and shoot camera.

SHARPNESS AND FOCUS
Smoke has low contrast and moves constantly, making it difficult to focus on it. Instead, focus is achieved by using a large depth of field. A p&s has a far deeper depth of field than a DSLR because of the p&s' small sensor, making it easy to keep much of the smoke in focus, and thus sharp. In the shots above, I used f/4 or thereabouts. On a DSLR, the depth of field with such an aperture is quite shallow when shooting as close as we do with smoke photography. If I had been using a lens with 35mm focal length (52.5mm equivalent in 35mm terms) at a distance of 3 feet, an aperture of f/4 would result in a depth of field of 0.35 feet (see the Depth of Field Calculator). Even at f/16, the depth of field would be 1.46 feet.
I used a dinosaur of a point and shoot - the Konica Minolta Dimage Z1 (my first digital camera!) from 2003. Its sensor is 1/2.7, even smaller than the common 1/2.5 sensor size on compact point and shoot cameras. With the Z1, at a focal length of 7.6mm (50mm equivalent in 35mm terms), also at a distance of 3 feet, an aperture of f/4 has a depth of field of 2.09 feet - deeper than the the depth of field of the hypothetical DSLR at f/16. If I had stopped down to f/8, the depth of field would have been 6.22 feet. So although the Z1 has a atrociously slow autofocus system, ironically, it is able to keep the somewhat challenging subject here in focus more easily than a D300 - simply because of its large depth of field.

CLEAN BACKGROUND
The second technical criterion is a clean background. That is accomplished partly by aiming the flash away from the background (if possible), but also by minimizing ambient light. In that regard, a point-and-shoot has no mechanical shutter, and thus is theoretically not subject to a sync speed limit. It is possible therefore to kill the ambient using a very high shutter speed without affecting flash exposure. In the shots here, I used the Z1's maximum shutter speed of 1/1000 with no problems.
As for the light, one can use a point and shoot's built-in flash (which is weak and therefore should have a fast flash duration, another plus). However, an external flash with an optical slave can be triggered by the built-in flash of the point-and-shoot camera. Here I used the YongNuo YN-560, which has a digital optical slave to ignore the TTL preflashes of the point-and-shoot camera. The YN-560 sync'd optically even at 1/1000 shutter speed.

WHAT ABOUT NOISE?
A point and shoot does have a noiser image than a DSLR, but many point and shoots have very low ISO modes that have acceptable noise in my opinion. The Z1 I used goes as low as 50 ISO. I have a Casio Exilim EX-V7 that goes to 64 ISO. By comparison, the D300 has a base ISO of 200 (100 is possible, but with a smaller dynamic range). Fortunately, with a flash, we can use a low ISO, which will also help kill the ambient light.
No comments:
Post a Comment
Thanks for your comment. It will be published as soon as we get a chance to review it, sorry for that, but we get lots of spam with malicious links.