I've read a lot about portrait techniques and I try to apply them when I can in taking our family photos. But it's not really the same as taking a 'proper' portrait, and I wanted to gain more experience doing portraits to better understand where and how lights should be positioned, and what light intensities to use.
Recently I did a high-key portrait with one flash. Tonight I wanted to try a simple two-light setup: one large light source as key plus a hard light source as rim light. First, I set the exposure to minimize ambient. With the YN-560 as an optical slave, my shutter speed was limited to around 1/100 or 1/125. I could have chosen an all-manual setup (with the SB-800 on SU-4 mode) which would allow me to sync at 1/320 but I wanted the ability to change the SB-800's settings remotely for convenience. I chose an ISO of 100 and an aperture that had sufficient depth of field to capture my entire face up to my ear. I figured f/4 would be enough and wouldn't require too much power from the flash. Later on, I switched to f/5.6 and ISO 200 (although in retrospect, I think I should have tried f/8 to minimize ambient light further).
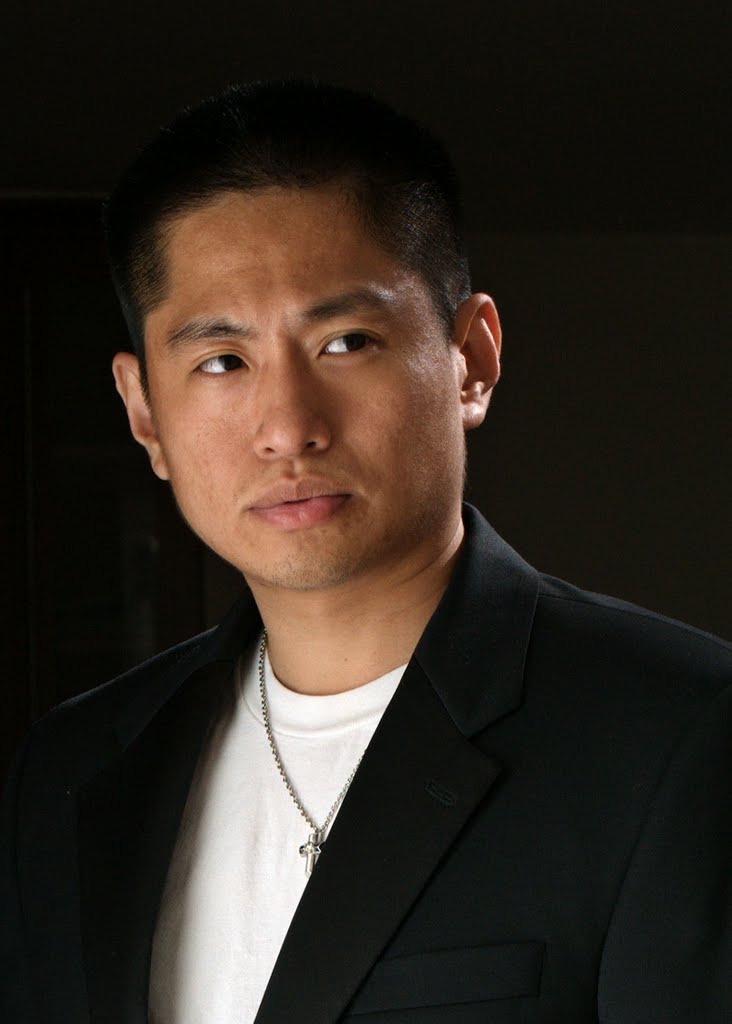
For my key light, I positioned the SB-800 in a "strip light softbox" camera left, triggered via CLS in manual mode (for consistency and for my education). A power of 1/8 seemed close enough, though after review later on, I found that 1/4 power would have been better. After a few tries I found that a good position for lighting my face was with the strip light in front of me, aimed to the side (feathered so that there would be a gradient instead of just one tone). I used the built-in diffuser in the SB-800 to fill the softbox as evenly as possible.

After setting the key light, I next added the YN-560 on a light stand as rim light to separate my coat and hair against the dark background. After experimenting with the height and direction of the YN-560, I figured that a good angle would be from above, behind, and to my side. Initially I set power to 1/8 but later reduced it to 1/32 for a more subtle result. I also discovered for myself why rim lights are often used with grids and snoots - doing so reduces the chance of spill on the background (and flare on the lens).

From there, I just did a little postprocessing to adjust the exposure and use some high pass sharpening to get the final result (was too tired to do an extraction).
By the way, here is my final setup, with a picture of my "strip light" - just a door with privacy glass. :)) The door here is open for illustration only -- it was closed when I was shooting. The SB-800 triggered without any issues whatsoever even with the door closed.

I think the shot can be improved in at least a couple of respects: First, the background should be darker -- this would have been possible with a narrower aperture. Second, I need more separation between my hair and the dark background.
Hello-and thank you for sharing your tips, I learn some tricks from you
ReplyDeleteWhy you need a better tripod?
The shutter speed at 1/100 is not freezing the motion, but since you use flash ( with duration =1/2000 or better) you motion is frozen any way
I’m not sure the cheap tripod has an impact here, or could have
Absolutely right Robert_Pat. I rechecked my images and when I zoomed in at what I thought was a double-image from mirror vibration, and it looked like facial hair :))
ReplyDelete